

Tor is an excellent obfuscation network for web traffic, and while instant messaging over the network is very useful, it can be relatively difficult to configure. In this guide, we'll look at two synchronous communications platforms (instant messengers) which can be routed over the Tor network, Ricochet and XMPP.
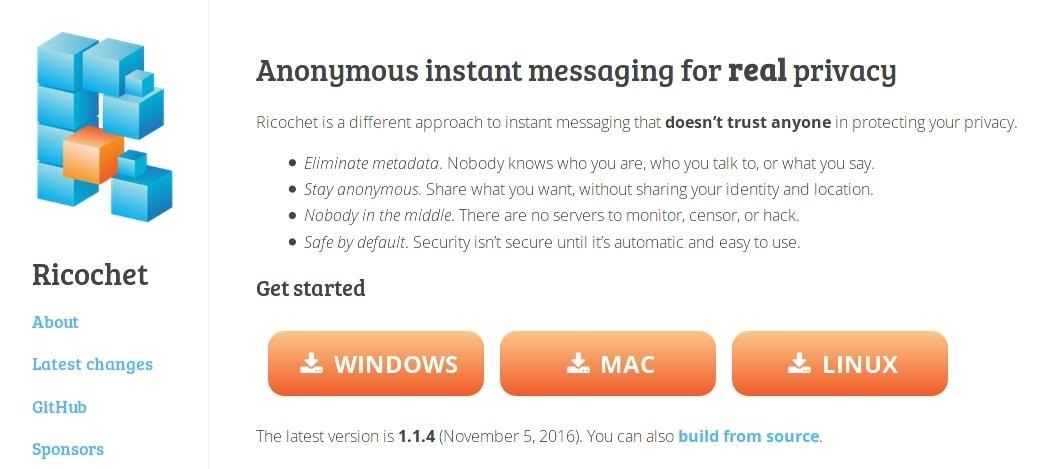
Ricochet, as described on its website, "uses the Tor network to reach your contacts without relying on messaging servers. It creates a hidden service, which is used to rendezvous with your contacts without revealing your location or IP address." This technique leads to Ricochet being one of the most secure messaging programs available, visible in the Secure Messenger Scorecard by Yawnbox, which was based on the prior work of the Electronic Frontier Foundation.
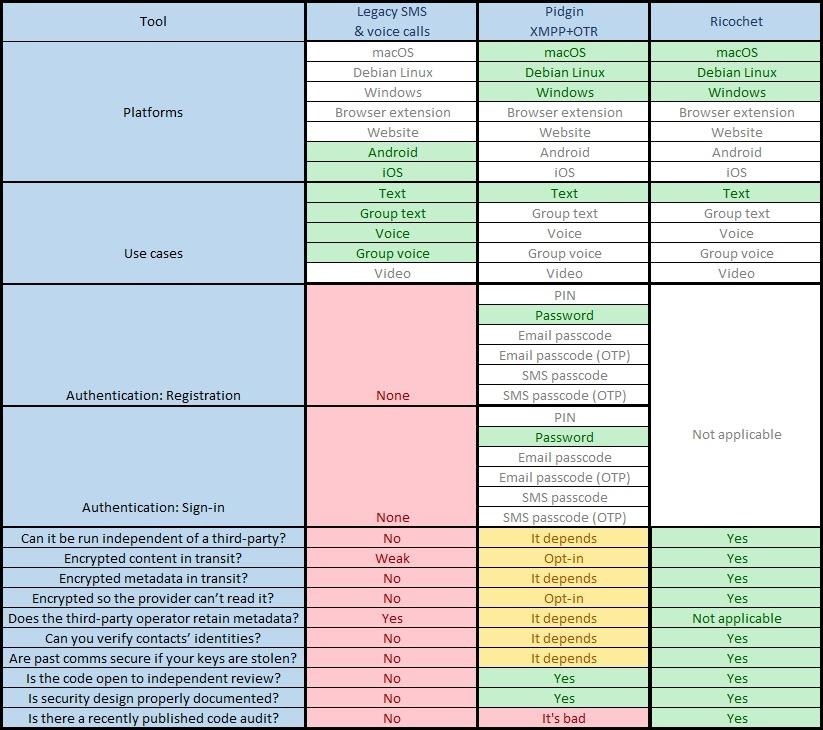
This chart compares XMPP and Richochet with legacy SMS and voice calls, showing the difference in features behind each messaging platform. XMPP is not inherently secure in itself, but it can be combined with other technologies to make it very secure while offering some features that Ricochet does not. Unlike Ricochet, XMPP traffic is passed over a server which isn't under the control of the user, offering less privacy in this sense than Ricochet. However, this setup allows for messages to be carried even when users are not necessarily online.
XMPP can be used with a variety of clients, and indeed combined with Tor and message encryption on a variety of clients as well. Clients such as Tor Messenger offer OTR (Off-The-Record) encryption and carry all traffic over Tor, but the client does not support multipoint encryption. Other clients, such as Gajim and Pidgin, as used in this tutorial, require a bit of additional configuration, but can be configured to use Tor and multipoint encryption while offering a very usable interface.
Step 1: Downloading Ricochet
While Ricochet binaries are available from the Richochet homepage, the Tor version packaged with the messaging application is relatively outdated, with the last build from November 5, 2016. While the program itself is still known to be secure, the Tor version should be updated for maximum security.
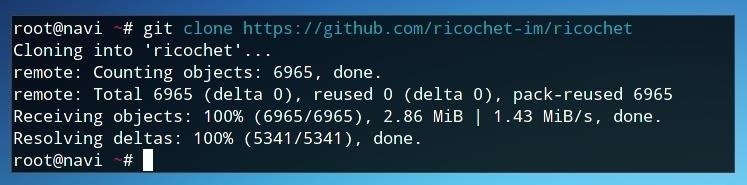
As such, rather than downloading a binary, it will be best to build Ricochet from source. We can fetch a copy of the source code from git.
git clone https://github.com/ricochet-im/ricochet
Step 2: Installing Ricochet
After downloading the Ricochet source, we'll need to make sure we have all dependencies before compiling. On Debian/Ubuntu, the following commands should work assuming all dependencies are found in the repositories.
apt-get install qt5-qmake qt5-default qtbase5-dev qttools5-dev-tools qtdeclarative5-dev qtmultimedia5-dev
apt-get install qml-module-qtquick-controls qml-module-qtquick-dialogs qml-module-qtmultimedia
apt-get install build-essential libssl-dev pkg-config libprotobuf-dev protobuf-compiler
Install Tor, or build it from source to ensure complete trustworthiness. Otherwise, it can be installed with apt.
sudo apt-get install tor
Next, move into the Ricochet directory with cd.
cd ricochet
To build and install Ricochet, use qmake first for Qt building. The qmake process should be relatively quick.
qmake
Finally, run make to complete the build process. This may take slightly longer to build.
make
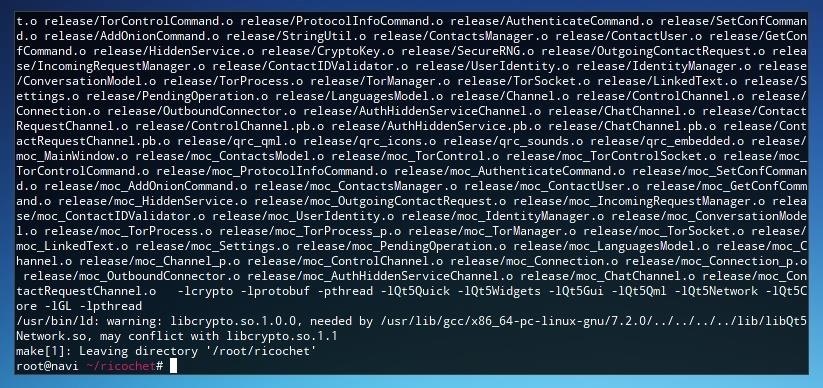
After the build process is completed successfully, Ricochet can be run.
Step 3: Using Ricochet
We can launch Ricochet by running "./ricochet" from within the Ricochet directory. Errors and warning messages will be logged to the terminal from which this is launched. On the first run, Ricochet will prompt the user to configure their Tor connection. Unless you wish to use bridges or have a censored or proxied connection, simply clicking "Connect" should be sufficient.

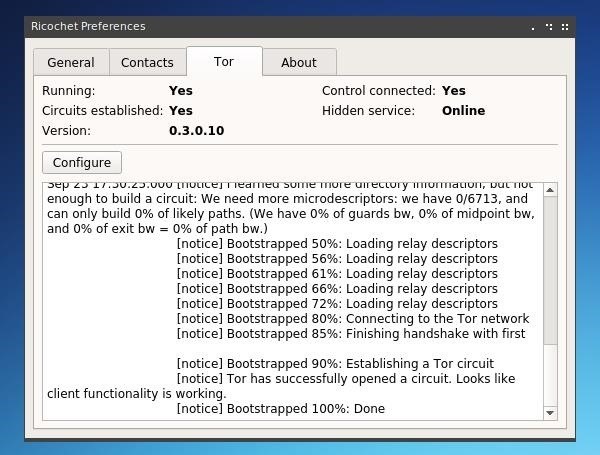
Once Ricochet is running and connected to Tor, we should first click the "Preferences" cog icon and then the "Tor" tab to confirm the Tor version in use. If the Tor version is at least 0.3.X.X, Ricochet is safe to use as of October 2017.
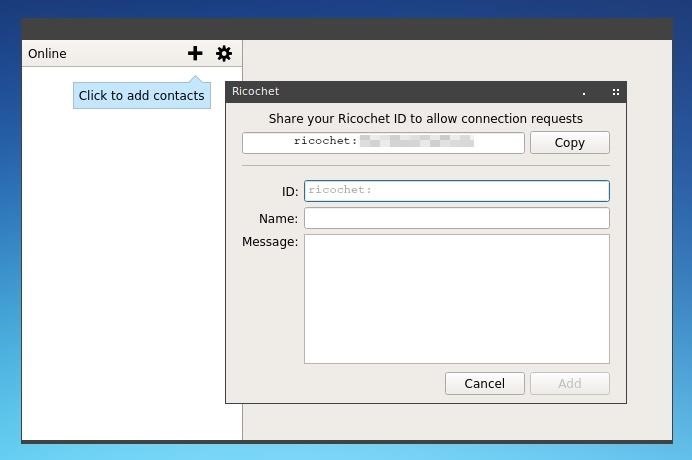
The interface of Ricochet is relatively straightforward. The plus icon at the upper left of the window allows you to add other users based on their ricochet identifiers, formatted as "ricochet:" followed by a string of random characters. The nicknames or contact names assigned to a given ID are entirely client-side, however, when adding a new user, one can include a short message to help identify oneself.
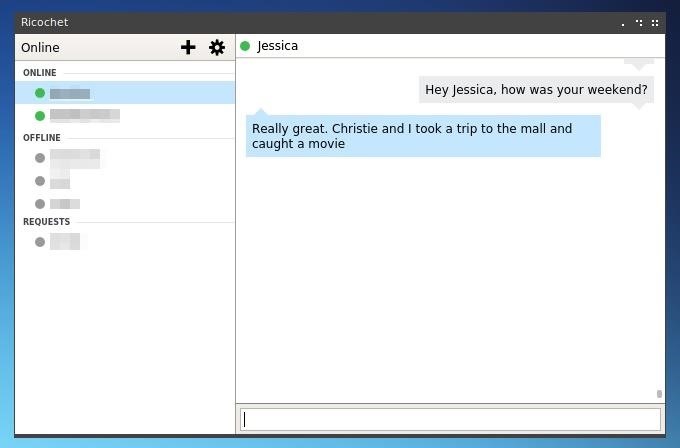
Chatting in Ricochet works like any other instant messaging application, type and then press enter. There are no special characters or peculiar text formatting, save for a message capacity limit. The only peculiarity is that for security purposes, messages are only visible while the window remains open, and conversations can only be carried out while both parties are online.
Step 4: Installing Pidgin for XMPP
While Ricochet is extremely secure and has been thoroughly audited, the program itself has several limitations, including the lack of group chat functionality and the need for both users to be online at once.
Instead, we can use XMPP, Tor, and several encryption plugins by using an alternate client. Pidgin is a multi-protocol instant messaging client available for Windows, OS X, and Linux. To be able to route it over the Tor network, it's simplest to point it towards the Tor service on a Linux distro such as Ubuntu, Debian, or Kali. Pidgin is available at the Pidgin homepage, and in most Linux repositories.
On Ubuntu based systems, it can be installed using apt, as seen below.
sudo apt-get install pidgin
If Tor is not yet installed, it will need to be as well. Type the following to install it.
sudo apt-get install tor
After Pidgin is installed, launch it by running "pidgin" on the command line or navigating to it through the applications menu.
Step 5: Configuring Pidgin
On the first launch, Pidgin prompts the user to add accounts. We can add an account immediately at this time, but it may be worthwhile to take special care in choosing servers and configuring our network connection first.

Some XMPP servers will allow inline registration through Pidgin, however, others require registration through a website. When choosing an XMPP server, consider the location of the server, their state policies, and their uptime. A list of XMPP servers is available at this link.
If one plans to communicate only over Tor, it may be worth considering an XMPP server with an onion hidden server for extra privacy, but keep in mind that a hidden service server will only be able to communicate with members whose accounts are also on hidden services.
Keep in mind that while the contents of messages will be private from a server administrator due to encryption, other metadata including messages times, conversation participants, and contact lists may be logged. To avoid this, it is possible to host one's own XMPP server, but otherwise, it generally will be sufficient to keep this metadata logging potential in mind and take the necessary operational security precautions.
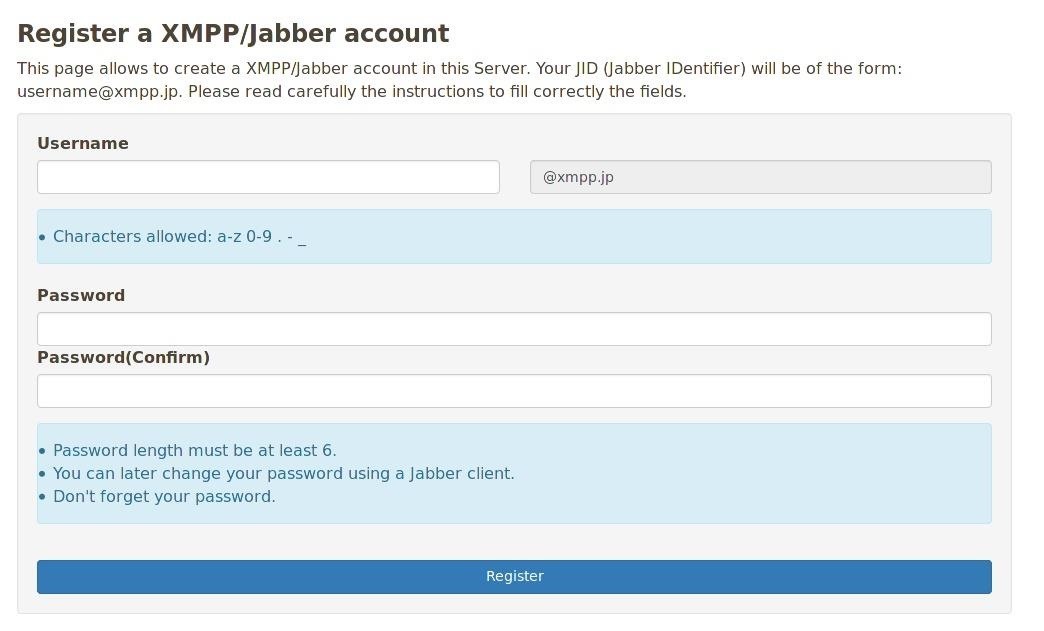
For this example, I registered an account at the XMPP homepage. If you wish to remain anonymous, it's important to register your account over Tor, a VPN like PIA, or both, so to maintain separation between your personal IP and the account you register.
If you already feel your internet connection is private and secure, you can click "Add" within Pidgin. Otherwise, it will be best to close the window and configure our Tor connection, first by ensuring that the Tor service is running. We can start this as a daemon using systemd by typing the following.
systemctl start tor
We can alternatively launch it in its own terminal window with error logging by typing the command below.
sudo tor
Once Tor is running, and after closing the "Accounts" window, we can access preferences by pressing Ctrl+P, or opening it under the "Tools" menu.

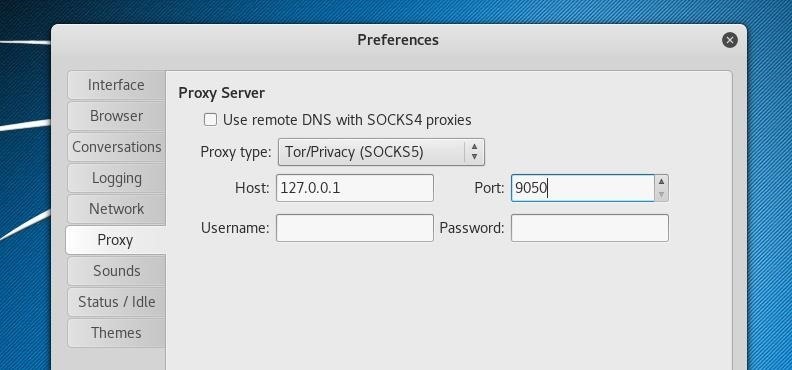
With this menu open, we'll want to click on "Proxy" in the left pane. On this window, the "Proxy Type" drop-down menu should be changed to select "Tor/Privacy (SOCKS5)" rather than "No Proxy." As the Tor service is running on our local system at port 9050, we should change "Host" to 127.0.0.1 and "Port" to 9050.
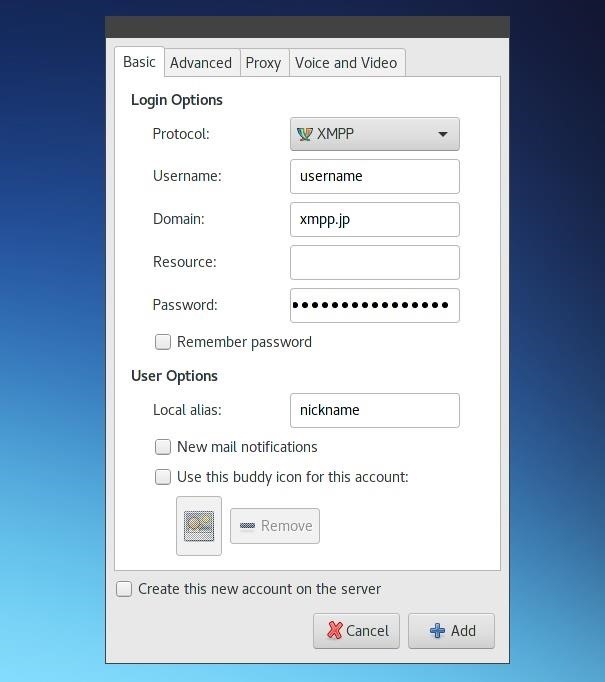
After configuring our global proxy settings, we can add our account by opening "Manage Accounts" under the "Accounts" menu of the main Pidgin window

Here we can add our XMPP account details. Select "XMPP" as the "Protocol" and add one's username and password. The "Domain" is the server on which you registered your account and the "Local alias" is what your account is named locally. If you're registering an account on a server which allows online registration, you may wish to check the "Create this new account on the server" box.
While Global Proxy Settings should be sufficient for this process, the Tor configuration data can also be added to the "Proxy" tab of the Modify Account window.

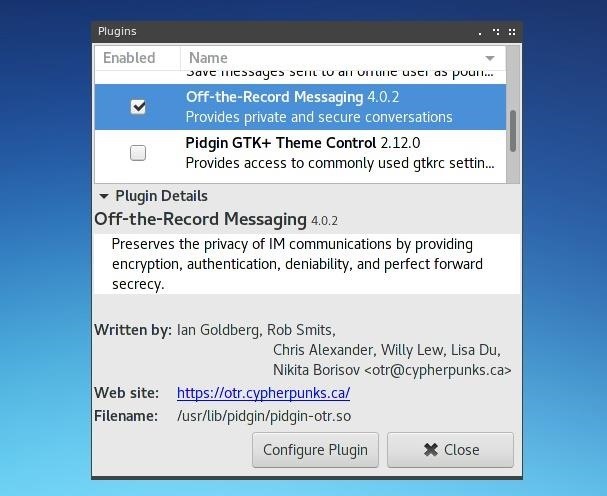
If the account successfully connects when the "Enable" box is checked, the account is ready to communicate, but not necessarily securely. The last part of configuration to do is enabling and requiring encryption. Open the "Plugins" manager under the "Tools" menu in Pidgin, and look for OTR, or Off-The-Record messaging, and ensure that it is enabled.
If you wish to encrypt group chats, it may be useful to install Lurch for Pidgin, an implementation of OMEMO, or OMEMO Multi-End Message and Object Encryption. OMEMO is an adaptation of the Signal Protocol, created by Open Whisper Systems.
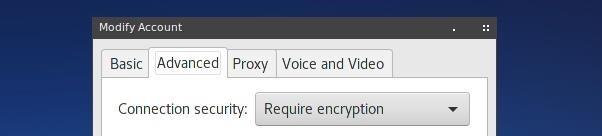
After making sure that OTR is enabled, we'll generally want to enforce it as a requirement for all chats. This can be done by returning to the "Modify Account" menu, opening the "Advanced" tab, and changing the "Connection Security" drop-down menu to select "Require Encryption."
With this completed, Pidgin and XMPP should be ready to use!
Step 6: Using Pidgin
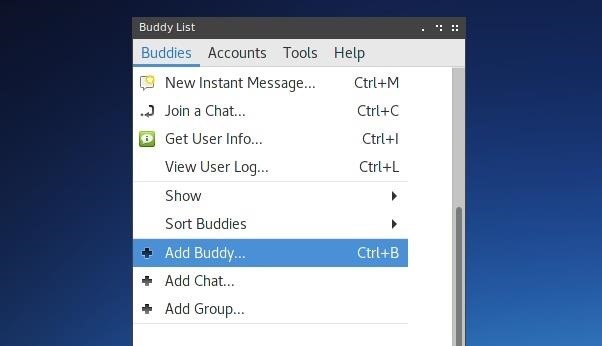
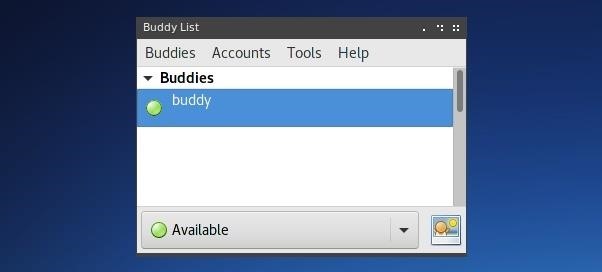
Using Pidgin over XMPP is much like using any other instant messaging client. Contacts appear in the main Pidgin menu, and new contacts added, messages started, and chats joined through the "Buddies" drop-down menu at the top left of the window.
Once buddies are added, we can open a chat with them by simply double clicking on their name in this panel.
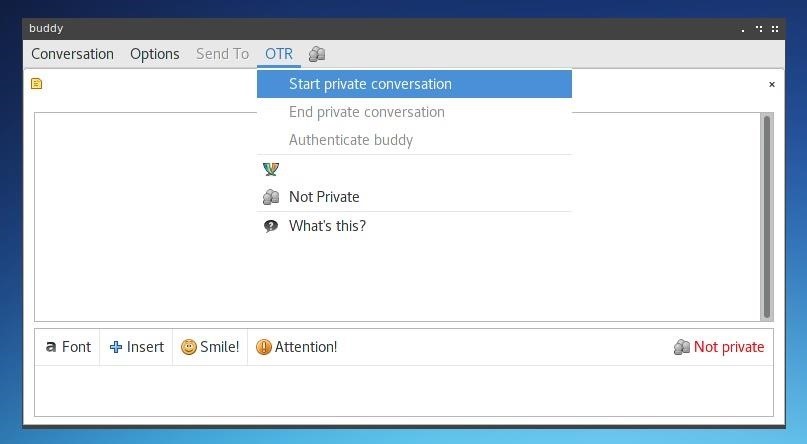
After opening a new chat window, we can ensure encryption is active by viewing the status at the lower right of the window. If "Not Private" or a similar message is visible, we can begin using OTR by opening the "OTR" menu at the top of the chat window and clicking on "Start Private Conversation."
With these programs installed and configured, you're ready to chat more securely using Ricochet or XMPP! Using encryption and privacy tools effectively is vital in the face of increasingly sophisticated surveillance which makes private communication less and less guaranteed. It's up to you, the user, to take responsibility for your privacy in the world we live in, and learning tools like encrypted messengers are the best way to do so.
Thanks for reading. If you have any questions, you can ask them in the comments, or on Twitter.
- Follow Null Byte on Twitter and Google+
- Follow WonderHowTo on Facebook, Twitter, Pinterest, and Google+
Screenshots and cover image by Takhion/Null Byte
Just updated your iPhone? You'll find new emoji, enhanced security, podcast transcripts, Apple Cash virtual numbers, and other useful features. There are even new additions hidden within Safari. Find out what's new and changed on your iPhone with the iOS 17.4 update.


Be the First to Comment
Share Your Thoughts