
There's no doubt Kali has established itself as the most popular penetration distribution available. However, just because it's the fan favorite of beginners and security researchers doesn't make it right for everyone. Manjaro Linux is a beginner-friendly Arch-based distribution which can be easily weaponized with the Black Arch expansion, creating a friendlier first-time Arch experience.
The battle of the best penetration distribution is a conversation I've seen discussed in forums and IRC channels for several years. Hackers and pentesters will frequently debate which operating system is the most intuitive and easy to use, as well as which has the superior collection of curated hacking tools.
Beginners often are left wondering which hacking distro is right for them, asking themselves if choosing between ParrotSec and Kali are the best options to get started. Arch Linux is commonly thought of as a powerful distribution but not particularly beginner-friendly. Let's explore an easier way for novices to get started hacking on an Arch-based system with Manjaro Linux.
What Is Manjaro?
Manjaro is an easy-to-use, beginner-friendly Linux distribution based on Arch Linux, a cutting-edge, lightweight distribution with a "keep it simple" philosophy. Setting up Arch can be intimidating as it requires a deeper understanding of building Linux systems than other distributions, but Manjaro takes the hassle and complexity out of the Arch installation. Manjaro also has an excellent community of experienced Arch users who are very receptive to beginner questions.
What Is BlackArch?
BlackArch Linux is also an Arch Linux-based distribution, but focuses on penetration testing and is geared toward security researchers and independent hackers alike.
BlackArch has an impressive 2,200+ tools indexed on its website. Kali, on the other hand, currently has about 365 tools. It's fair to say BlackArch provides a more significant collection of software for curious penetration testers to experiment with. One could spend an entire weekend sampling hundreds of exciting tools and still not scratch the surface of what BlackArch has to offer.
The Road to BlackArch
We'll be installing Manjaro, then manually importing the BlackArch repositories which contain all of the fun hacking tools. This will allow us to install Wi-Fi hacking tools and use exploit frameworks like Metasploit from our inconspicuous Manjaro distribution.
This article will be a quick guide for anyone who wants to weaponize their user-friendly Manjaro distribution by adding some penetration testing applications to their operating system. This will be an excellent experience for anyone looking to step out of their comfort zone and experiment with BlackArch tools.
Step 1: Download Manjaro
The first thing we'll need to do is head over to the Manjaro website to view the available download options. We'll be presented with several desktop environment options. This includes XFCE, KDE, and GNOME.
- XFCE is a lightweight desktop environment. It aims to be fast and low on system resources, while still being visually appealing and user-friendly, which will create a comfortable experience for users who are new to BlackArch. This also means our CPU and RAM won't work as hard to render applications and processes when using XFCE.
- KDE is a feature-rich and versatile desktop environment that provides an advanced graphical desktop and a wide variety of applications. While very user-friendly and undoubtedly flashy, KDE is also quite resource-heavy and noticeably slower than a desktop environment like XFCE.
- GNOME, which is also the default Kali desktop environment, aims to be simple and easy to use. While the appearance is unique, it remains very customizable with a variety of available extensions. Like KDE, it uses more system resources than XFCE.
Generally, I prefer desktop environments that utilize as little system resources as possible. This allows me to focus on the task at hand and not worry about my laptop fan spinning out of control because I have seven terminals, two browsers, three messengers, and Minesweeper open all at the same time.
XFCE is the clear choice for anyone who prefers efficiency over flashiness and likes to keep a dozen applications running in the background. On the other hand, if you have the fastest CPU on the market and 128 GB of RAM, it's probably safe to use KDE without consequence.
On Unix-like operating systems, we can use wget to download the ISO by entering the below command into a terminal. Make sure to substitute the proper download link for the one you choose.
~$ wget https://osdn.net/projects/manjaro/storage/xfce/18.0.4/manjaro-xfce-18.0.4-stable-x86_64.isoYou're encouraged to verify the ISO Sha1sums, which can be found on the downloads page for whichever Manjaro version you chose to install.
Isn't There a Simpler Way?
Before we begin, I'd like to point out that my below guide is one of several ways of building a BlackArch box. Another method would be to download the BlackArch OVA image. OVA (Open Virtual Appliance) files are often used to distribute pre-configured virtual machines (VMs) of a particular operating system. We can double-click on the BlackArch .ova file to open it in Oracle's VirtualBox and be done with installation.
The major downside to the BlackArch OVA is the 18 GB file size. I'm not sure security researchers interested in sampling BlackArch for the first time will be excited to download a massive 18 GB file. Another potential downside is BlackArch doesn't use XFCE, KDE, or GNOME by default. It uses Fluxbox, a much more DIY desktop environment than GNOME. Native Kali users probably won't find a Fluxbox desktop environment intuitive or comfortable their first time around.
Step 2: Install Manjaro
I'll be using the latest Manjaro XFCE ISO and installing it in VirtualBox. We're only sampling BlackArch today, so using a virtual machine seems appropriate.
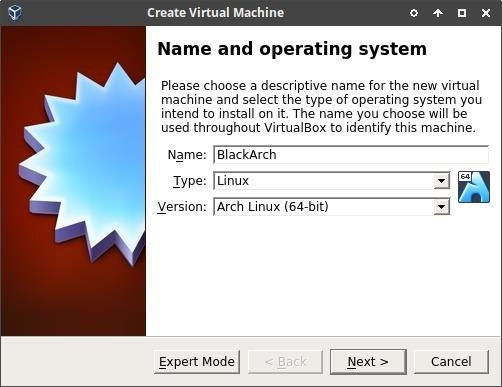
Start VirtualBox and click "New" to create a new VM. VirtualBox will ask you to name the VM and select a type and version. Be sure to use "Linux" as the Type and "Arch Linux" as the Version. Then click "Next" to continue.
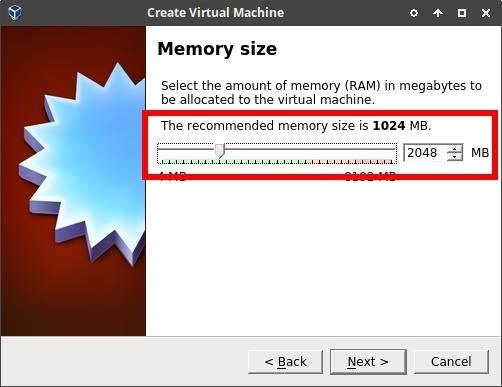
Here, we'll need to allocate memory (RAM) to the BlackArch VM. 2048 MB is the equivalent of 2 GB of memory. Allocating 2048 MB is generally enough to run a VM without noticing any hardware limitations. If you have 16 GB (or more) of memory on your machine, it's probably safe to allocate 4096 MB or more.
When you've decided how much Memory to allocate to the BlackArch VM, click "Next" to continue.
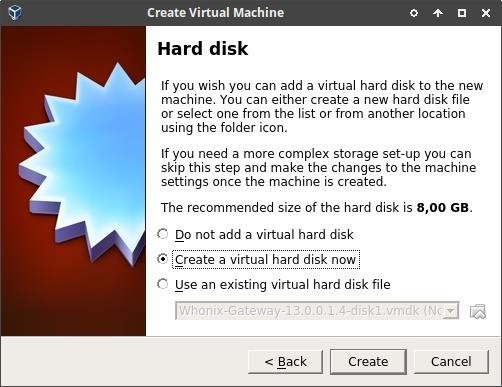
Click "Create" to create our new virtual hard disk.
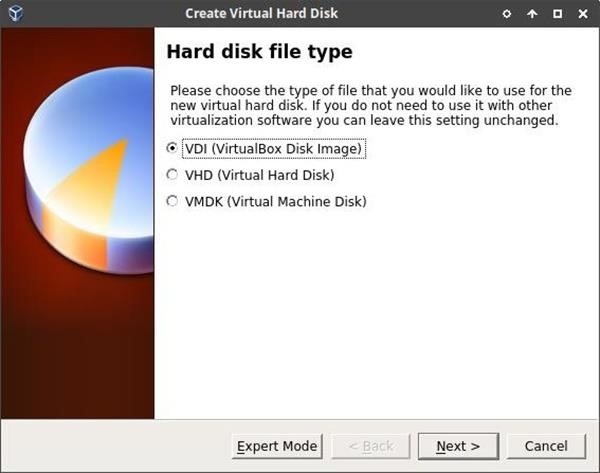
Next, set the hard disk file type as "VDI (VirtualBox Disk Image)." This will allow us to use our new BlackArch VM on other computers using VirtualBox if we decide to move VMs around in the future. Simply click "Next" to continue.
Now set the storage on the physical hard disk to "Dynamically allocated." This is a great feature of VirtualBox. It allows the BlackArch VM to allocate space on the hard disk drive (HDD) on an as-needed basis. Dynamically allocated disks will only use space on your physical HDD as it fills up. So if our BlackArch VM initially requires 5 GB of space and later grows to 15 GB after installing more tools, that's okay. A dynamically allocated disk will grow as needed. Click "Next" to continue.

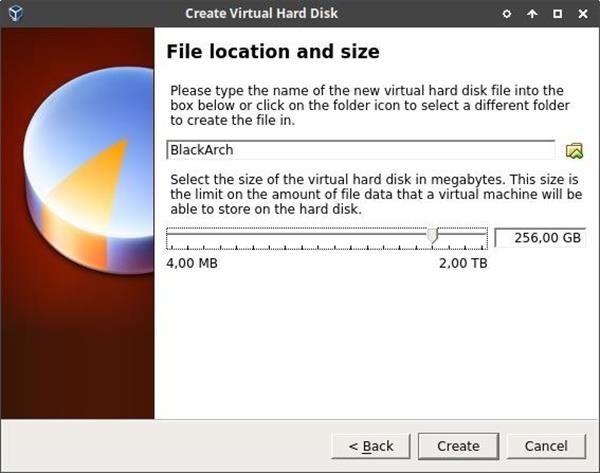
Next, set the maximum size we'll allow the BlackArch VM to grow. Depending on how much space you have available on your physical HDD, this setting might be trivial — 256 GB is probably more than we'll ever need for a BlackArch VM. Be sure to increase or decrease this number as it fits your needs, then click "Create" to finish.
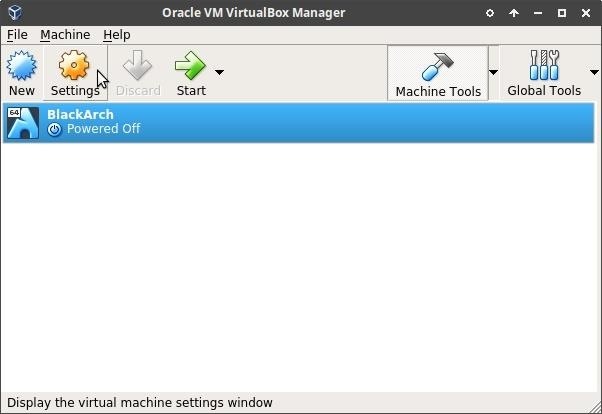
Now highlight the newly created BlackArch VM in the VirtualBox Manager window and click the "Settings" button to view the BlackArch VM settings.
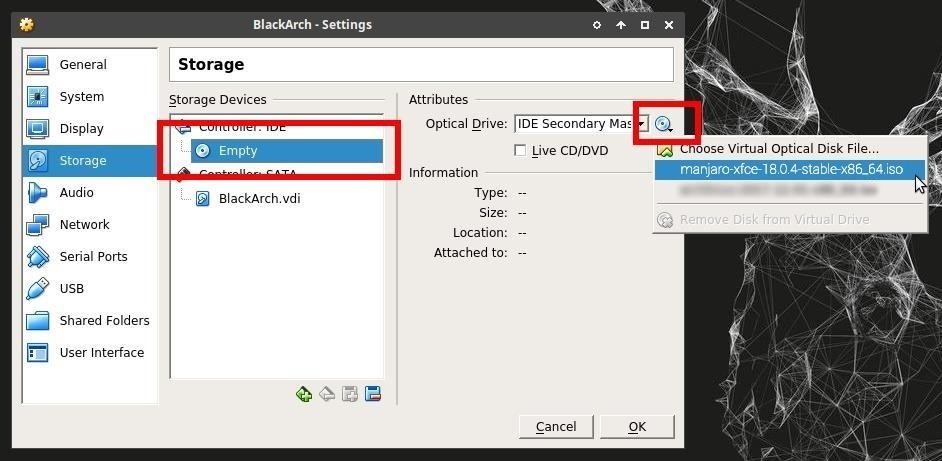
Click the "Storage" tab, then click the "Empty" storage device to add the Manjaro ISO we downloaded earlier. Then, click the CD/DVD icon to show the available ISOs. You will need to click "Choose Virtual Optical Disk File" to location the Manjaro ISO on your computer. When you've done that, click "OK" to save the changes.
Step 3: Configure Manjaro
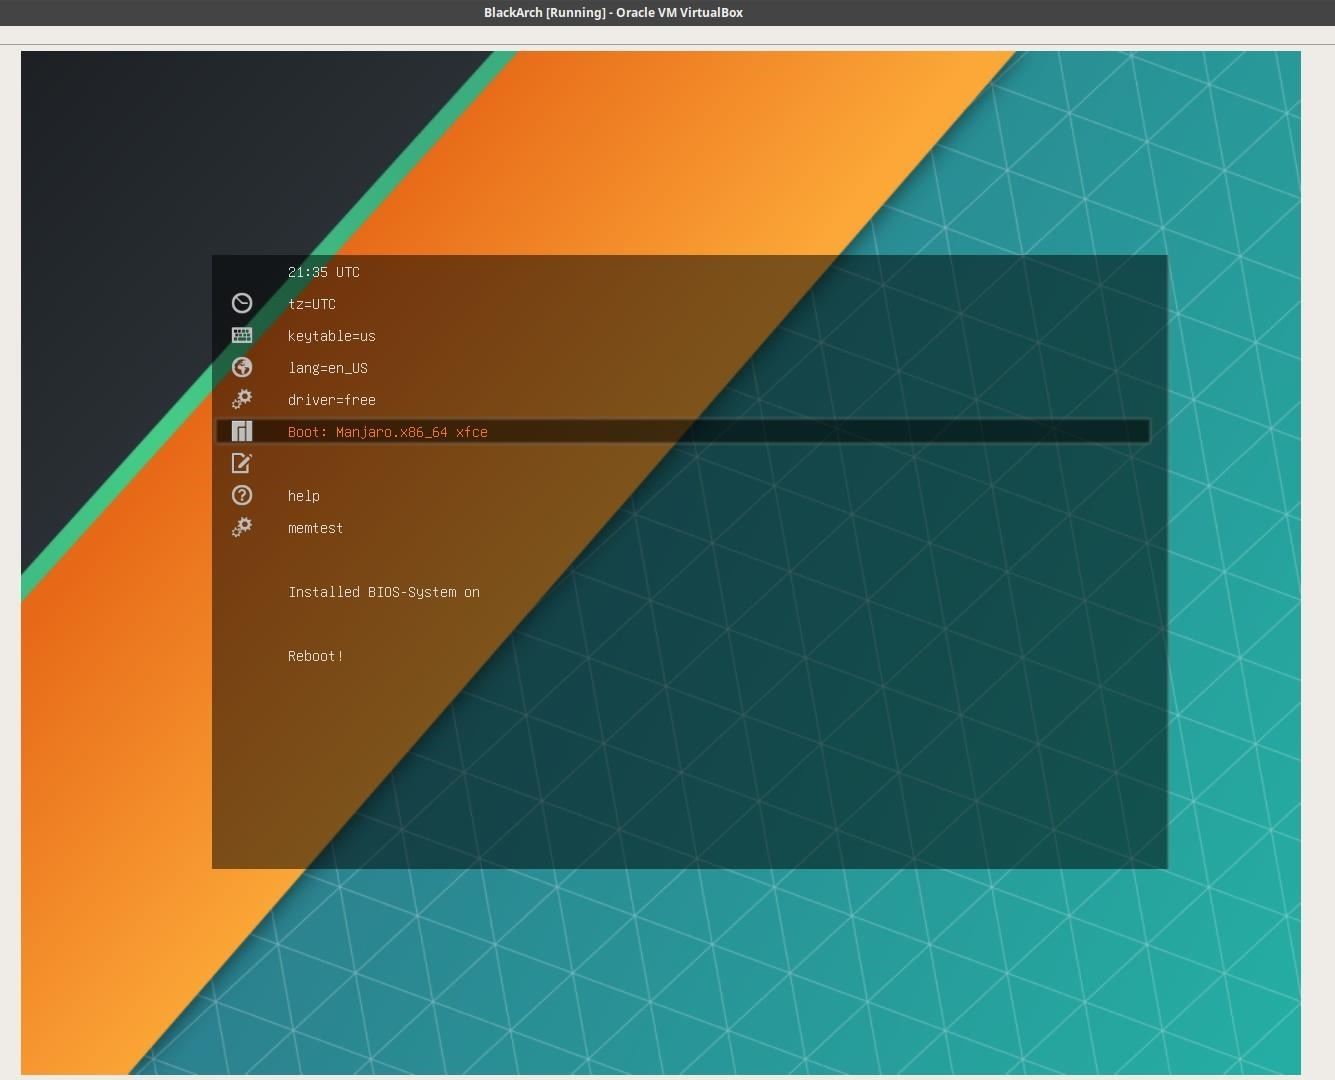
Now, all we have to do now is click "Start" to power on the Manjaro VM. If all went well, you'll be greeted with the Manjaro bootloader. Press the down arrow key on your keyboard to highlight the "Boot: Manjaro" option and press Enter.
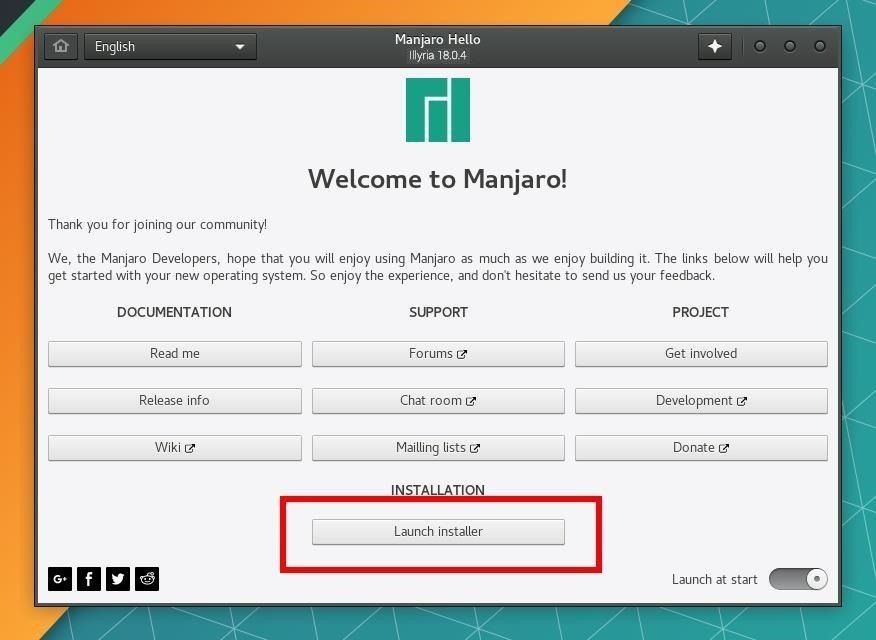
After a few seconds, we'll be greeted with the installer menu. Click on the "Launch installer" button to begin.
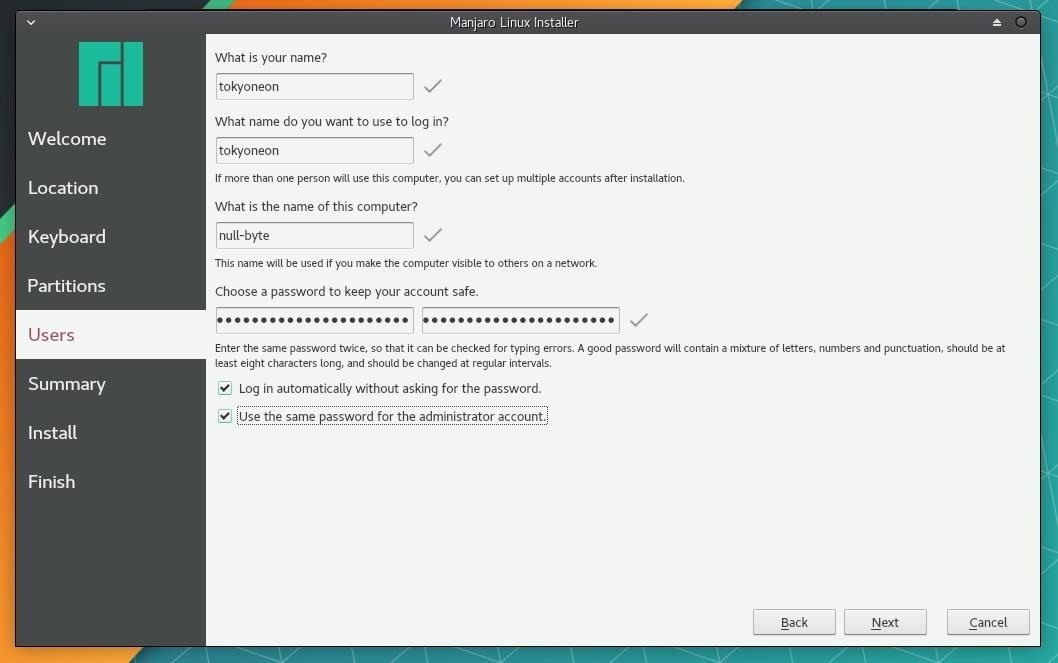
This will walk you through selecting your preferred language, keyboard setup, hard drive partitioning, and more. Be sure to set a strong password when creating your account. And remember the "name" of this computer is the name that will appear on routers when you connect to them.
- Don't Miss: How to Create Stronger Passwords
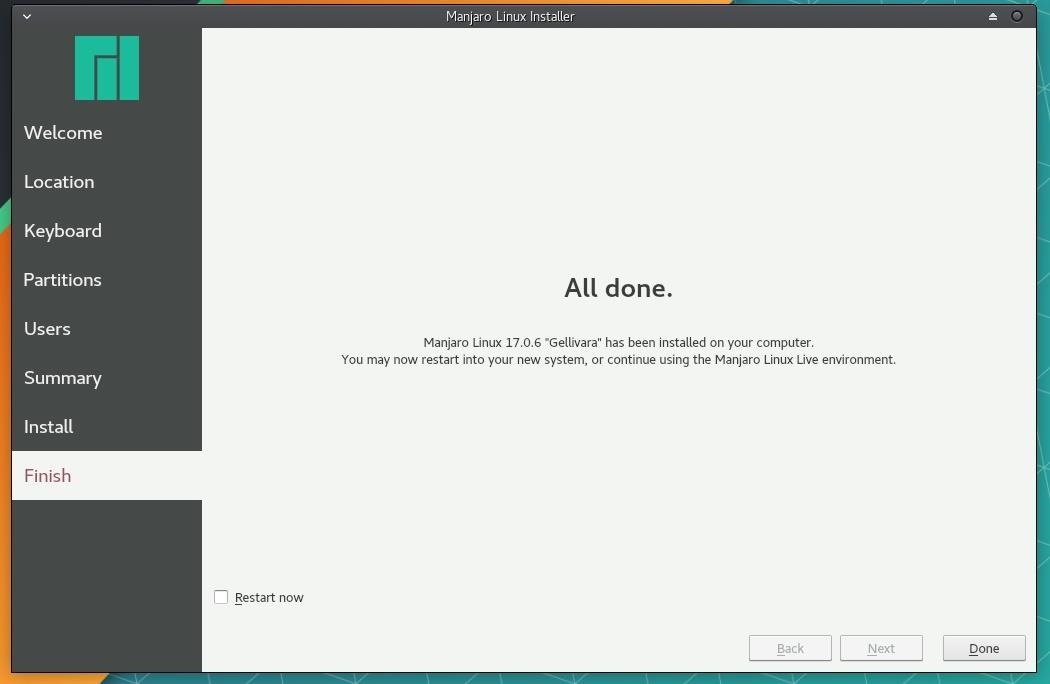
When the installer is completed, you'll be greeted with the below screen. Check the "Restart now" option and click "Done" to complete the installation.
Afterward, power down the system with the below command.
~$ shutdown nowThen, in VirtualBox, make sure your Majaro machine is selected, then hit the "Settings" button. Next, in the "Storage" tab, select the ISO file that you used to install Manjaro in VirtualBox, then hit the remove button at the bottom. Hit "OK" to continue.
This is done, as Null Byte user Eshaan Bansal pointed out in the comments, to make sure you boot into the installed media and not the ISO. So go ahead and power on your Manjaro VM in VirtualBox to dive into the real VM system.
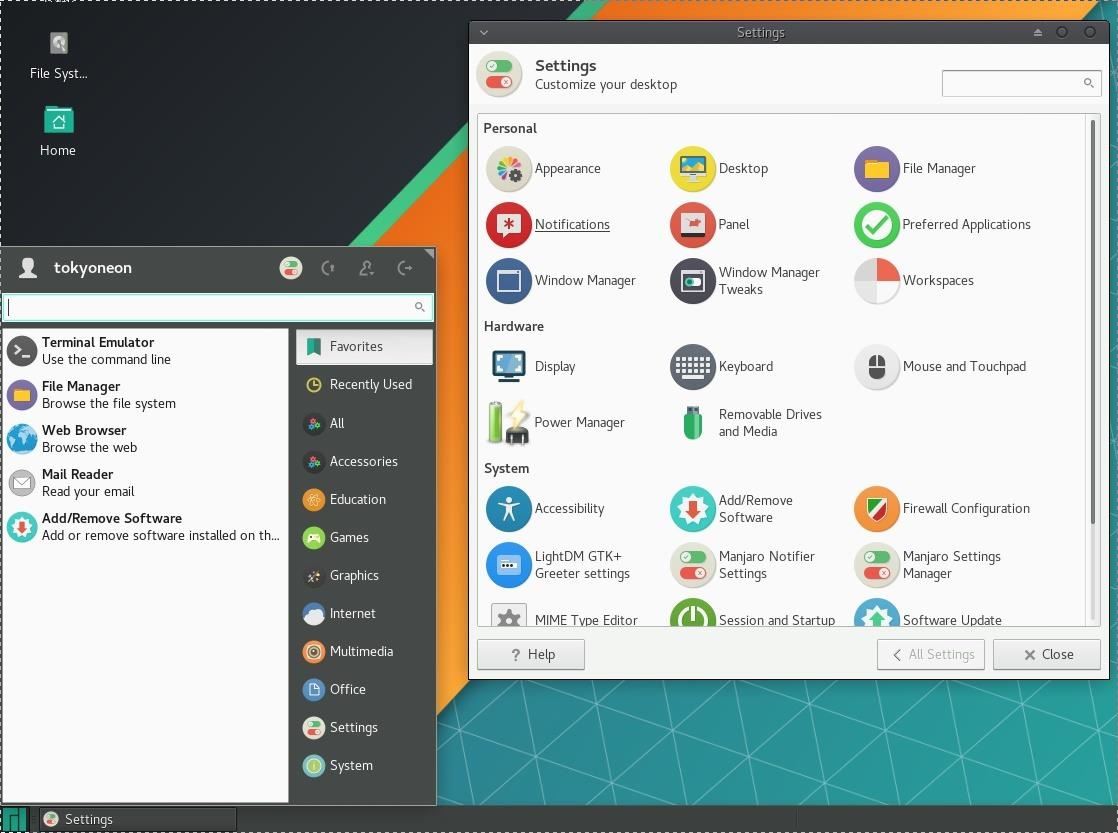
Step 4: Get Used to XFCE
The first thing I recommend users do after installing Manjaro is to go through all of the settings and tweak minor features to your preference. Anyone familiar with GNOME or macOS will feel comfortable using the XFCE "Settings" menu.
Step 5: Import BlackArch Repositories
BlackArch provides a handy installer script designed for manually importing BlackArch tool repositories. Open a terminal and type the below command to download the strap.sh installer script.
~$ curl -Os https://blackarch.org/strap.shThe .sh file extension means this is a Shell script and we'll need to give the file permissions to execute commands on our machine. Type the this chmod command into your terminal to give the strap.sh script permissions to run.
~$ chmod +x strap.shNow run the strap.sh installer script by typing this into your terminal:
~$ sudo ./strap.shWhen the installer prompts you to enter a BlackArch mirror, just press Enter to use the default mirror. If all goes well, the script should report "BlackArch Linux is ready!"
...
[+] keyring installed successfully
[+] configuring pacman
    -> enter a BlackArch Linux mirror url (default: https://www.mirrorservice.org/sites/blackarch.org)
[!] WARNING: you did not specify a correct mirror url
[+] using default mirror https://www.mirrorservice.org/sites/blackarch.org
[+] updating pacman.conf
[+] updating package databases
:: Synchronizing package databases...
 core               140.2 KiB   296K/s 00:00 [###]
 extra             1775.5 KiB   408K/s 00:04 [###]
 community            4.4 KiB   522K/s 00:09 [###]
 multilib           175.0 KiB   414K/s 00:00 [###]
 blackarch            2.0 MiB   544K/s 00:04 [###]
 blackarch.sig      566.0   B  0.00B/s 00:00 [###]
[+] BlackArch Linux is ready!
Apt-Get What?
APT (Advanced Packaging Tool), which is used for installing packages and tools in Kali and Debian, is not used in Arch-based operating systems. BlackArch doesn't use APT, as most Kali natives are used to.
The Pacman package manager is one of the major distinguishing features of Arch Linux. The goal of Pacman is to easily manage packages, whether they are from the official Arch repositories or third-party repositories like BlackArch.
Below is a small list of APT-to-Pacman equivalent commands to help new BlackArch users get familiar with installing packages and tools.
- Installing packages:
~$ apt-get install <package name>
~$ pacman -S <package name>- Removing packages:
~$ apt-get remove <package name>
~$ pacman -Rs <package name>- Searching repositories:
~$ apt-cache search <package name>
~$ pacman -Ss <package name>- Upgrading the system:
~$ apt-get update && apt-get upgrade
~$ pacman -Syu- Removing old and unneeded dependencies:
~$ apt-get autoremove
~$ pacman -Qdtq- Displaying package information:
~$ apt-cache show <package name>
~$ pacman -Si <package name>
For a complete list of corresponding APT-to-Pacman commands, check out the full list curated by the Arch community.
BlackArch Tool Categories
As mentioned previously, BlackArch has an incredible repository of tools. Depending on your network speed, installing every single tool may take an incredibly long time to download. All of the tools can be installed individually or in bulk by category. Below is a list of a few available categories.
- webapp: A collection of tools designed for exploiting web servers and enumerating vulnerabilities in web applications.
- fuzzer: A collection of tools designed for fuzzing, which is often defined as automated bug finding or "throwing" random input data at an application to invoke interesting or unwanted responses.
- scanner: A collection of scanners that includes SSL scanners, SQL Injection scanners, CMS scanners, and much more.
- cracker: A collection of tools designed for cracking cryptographic functions, as well as brute-forcing tools.
- forensic: A collection of tools designed to find data on physical disks and embedded memory.
- proxy: A collection of tools designed to act as a proxy or redirect traffic to another server on the internet.
- mobile: A collection of tools designed to manipulate mobile platforms.
- code-audit: A collection of tools designed to audit existing source code for vulnerabilities.
- fingerprint: A collection of tools designed to exploit fingerprint biometric equipment.
We can install entire categories by typing the below command into a terminal. Substitute <category> for the category name above that you want.
~$ sudo pacman -S blackarch-<category>For a complete list of BlackArch categories, run the below command.
~$ sudo pacman -Sg | grep blackarchAlternately, we can view the official BlackArch guide for more details. We can also install all 2,200+ available tools with a single command. This would take a considerable amount of time. If you're feeling patient, use the below command to install everything BlackArch has to offer.
~$ sudo pacman -S blackarchWhich Distribution Is Right for You?
The debate of which penetration distribution is the best may never be settled. The truth is, there probably isn't a single perfect distribution capable of satisfying the individual needs of every security researcher out there. We all have different standards, preferences, areas of expertise, and varying degrees of experience. All of these things factor into how we use our penetration-testing distributions.
If you're looking to explore new and interesting tools, coupling Manjaro's intuitive interface with BlackArch's repository of tools will have Kali Linux natives feeling at home.
So you have a new Manjaro VM equipped with hundreds of new hacking tools, what next? How about connecting a wireless network adapter to the VM and installing some fun Wi-Fi hacking tools we wouldn't find in Kali.
Thanks for reading. If you have any questions, be sure to leave a comment below or ask me on Twitter @tokyoneon_. And don't forget to stay connected and check out our social accounts!
Just updated your iPhone? You'll find new emoji, enhanced security, podcast transcripts, Apple Cash virtual numbers, and other useful features. There are even new additions hidden within Safari. Find out what's new and changed on your iPhone with the iOS 17.4 update.


7 Comments
Neat, well-explained article. Thank you very much.
Probably not the best approach, you need to bear in mind that BlackArch and Arch linux are rolling releases, while Manjaro freezes some packages, this will eventually break things during the updates. Installing Arch is fun and gives you some basic knowledge of how Linux works under the hood, just go this way and add BlackArch mirrors to this install.
Enjoy the ride! :)
I have been using Arch Linux since last few days on Gnome Desktop Enviroment.
And yeah it was quite lengtly process to Install Arch if you are not famliar with it but it's all Good you can have "Arch Linux" also if you have basic understanding to different Disk types and bootloder and package managment.
And finally do not forget to add the menu...
Blackmate is a generator for the tools list of BlackArch Linux OS, made for the wm Xfce4. The script fetches the latest tools and generates a new entry on the blackarch menu.
#> pacman -S blackarch-menus
#> pacman -S blackmate
#> blackmate
#> reboot
And enjoy!!!
I have KDE but im having issues installing blackarch, after all the steps this happend
:: Proceed with installation? Y/n y
(3501/3501) checking keys in keyring ################### 100%
(3501/3501) checking package integrity ############################################################ 100%
(3501/3501) loading package files ############################################################ 100%
(3501/3501) checking for file conflicts ############################################################ 100%
(like hundresds of failed stuff)
Errors occurred, no packages were upgraded.
Any ideas how to do it?
Something to note:
Before step 4, we need to go into VB settings of manjaro and remove the iso and run our machine again so it boots in the installed media.
Awesome! Definitely going to try this out
But since we are installing the tools using the program "strap.sh" couldn't we do it with other non-arch distros ??
It may be dumb question but ill try it out some other debian distro to see if it works :)
Share Your Thoughts