
In a previous guide, I demonstrated how to extract images from a security camera over Wi-Fi using Wireshark, provided you know the password. If you don't know the password, you can always get physical with the Hak5 Plunder Bug. Using this small LAN tap, we can intercept traffic like images from a Wi-Fi or IP security camera if we can get physical access to the Ethernet cable carrying the data.
Many IoT devices use weak security because they assume these devices will live inside Wi-Fi networks with strong passwords. This does nothing to protect them from physical attacks, so if you get access to an Ethernet cable, these devices can often be accessed in unexpected ways without even requiring a password.
In this guide, we'll be trying to grab images from a security camera connected to a local network that someone is displaying on a monitor. Our goal will be to sniff the traffic from the insecure webpage on the device to see if we can pull images out of the traffic we intercept, allowing us to "see" what the receiver sees.
Limitations of Wi-Fi
While Wi-Fi allows us to see everything that is happening on a network, there are some downsides as well. First, for the attack we're talking about to work, we'd need to know the password to the Wi-Fi network. We'd also need to kick off the device we were looking to snoop on momentarily, so we could listen in when the device and Wi-Fi router negotiate the keys for their connection.
That means two big conditions must be met in order for the Wi-Fi version of this to work. First, someone must be on the network to kick off, and second, we have to know the password to put everything together. Once we have all of this information, intercepting the images is easy. The hard part can often be getting the Wi-Fi password in the first place.
Plunder Bug to the Rescue
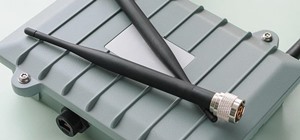
The Hak5 Plunder Bug is a 10/100 Base-T Fast Ethernet switch with the mirrored traffic heading to an integrated USB Type-C Ethernet adapter. The whole thing easily slips between where a router and Ethernet cable intersect, giving you access to any unencrypted traffic flowing inside.
Unlike Wi-Fi, we don't need a password to see unencrypted traffic like shoddy IP security camera viewing pages. What we do need to remember is that unlike Wi-Fi, which shares a common channel being broadcast over the air, Ethernet cables coming from the router to an end device will only contain traffic for the particular device the cable is connecting to the network.
Put simply, if you tap the wrong Ethernet cable, you'll be watching the wrong computer, because Ethernet only sends the data we're looking for over the cable directly connecting the router to the computer the target is viewing the camera on.
What You'll Need
To do this, you'll need a wired or wireless security camera connected to your network to experiment on, as well as a "victim" computer watching the camera feed in a browser window. The webcam needs to be using HTTP, not HTTPS. You'll also need a Hak5 Plunder Bug for $49.99, as well as a USB Type-C to USB Type-A cable to connect the Bug to your computer.
If you don't have Ethernet cables lying around, you'll also need a length of Ethernet cable to slip the Plunder Bug in between the target's Ethernet connection and the router.
Step 1: Watch the Viewing Page of the Test Camera
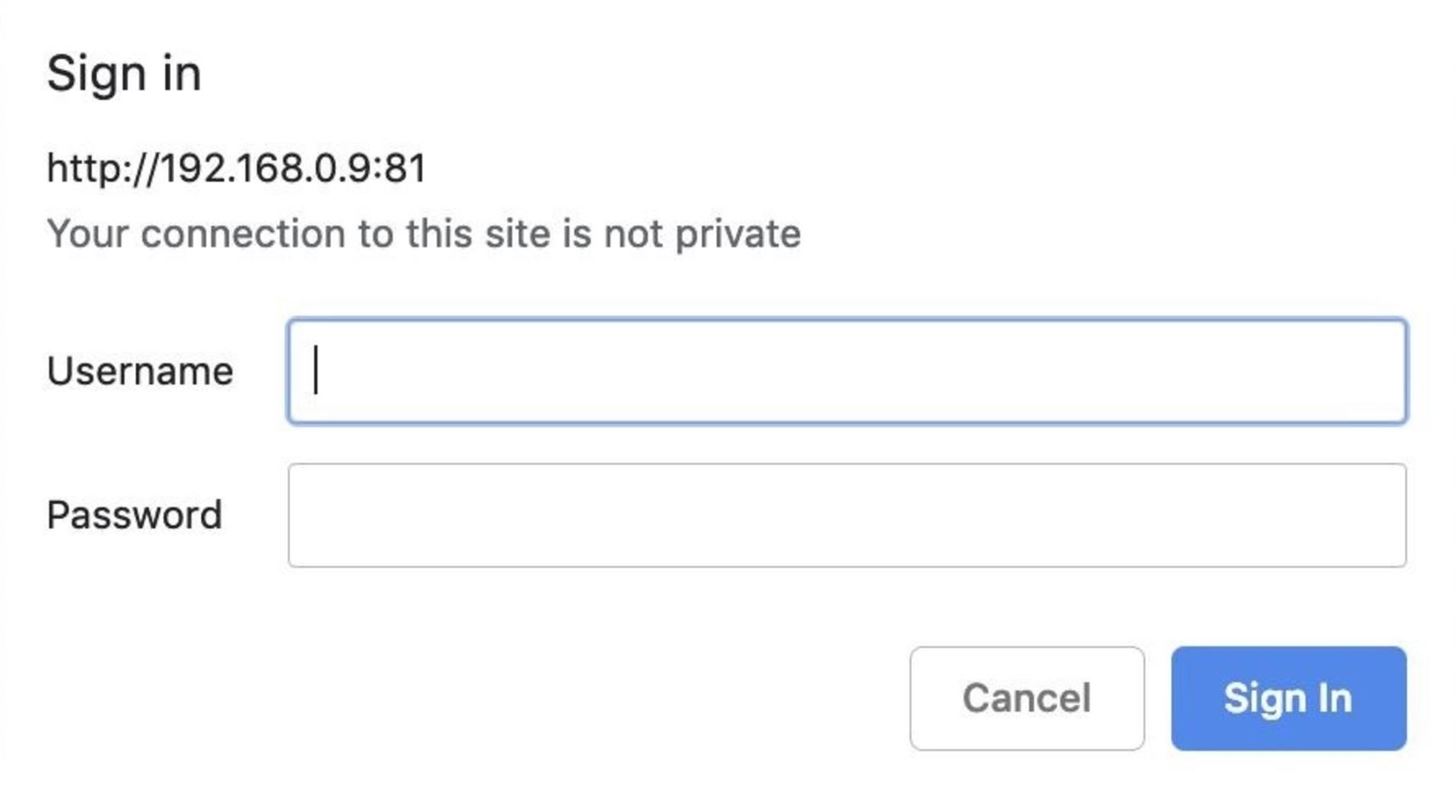
To start, you'll need to access the built-in interface on whatever webcam, IP security camera, or DVR system you want to intercept images from. This attack relies on the target accessing the insecure website hosted on the device to view the camera feed, so if they use HTTPS, it won't work. To set up our test computer, we'll need to access and be watching the camera.
In a browser window on your "target" computer, navigate to the HTTP interface, enter any password required, and then begin viewing the live webcam view. Check to make sure "HTTP" is enabled, and not "HTTPS." Below you can see a typical login prompt.
If you need to find your camera on the network, you can run an Nmap scan to discover different devices on the network running common HTTP ports often associated with cameras.
For this command, you'll need to know the network range. You can find this by typing ifconfig and copying down the IP address assigned to your computer. Then, you can type ipcalc and your IP address to calculate the network range. It should be something like 192.168.0.0/24. Run the following command, substituting 192.168.0.0/24 for your own network range.
sudo nmap -p 80,81,8080,8081 192.168.0.0/24 --openWhen you find a device on the network with a port open, you can navigate to it by typing the IP address and then the port number in a browser window. For example, if you want to navigate to port 8081 on 192.168.0.1, type 192.168.0.1:8081 to your browser window.

In the above example, we can see the webcam viewing page is vulnerable!
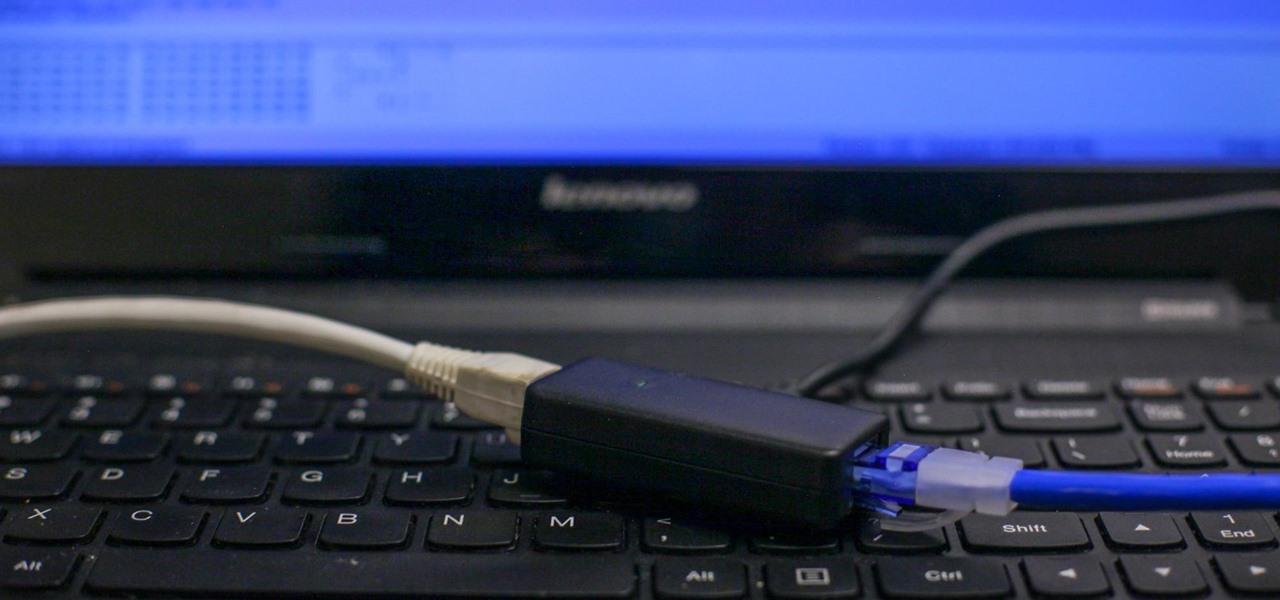
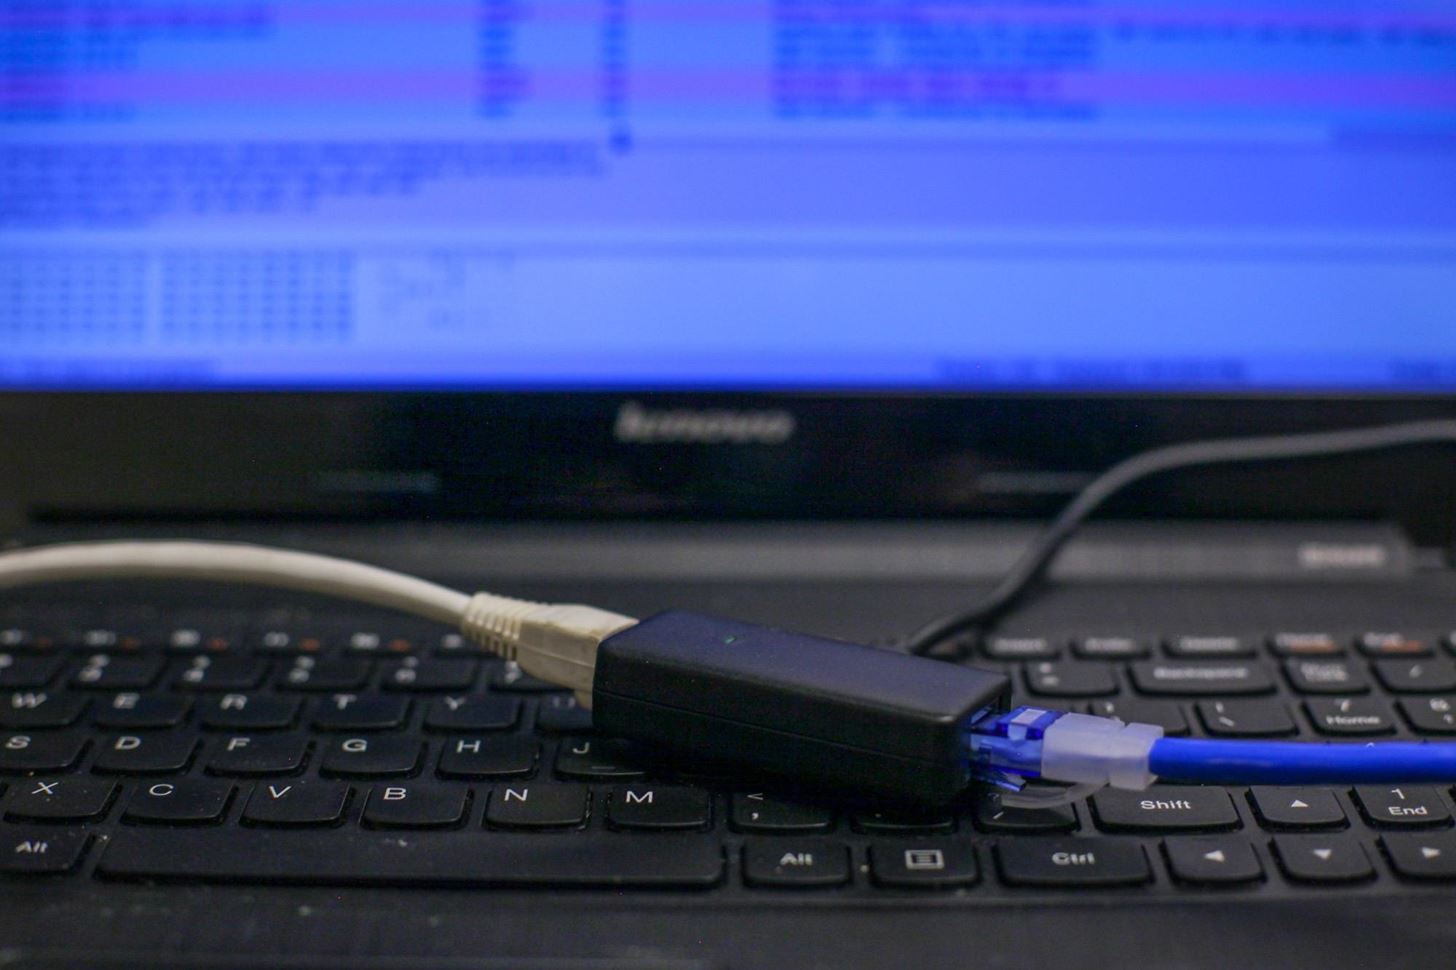
Step 2: Insert the Plunder Bug
Now comes the easy part. Plug the Plunder Bug into your laptop via the USB Type-C to USB Type-A cable. Now, unplug the Ethernet cable of whatever device you want to monitor from the router, and plug a length of Ethernet cable both into the router and one side of the Plunder Bug. Then, insert the Ethernet cable leading to the target into the remaining slot on the Plunder Bug.
With the Plunder Bug sitting in between the two cables, we can now see the data passing through after connecting the USB cable to our computer.
Step 3: Locate the USB Device
After inserting the Plunder Bug, you should see a second USB Ethernet device. To check, run ifconfig before and after, and look for something like eth1 to appear. Unless your computer lacks an Ethernet port, eth0 is usually your internal adapter.
ifconfigeth0: flags=4099<UP,BROADCAST,MULTICAST> mtu 1500
ether 50:7b:9d:7a:c8:8a txqueuelen 1000 (Ethernet)
RX packets 0 bytes 0 (0.0 B)
RX errors 0 dropped 0 overruns 0 frame 0
TX packets 0 bytes 0 (0.0 B)
TX errors 0 dropped 0 overruns 0 carrier 0 collisions 0
eth1: flags=4163<UP,BROADCAST,RUNNING,MULTICAST> mtu 1500
inet6 fe80::e476:ed83:a72c:72b4 prefixlen 64 scopeid 0x20<link>
ether 00:13:37:a7:25:cf txqueuelen 1000 (Ethernet)
RX packets 25 bytes 6272 (6.1 KiB)
RX errors 0 dropped 0 overruns 0 frame 0
TX packets 50 bytes 7364 (7.1 KiB)
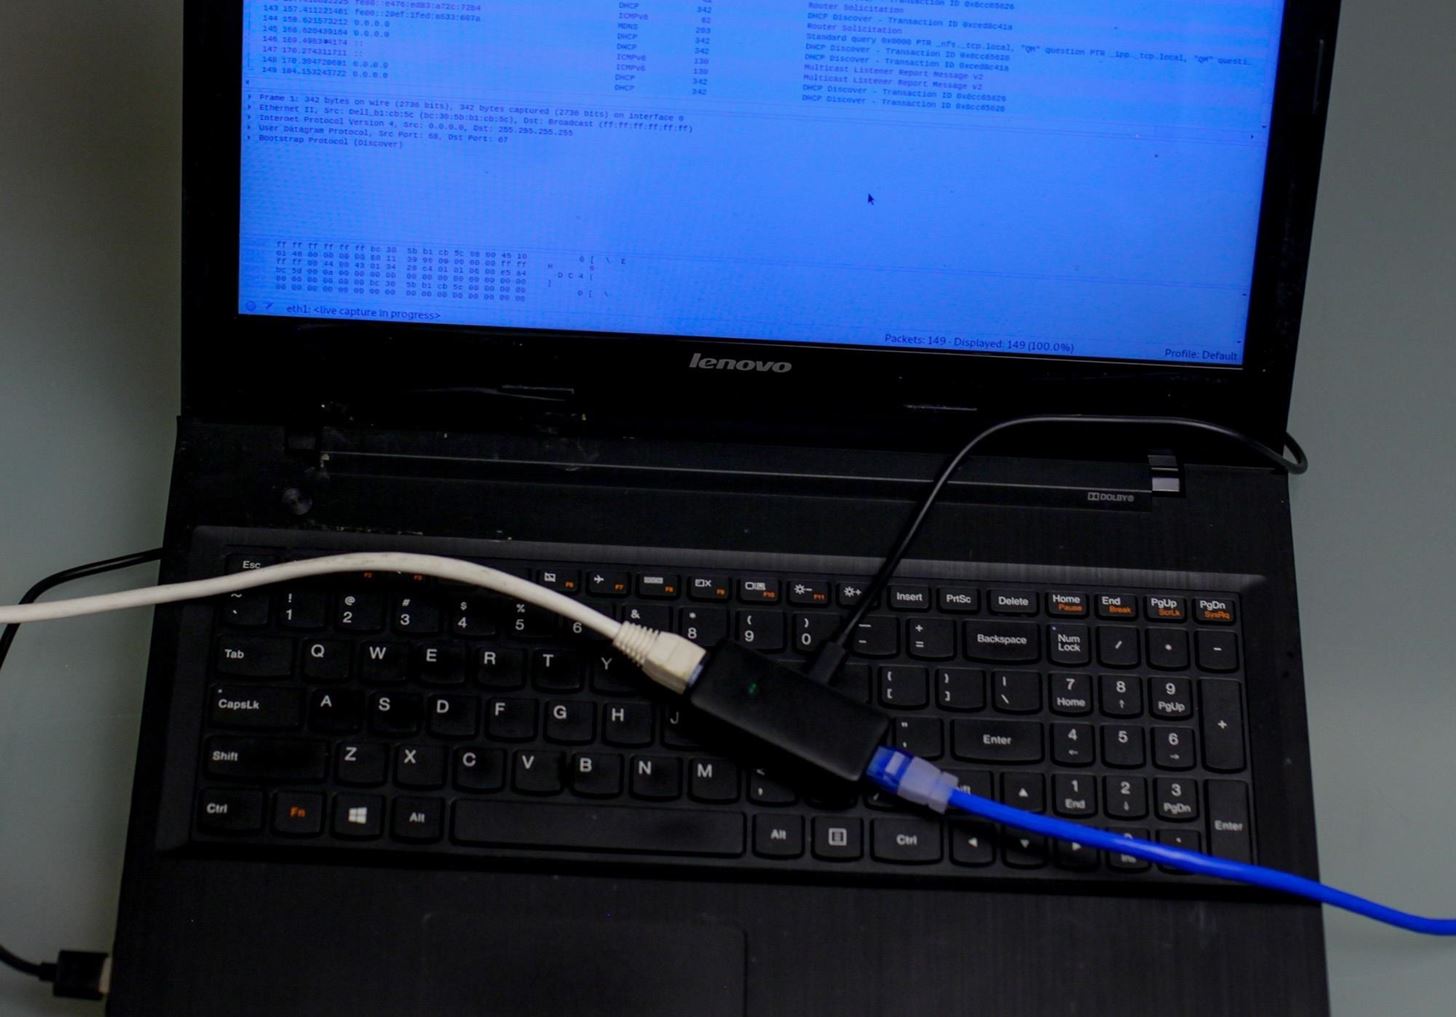
TX errors 0 dropped 0 overruns 0 carrier 0 collisions 0Now that we know the name of the adapter, in this case, eth1, we can start Wireshark and start monitoring traffic flowing across this interface.
Step 4: Start Wireshark
While we've gained access to the network traffic and narrowed it down to the target computer, there may be other traffic that's unrelated to the images we're trying to capture and makes it difficult to focus on what we're looking for.
Start Wireshark by selecting it from the drop-down menu of applications in Kali or via a quick search. Next, select the interface we found before, in my case, eth1.
Double-click the interface to start Wireshark. A flood of packets should start to fill up the window.
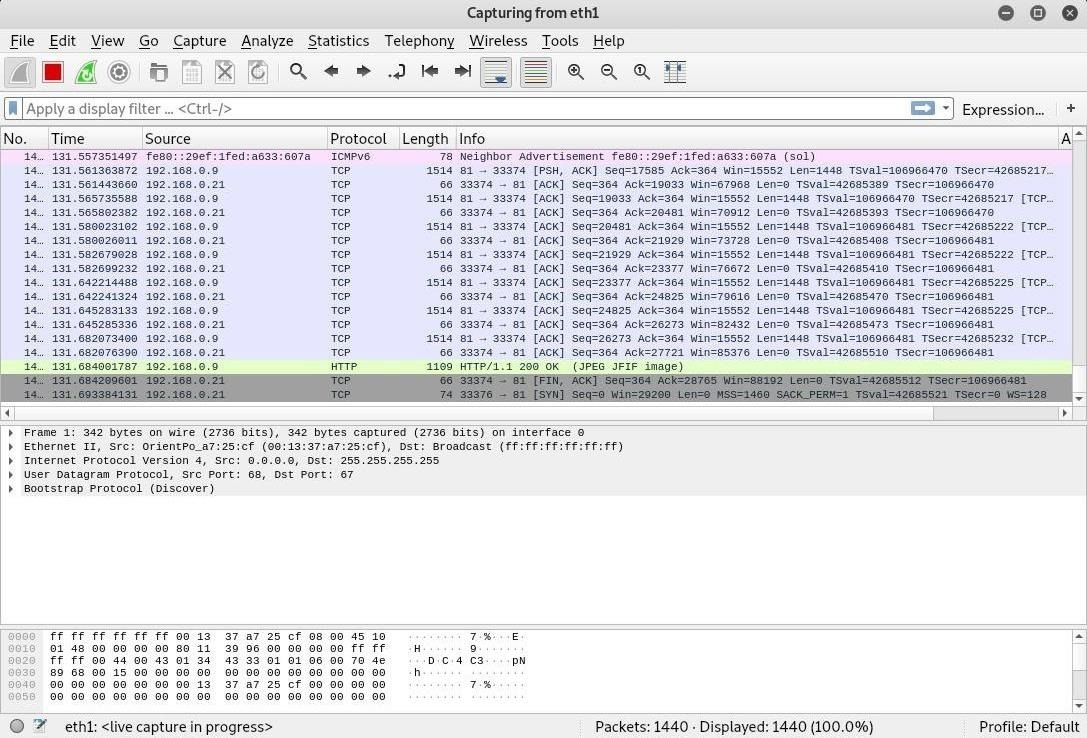
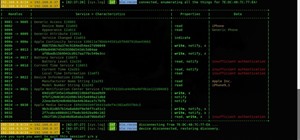
That is way too much traffic to parse through. To cut through the data, we'll add another network filter to show only HTTP traffic flowing on the network. In the Wireshark main view, type http into the display filter bar.
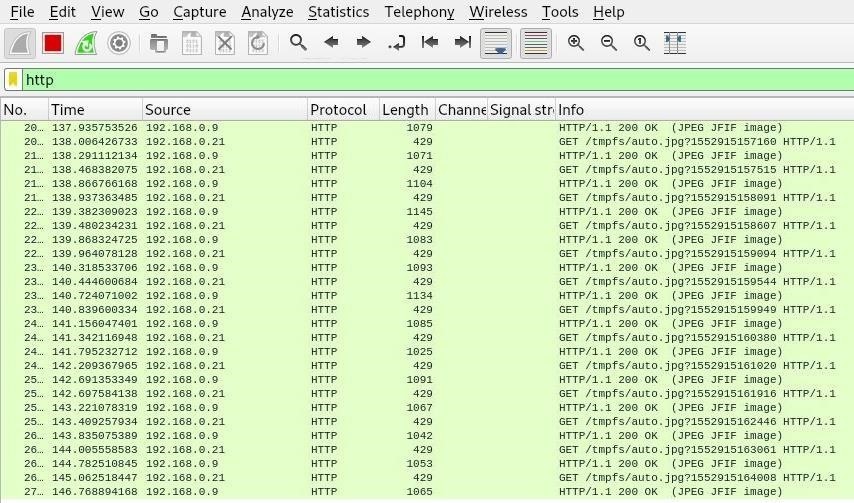
This will only allow HTTP traffic being sent to the computer we're monitoring to be displayed, filtering our view even further until we're only looking at the traffic to our insecure web app. Now, we'll need to actually decode the intercepted packets into images so we can see what our target is seeing. Stop Wireshark by clicking the red square, and we'll export the JPEG images we've captured.
Step 5: Export Intercepted Images
Now that we can see the HTTP traffic from the web app, we'll need to select the encoded JPEG files in order to turn them into something we can work with. Click on "File," then "Export Objects." We'll be exporting the HTTP objects we've found, so click on "HTTP" to open the object list.
In the HTTP object list, we'll see a list of HTTP objects we've intercepted. Here we can see the JPEG images we want to decode. You can select one or all of them, and then click "Save" or "Save All" and pick a location to export the files to.
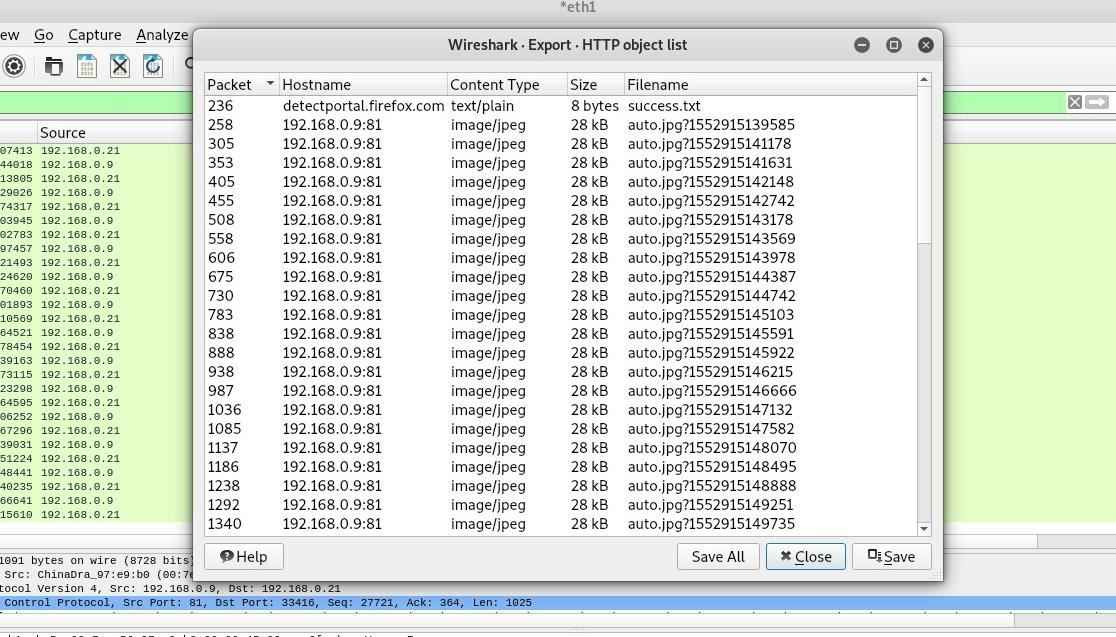
Click "Close," and then navigate to the folder you exported the images to. You should see a list of files that Wireshark exported from our capture. This will be more or less depending on how long you ran the capture for.
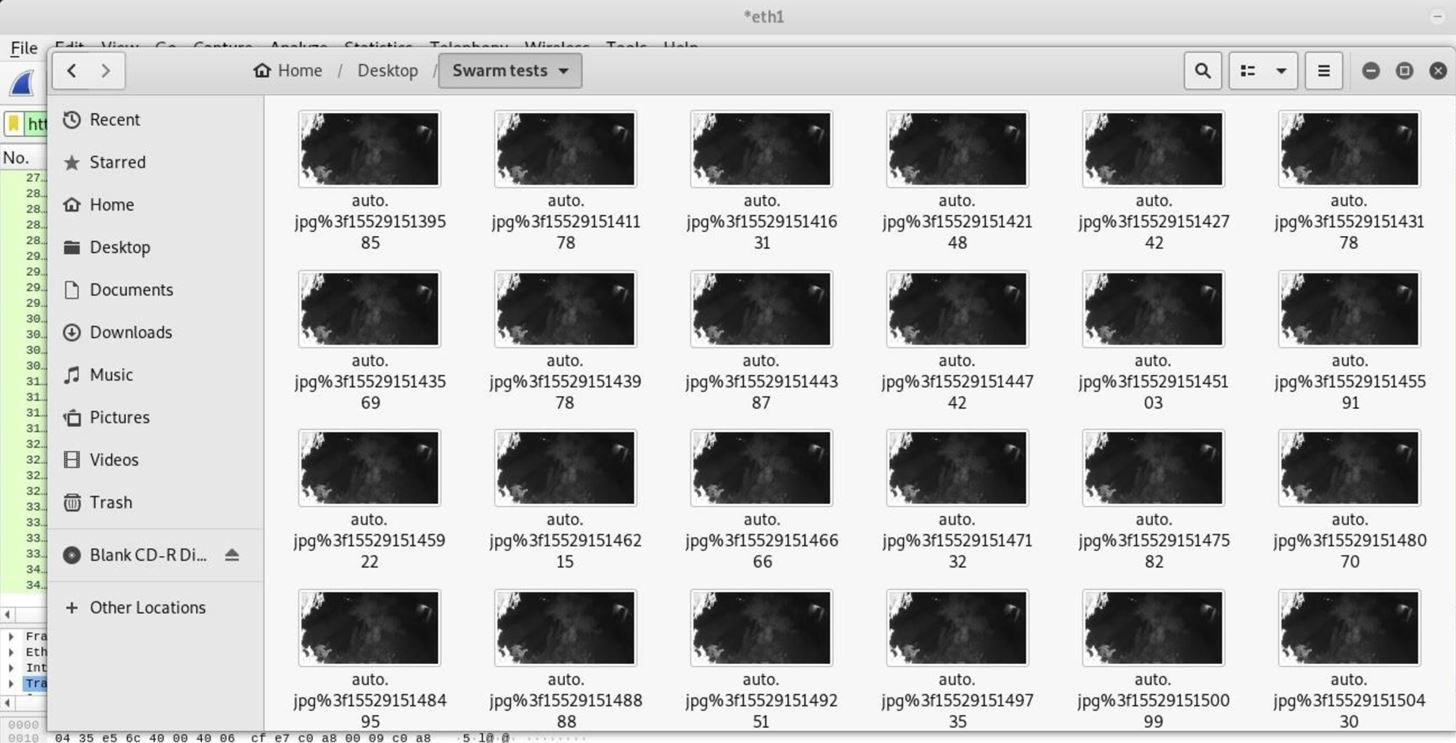
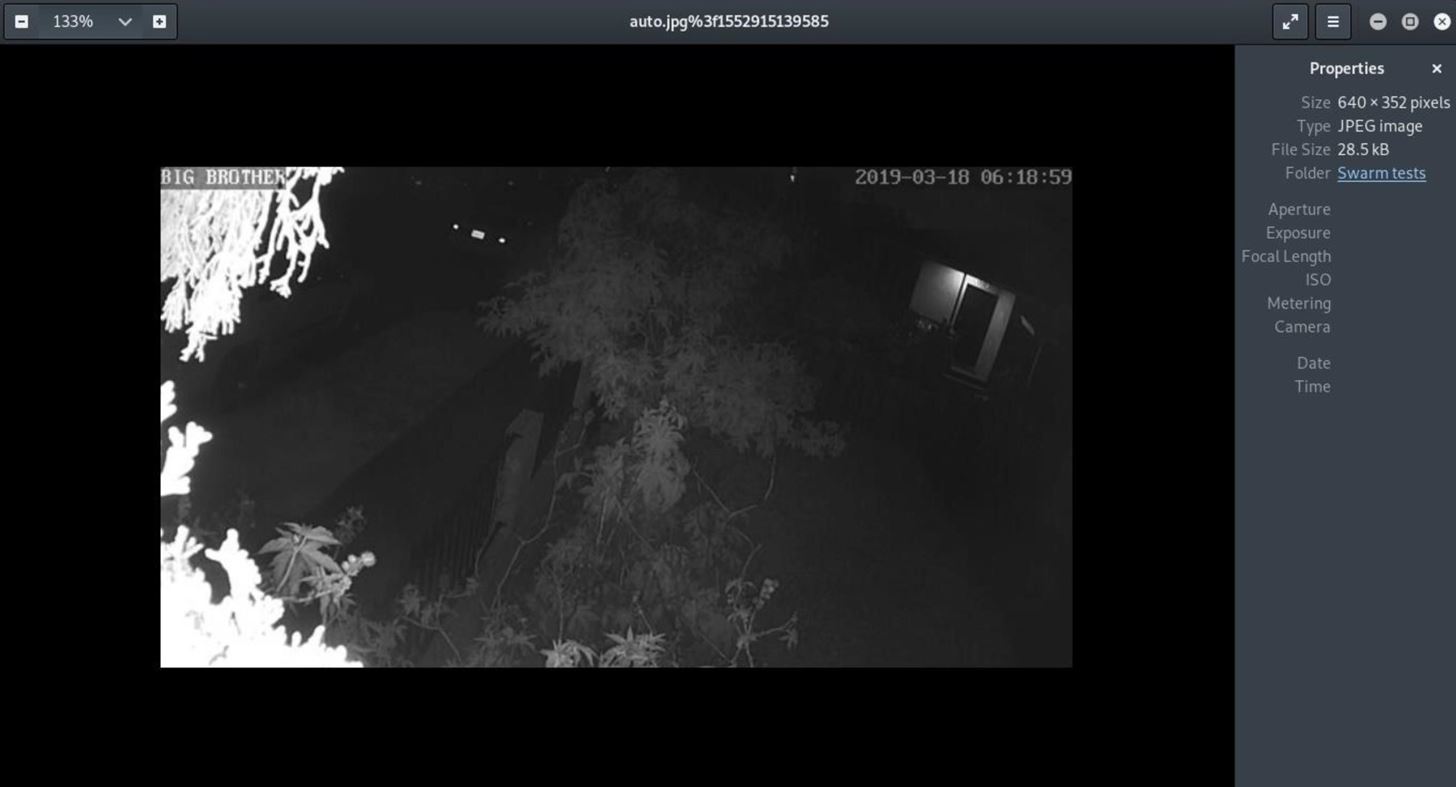
Finally, click on one of the images to see the image that was intercepted on the way to the target computer. You should see a frame from the video feed!
The Hak5 Plunder Bug Makes Net Snooping Easy
As the Plunder Bug goes to show, physical access is everything. Especially for IoT devices designed to be used within the safety of a protected LAN, gaining physical access to the network can allow access to devices like security cameras in unintended ways. More advanced IoT devices using HTTPS are safe from these attacks thanks to their traffic being encrypted end to end, but critical details like HTTPS security are frequently overlooked when connected devices are designed.
This is just the beginning of what you can do with this awesome Hak5 tool. You can pick up a Plunder Bug from Hak5's shop and check out the official documentation for more details on setting active and passive modes of the device.
I hope you enjoyed this guide to using the Hak5 Plunder Bug to intercept webcam images. If you have any questions about this tutorial on LAN taps or you have a comment, feel free to write it below in the comments or reach me on Twitter @KodyKinzie.
Just updated your iPhone? You'll find new emoji, enhanced security, podcast transcripts, Apple Cash virtual numbers, and other useful features. There are even new additions hidden within Safari. Find out what's new and changed on your iPhone with the iOS 17.4 update.


Be the First to Comment
Share Your Thoughts