
In many urban areas, GPS doesn't work well. Buildings reflect GPS signals on themselves to create a confusing mess for phones to sort out. As a result, most modern devices determine their location using a blend of techniques, including nearby Wi-Fi networks. By using SkyLift to create fake networks known to be in other areas, we can manipulate where a device thinks it is with an ESP8266 microcontroller.
For devices with limited access to GPS, Wi-Fi networks are a reliable way of finding out where a device is located. Hackers can exploit the flaw by broadcasting signals that appear to be from known networks. While the tactic doesn't work in areas with a lot of other Wi-Fi networks or a clear GPS signal, it works very well in sites that force smart devices to rely on aGPS.
How Do Smart Devices Do Geolocation?
The problem of locating a device is not new, and most smart devices have a range of options besides GPS for determining where it's located. It can involve things like cell phone towers, which do not move and are useful for determining the relative location of a user. As demand for fast GPS devices began to increase, Assisted GPS, or aGPS, became a way for devices to get around the long signal acquisition time it took to get a traditional GPS lock.
To help with the problem of finding where a device with little or no GPS reception is, most smartphones continuously record the location of nearby Wi-Fi networks. These are added to a massive database of located networks that have been geolocated by multiple users, providing the information needed to determine where a device is by which Wi-Fi networks it can see.
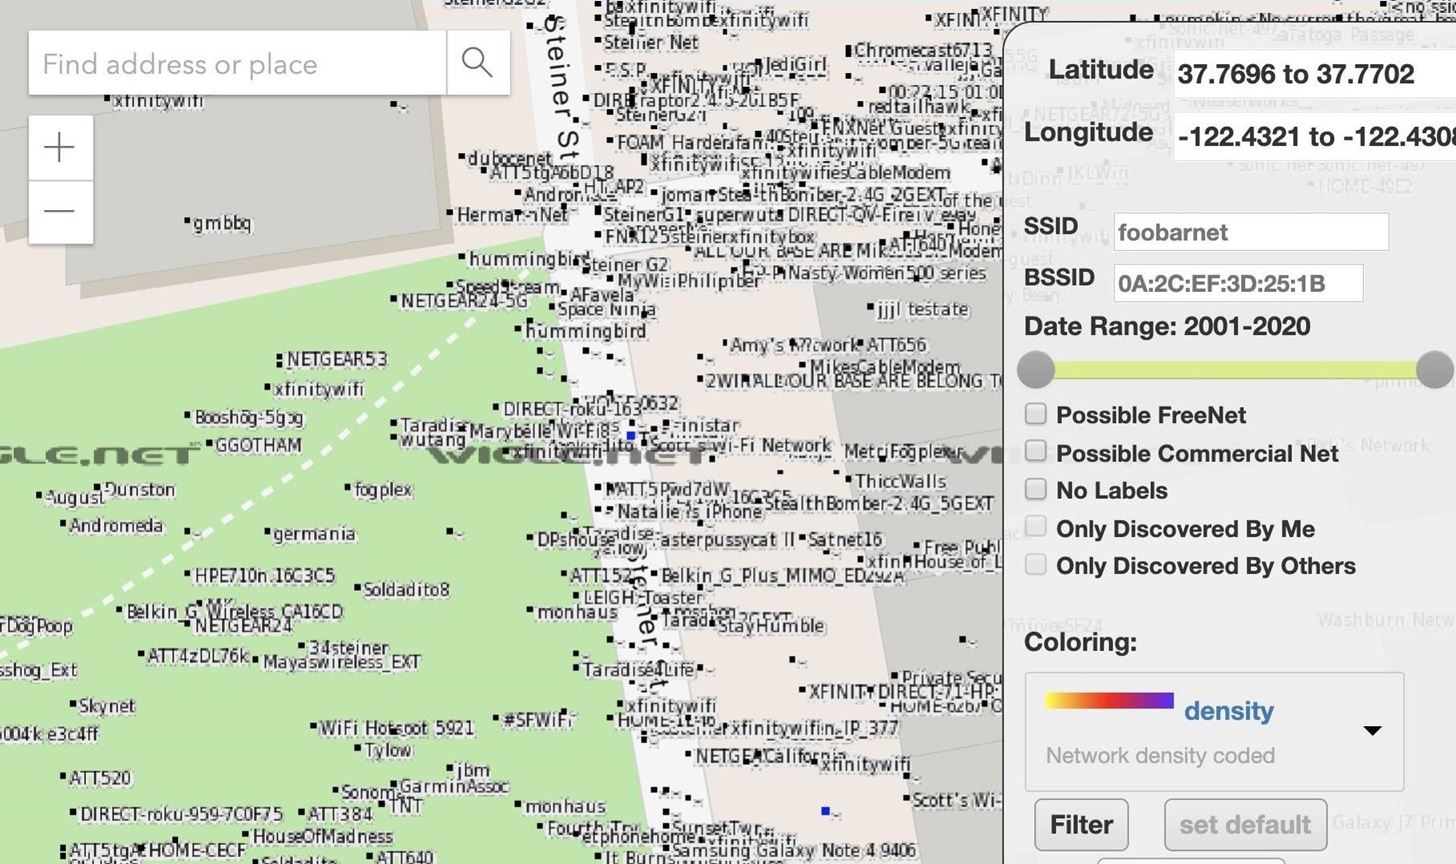
It shouldn't surprise anyone familiar with wardriving, as projects like Kismet have done so for quite some time. The Wigle.net project lets hackers upload the data and determine where each network is located, making it easy to identify where a device might be if it comes in range of a network with a known location. The difference between aGPS and a traditional GPS lock is that with aGPS, a device will call an API to derive its position from the name, MAC address, and signal strength of nearby Wi-Fi networks compared against a known database of geotagged networks.
How Do We Spoof aGPS?
Now that we know how aGPS works, we can start looking for ways to abuse it. One of the most obvious ways is to simply find areas that rely more on aGPS than traditional GPS to determine a location. It can be anywhere that lacks a line of sight to the sky or deep inside buildings or parking garages where GPS signals cannot penetrate. Those conditions force smart devices to rely on less accurate data to find their geolocation, like any nearby Wi-Fi networks.
Once we force smartphones into a condition where they are relying on aGPS more than GPS to determine their location, using a project called SkyLift, we can broadcast Wi-Fi beacon frames of networks with a previously logged geolocation to begin confusing the device. It will only work if there are few competing networks, as in a dense urban area, the results can range from moving around randomly to completely failing when real known networks are nearby.
If we're in an excellent location to force phones to use aGPS to know where they are, we can also pick specific locations we want to spoof. To do so, we can either go to the site and record Wi-Fi traffic or use Wigle.net to query which networks are present at a location we want to spoof and then copy the network details.
What You'll Need
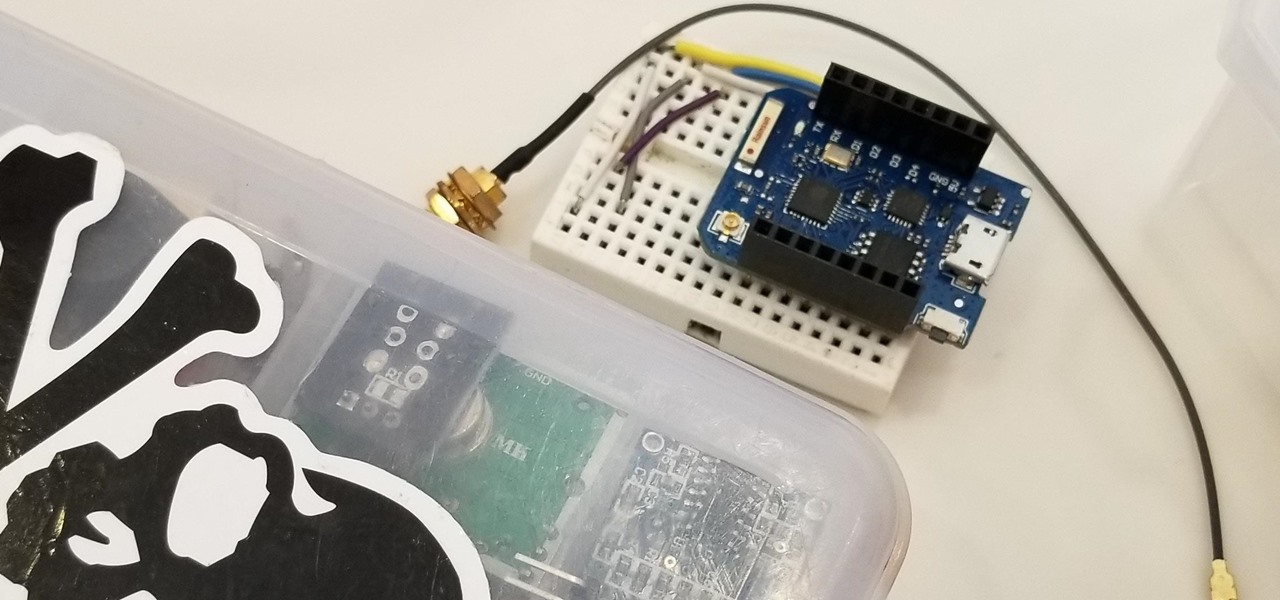
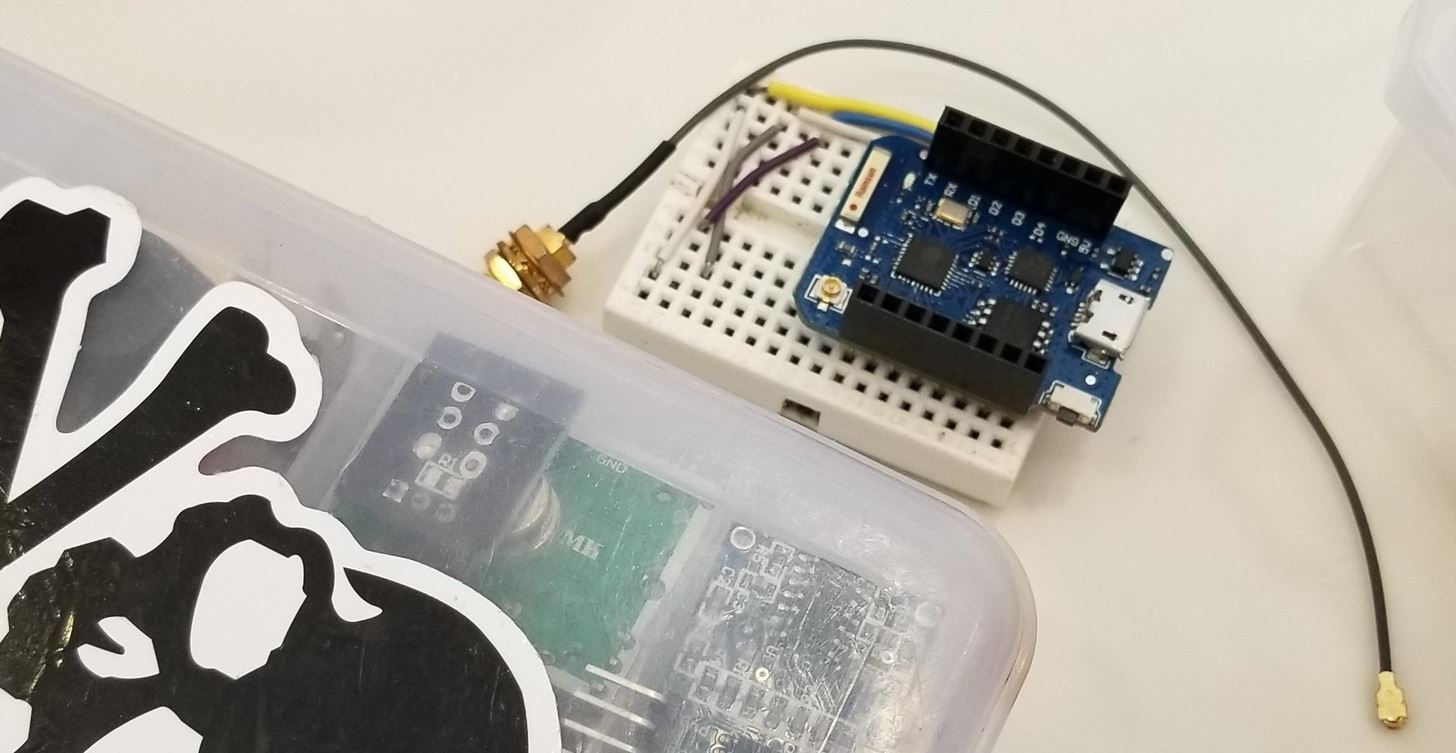
To follow this guide, you'll need an ESP8266-based microcontroller. It can be anything from a D1 Mini to a NodeMCU, which can be found for very cheap online. For the MCU's setup, you'll need a breadboard, jumper wires, Micro-USB cable, and a Wi-Fi antenna and SMA cable. I do not go over putting the MCU together since I have covered doing so in many previous ESP8266 guides. Please refer to those if you need help or ask questions in the comments.
- D1 Mini Board: Buy on Amazon (Alt) | AliExpress
- Or a D1 Mini Board with Antenna: Buy on Amazon | AliExpress
- Or a NodeMCU Board: Buy on Amazon | AliExpress
- Micro-USB cable: Buy on Amazon | AliExpress (Alt)
- Breadboards: Buy on Amazon | AliExpress
- Breadboard jumper wires: Buy on Amazon (Alt)
- Antenna w/Cable (if not included with the board): Buy on Amazon
You'll also need an internet-connected computer with Arduino IDE installed. We'll use it to program the microcontroller, and the Micro-USB data cable is used to connect the ESP8266 to the computer for power and programming.
Step 1: Add the ESP8266 Board to Arduino
We will use the free and cross-platform Arduino IDE, which will allow us to prototype what we need quickly. Arduino IDE (the IDE stands for "integrated development environment") will enable you to write and upload scripts to Arduino-like microcontroller devices easily.
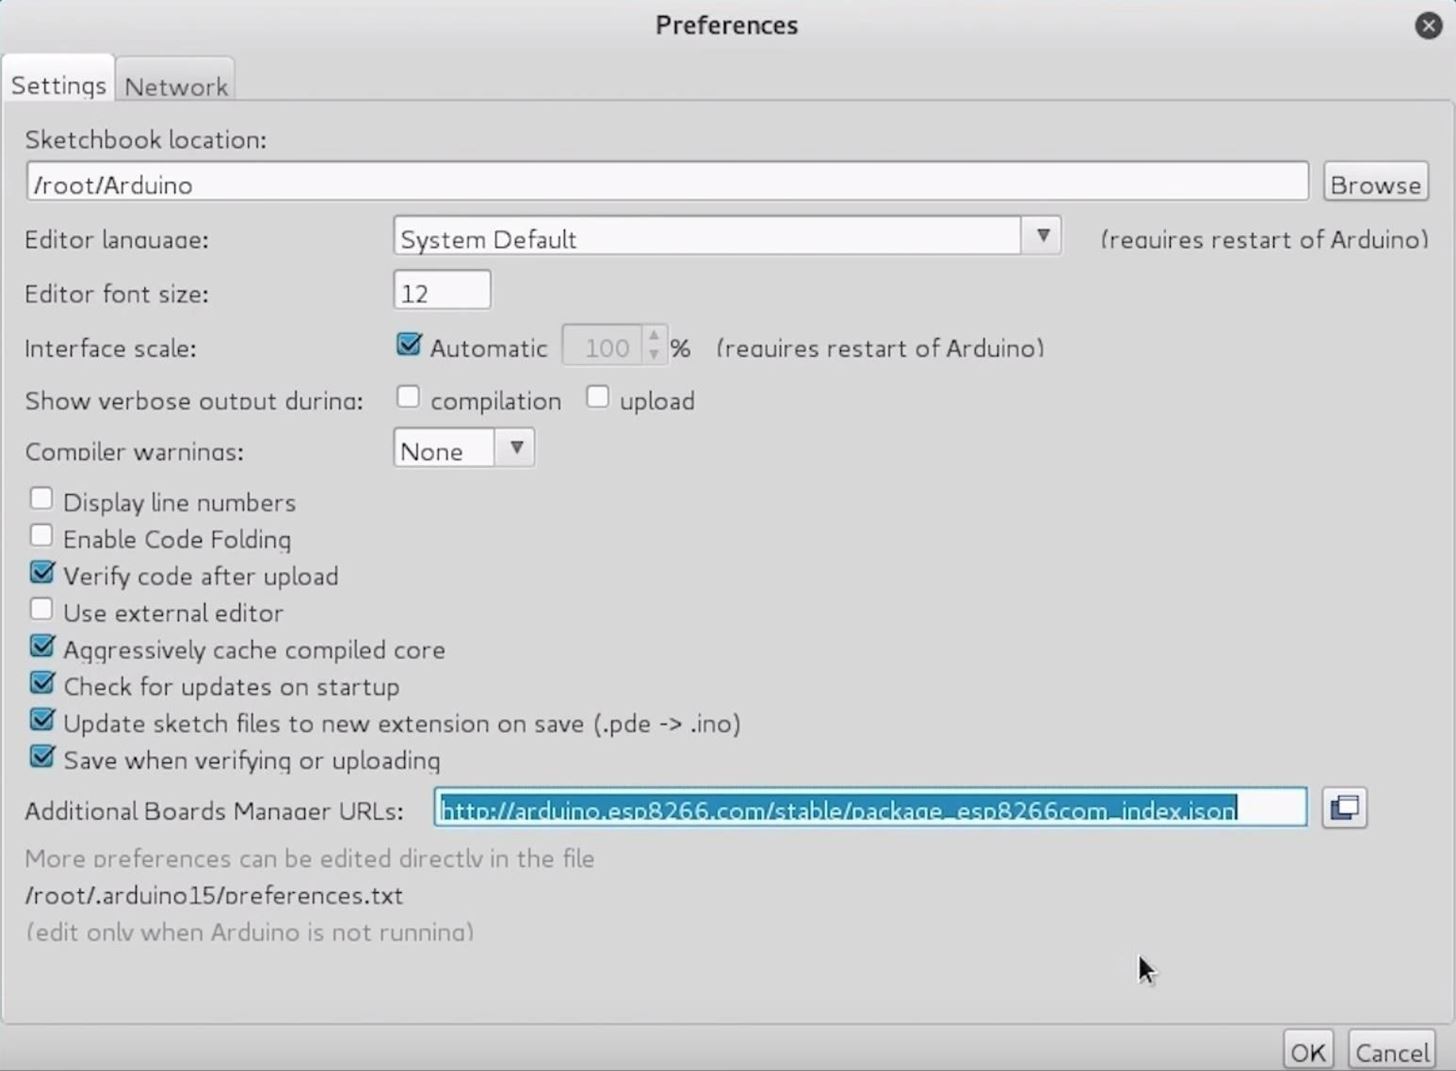
You can download the Arduino IDE from the official website. Once it's installed, you'll need to click on the "Arduino" drop-down menu, then select "Preferences." Next, paste the following URL into the Additional Boards Manager URLs field.
http://arduino.esp8266.com/stable/package_esp8266com_index.jsonOnce that's complete, click "OK" to close the menu.
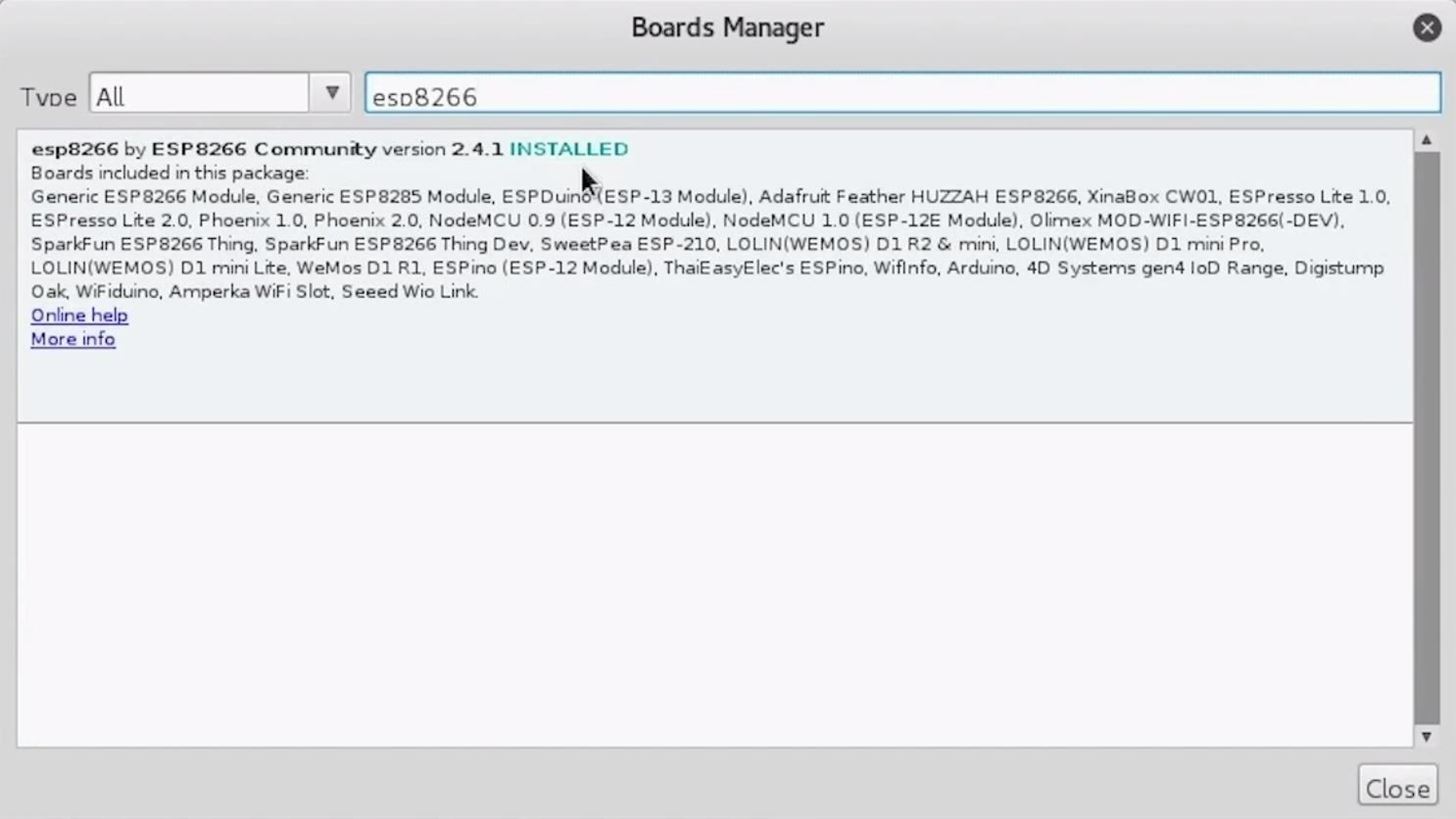
Next, you'll need to add the NodeMCU to the Boards Manager. Click on "Tools," then hover over the "Board" section to see the drop-down list. At the top, click "Boards Manager" to open the window that will allow us to add more boards.
When the Boards Manager window opens, type "esp8266" into the search field. Select "esp8266" by "ESP8266 Community" and install it.
You should be ready to program your ESP8266-based microcontroller now. Plug your ESP8266 into your computer. When you click on "Tools," you should see the correct port auto-selected.
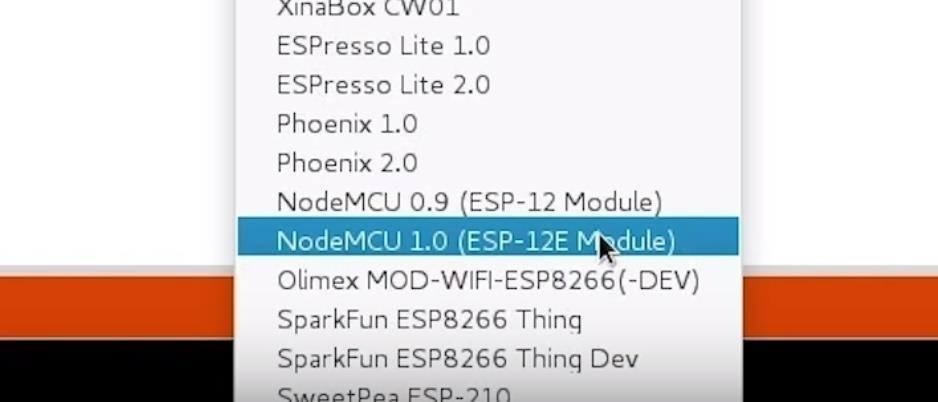
Select the "NodeMCU 1.0," or whichever ESP8266 you are using, from the "Board" menu. If you're using a bad USB cable, the port may not show up, so if you don't see anything after you've completed the other steps, try another cable first.
There are two main buttons up top. The checkmark compiles and checks our code for mistakes, and the right arrow pushes the code to the NodeMCU.
Step 2: Download SkyLift
Now that we have Arduino IDE set up, we'll need to download the SkyLift demo. We can clone its GitHub repository by typing the following into a new terminal window.
~$ git clone https://github.com/adamhrv/skylift.gitOnce it has completed, we can change directories into the folder that was downloaded and open the sketch in Arduino IDE.
~$ cd skylift
~$ cd skylift_demo/
~$ open skylift_demo.ino
Here, you'll see configuration files as well as the main script.
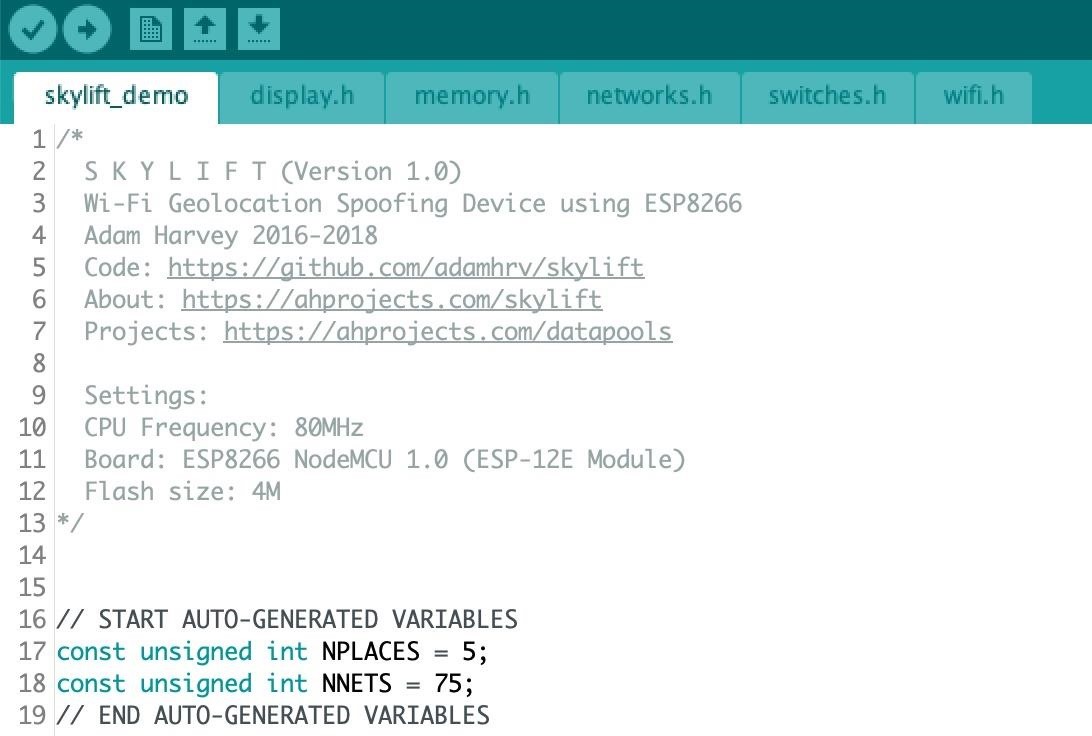
For our demo, we won't be modifying it. We can plug in our ESP8266 and, provided we see the LED on it flash, move on to the next step.
Step 3: Push the Code to the ESP8266
Now, it's time to push our code to the ESP8266, which should be plugged in via a Micro-USB cable to our computer running Arduino IDE.
Make sure that the correct board is selected in Arduino and that the port is set to the right interface for the ESP8266. Once you're sure the settings are correct, you can click the arrow icon to upload the code to your ESP8266-based board. It shouldn't take long, and when it's complete, you should see several open networks being broadcast nearby.
In our example, the open networks are the signals we are spoofing, as they are known networks that have been geolocated to Facebook's headquarters. If we can put a smart device in a position where it has only those signals to determine it's likely location, we can trick it into believing it's near the networks at Facebook's HQ instead of its actual location.
Step 4: Test the Demo in a Suitable Location
Once you've pushed the code to the ESP8266, it's time to test it out in a good location. You can use Wigle WiFi on Android to measure the number of nearby networks and hunt for places with poor reception of other networks. Once you find a location with lousy GPS reception, turn off the geolocation services on your phone, and then turn them back on again.
When your phone attempts to locate itself, it will have only the spoofed signals from the ESP8266 to rely on. Because these aren't reliable, it should determine its location as Facebook HQ.

The location should be encoded into photos taken with geolocation enabled, suggested by apps the target is using, and it will persist until you stop broadcasting spoofed networks or the target gets a good signal from a GPS satellite or a legitimate nearby network with a known location.
A-GPS Is Easy to Spoof in the Right Areas
Smart devices have many ways of determining their location, and hackers can use them to create a situation where a device will rely on false information. It has been used for everything from art projects in which devices are spoofed, to the pools of the rich and famous, to situations where manipulating directions could give hackers an advantage. While it may not be an issue in every environment, be extra wary of GPS locations that are derived deep inside buildings or other areas that force devices to rely on easily spoofed signals.
I hope you enjoyed this guide on spoofing aGPS locations using an ESP8266 microcontroller! If you have any questions about this tutorial on spoofing aGPS with Arduino, please ask below. And if you have a comment or idea for a future episode, feel free to reach me on Twitter @KodyKinzie.
Just updated your iPhone? You'll find new emoji, enhanced security, podcast transcripts, Apple Cash virtual numbers, and other useful features. There are even new additions hidden within Safari. Find out what's new and changed on your iPhone with the iOS 17.4 update.


4 Comments
Interesting, thanks!
Amazing post @kodykinzie
@kodykinzie I was hoping to message you directly but so far this looks like the only way. I'm hoping to ask you direct questions about certain raspberrypi videos I saw on YouTube recently. I love the tutorial but sometimes there are questions I can't find answers to online. It would be best to ask directly I think. If you can help or know of anyone willing please message me. I created an account here. I'll check it periodically.
very interesting. how to change gps location instead of FB Hq?
Share Your Thoughts