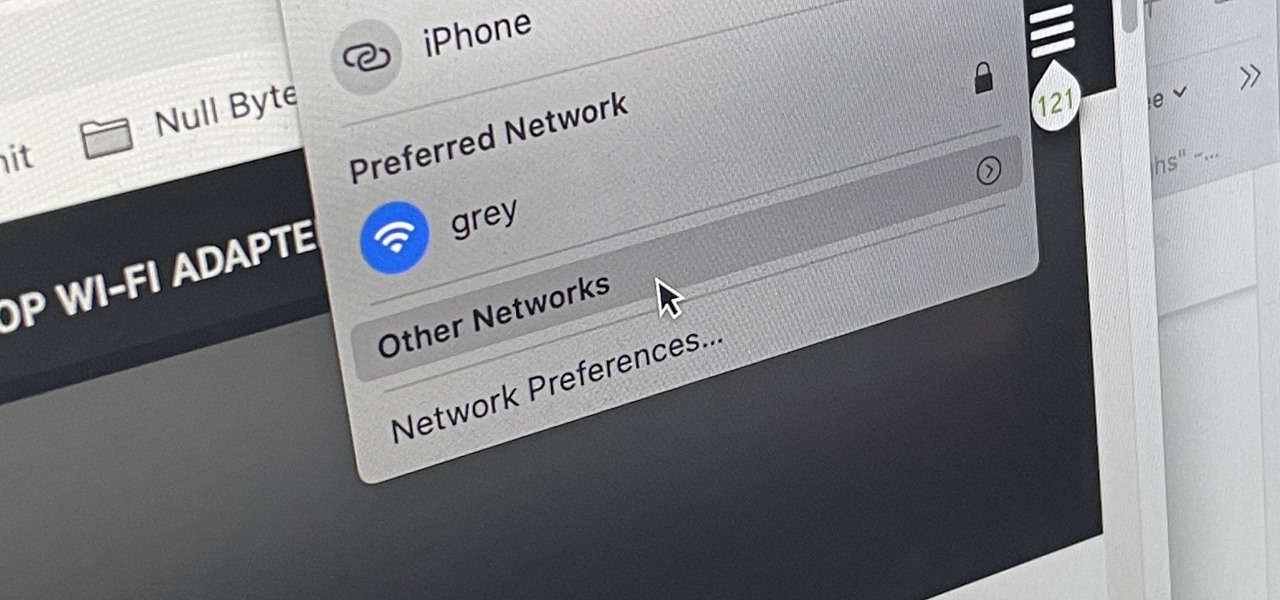

There are hidden Wi-Fi networks all around you — networks that will never show up in the list of available unlocked and password-protected hotspots that your phone or computer can see — but are they more secure than regular networks that broadcast their name to any nearby device?
The short answer is no, and that could be for any number of reasons.
Hidden networks are actually the same as regular Wi-Fi networks; only they don't broadcast their names (ESSID) in the beacon frames that regular networks send out. If the name isn't included, your phone or computer will never find it just by scanning for nearby hotspots to join. To join a hidden network, you need to know its name first, and there are a few attacks that can accomplish this.
There is no elaborate, crazy attack needed to discover hidden Wi-Fi networks in your area, so virtually anybody that can work their way around a computer can find one. You don't have to be a hacker, pentester, cybersecurity professional, or someone with another type of fancy cyber skillset.
Ways Somebody Can Uncover a Hidden Network
For example, you could monitor the phone, computer, or another device of a person who has connected to the hidden network before because their device will be "screaming out" the name of the network in plain text. That's because it never knows when it's physically close to the network since the network is not announcing its presence, so it's constantly looking for it.
You could also deauthenticate, or deauth, somebody currently connected to the hidden network. Then, when they try to reconnect to the hotspot, you'll be able to intercept the network name. Whether it's this way or the one above, you can use airodump and Wireshark to get the name, as you'll soon see.
Another option we'll show you today is attacking the network with MDK3 and brute-forcing the name from a word list. To follow along, you'll need to have a computer, Arduino IDE, Wireshark, and a wireless network card or adapter that can be put into monitor mode.
One such adapter is the Alfa AWUS036NEH ($29.99), but there are many that work. Other possible options include the Alfa AWUS036NHA ($35.99), TP-Link Nano ($14.99), Alfa AWUS036NH ($49.99), Panda PAU05 ($19.99), and Alfa AWUS036ACH ($59.99). You can learn more about monitor mode adapters in our Kali field-testing guide and wireless adapters for hacking roundup.
You will also need a hidden network to attack. An easy way to do that is to create one yourself, and one good way to do that is with a D1 Mini and Arduino IDE. Check out our full guide on turning a D1 Mini microcontroller into a hackable Wi-Fi network for more info, only we'll be using a different sketch today.
Step 1: Create a Hidden Network on a D1 Mini (Optional)
I'll assume you don't have a hidden network to hunt down, so we'll make one with a D1 Mini and Arduino IDE. I won't go into detail on how to set up a D1 Mini with Arduino IDE since we already have many guides that show how to do it, so check one of those out if you don't know how to connect to the D1 Mini.
Connect your D1 Mini to your computer, then open up the "WiFiAccessPoint" example sketch in Arduino IDE. You can find the sketch via File –> Examples –> ESP8266WiFi –> WiFiAccessPoint.
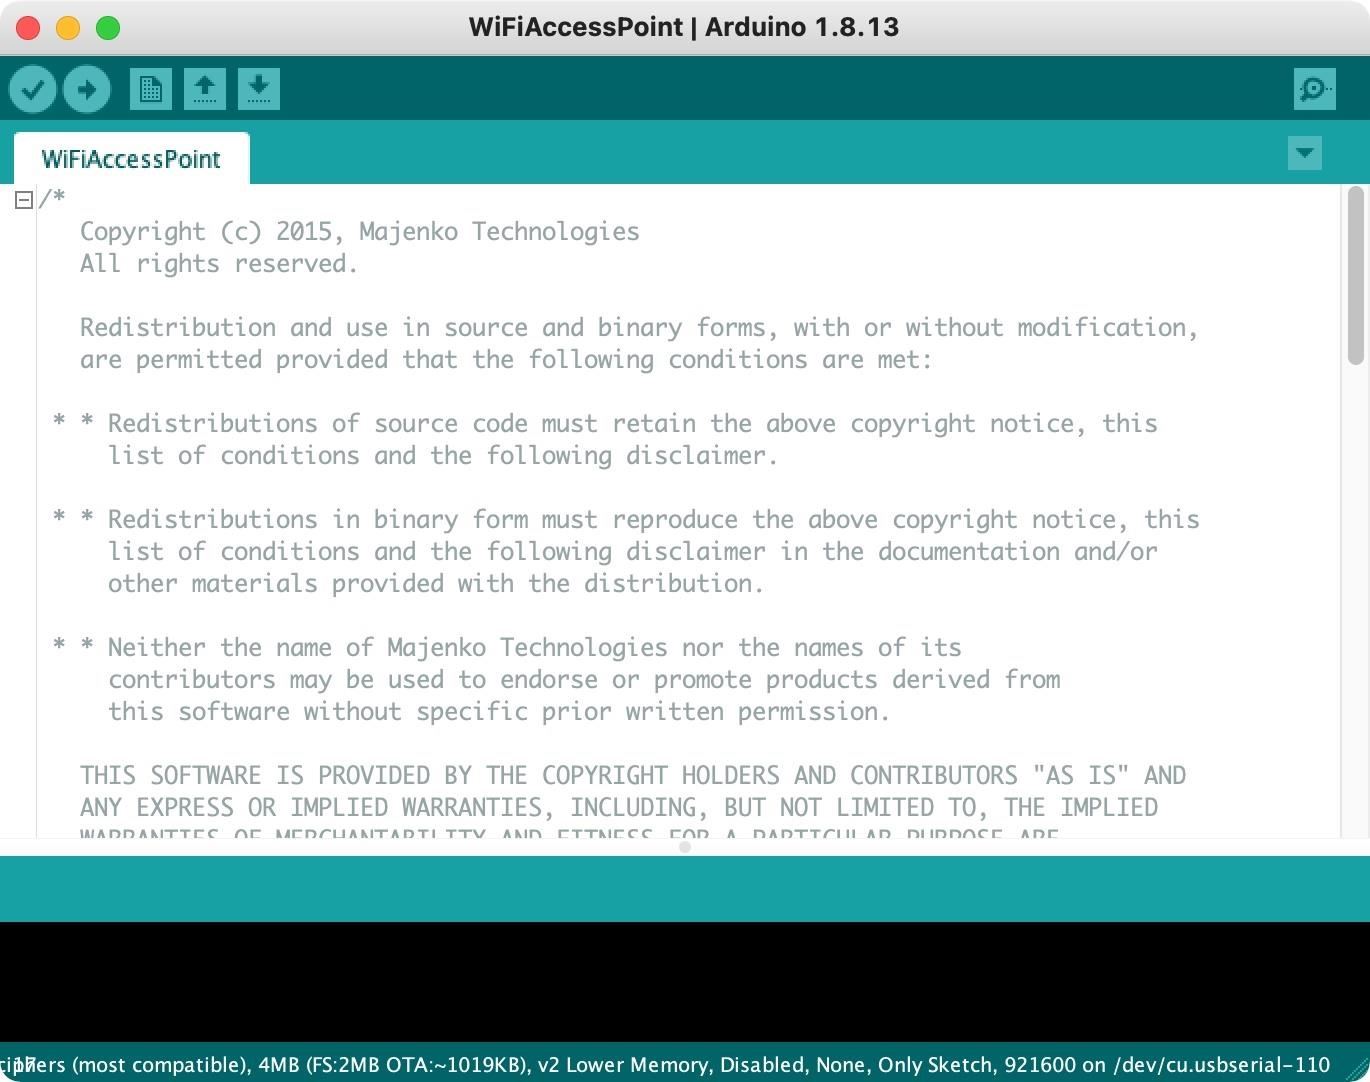
This sketch is pretty much good to go — we just need to modify one tiny thing to create a hidden network. Because the example sketch is for creating a visible access point, we need to tweak it a bit. Go to this line in the script:
WiFi.softAP(ssid, password);And change it to this:
WiFi.softAP(ssid, password, 1, 1);The first "1" is to set it to channel 1, while the second "1" is to say it's a hidden network. The full sketch should look like this now:
/*
   Copyright (c) 2015, Majenko Technologies
   All rights reserved.

   Redistribution and use in source and binary forms, with or without modification,
   are permitted provided that the following conditions are met:

 * * Redistributions of source code must retain the above copyright notice, this
     list of conditions and the following disclaimer.

 * * Redistributions in binary form must reproduce the above copyright notice, this
     list of conditions and the following disclaimer in the documentation and/or
     other materials provided with the distribution.

 * * Neither the name of Majenko Technologies nor the names of its
     contributors may be used to endorse or promote products derived from
     this software without specific prior written permission.

   THIS SOFTWARE IS PROVIDED BY THE COPYRIGHT HOLDERS AND CONTRIBUTORS "AS IS" AND
   ANY EXPRESS OR IMPLIED WARRANTIES, INCLUDING, BUT NOT LIMITED TO, THE IMPLIED
   WARRANTIES OF MERCHANTABILITY AND FITNESS FOR A PARTICULAR PURPOSE ARE
   DISCLAIMED. IN NO EVENT SHALL THE COPYRIGHT HOLDER OR CONTRIBUTORS BE LIABLE FOR
   ANY DIRECT, INDIRECT, INCIDENTAL, SPECIAL, EXEMPLARY, OR CONSEQUENTIAL DAMAGES
   (INCLUDING, BUT NOT LIMITED TO, PROCUREMENT OF SUBSTITUTE GOODS OR SERVICES;
   LOSS OF USE, DATA, OR PROFITS; OR BUSINESS INTERRUPTION) HOWEVER CAUSED AND ON
   ANY THEORY OF LIABILITY, WHETHER IN CONTRACT, STRICT LIABILITY, OR TORT
   (INCLUDING NEGLIGENCE OR OTHERWISE) ARISING IN ANY WAY OUT OF THE USE OF THIS
   SOFTWARE, EVEN IF ADVISED OF THE POSSIBILITY OF SUCH DAMAGE.
*/

/* Create a WiFi access point and provide a web server on it. */

#include <ESP8266WiFi.h>
#include <WiFiClient.h>
#include <ESP8266WebServer.h>

#ifndef APSSID
#define APSSID "ESPap"
#define APPSK  "thereisnospoon"
#endif

/* Set these to your desired credentials. */
const char *ssid = APSSID;
const char *password = APPSK;

ESP8266WebServer server(80);

/* Just a little test message.  Go to http://192.168.4.1 in a web browser
   connected to this access point to see it.
*/
void handleRoot() {
  server.send(200, "text/html", "<h1>You are connected</h1>");
}

void setup() {
  delay(1000);
  Serial.begin(115200);
  Serial.println();
  Serial.print("Configuring access point...");
  /* You can remove the password parameter if you want the AP to be open. */
  WiFi.softAP(ssid, password, 1, 1);

  IPAddress myIP = WiFi.softAPIP();
  Serial.print("AP IP address: ");
  Serial.println(myIP);
  server.on("/", handleRoot);
  server.begin();
  Serial.println("HTTP server started");
}

void loop() {
  server.handleClient();
}
Now, hit the Upload button to compile the sketch and flash it to the D1 Mini. After it finishes, your D1 Mini should now be broadcasting a hidden access point with the name "ESPap" and password "thereisnospoon" as seen in the example.
Step 2: Connect a Device to Your New Hidden Network
To see a device hunting for the hidden network, connect to it first with your phone or another device using the default name (ESPap) and password (thereisnospoon). Then, disconnect it from the network. After putting the wireless adapter into monitor mode and doing a quick scan on channel 1, we should be able to the device trying to auto-connect, but more on that in a second.
Step 3: Put Your Wireless Adapter into Monitor Mode
Putting your Wi-Fi card or adapter into monitor mode lets you monitor wireless traffic that's not just intended for your computer. Without out, it will only concentrate on what you're allowed to look at, so monitor mode is important for this attack to work. I'll assume you know how to do this, but just in case you don't, check out our full guide on checking and enabling monitor mode.
Step 4: Scan Channel 1 for Traffic
With the card in monitor mode, now it's time to see the channel we'll be listening in on, which would be channel 1, which we included in the example sketch above. This will dramatically narrow down our search. To do so, just use this in a Terminal window:
~$ sudo airodump-ng CARDNAME -c 1

[sudo] password:
Airodump should start scanning now, and if your phone is still on and trying to find the hidden network, you should see it frantically trying to connect to it. It may look like many different devices, but it's actually just one device that's randomizing its MAC address. Look for the wireless destination address.
In practice, you could start scanning with airodump, waiting for someone to come home, go into work, or some other scenario where their device will automatically start hunting for the nearby hidden network they've joined before and connect to it. If no other devices in the room have connected to the hidden AP before, it may be obvious which one on the scan is the target, but it could also be tricky if it has a lot of networks saved.
For me, airodump has given me a clear indicator of the hidden network. Once you find yours, copy the network device's MAC address, then turn off your phone or disable the Wi-Fi on it.

Step 5: Open Wireshark
Now it's time to start eavesdropping on the traffic. Open up Wireshark:
~$ sudo wireshark

[sudo] password:
It should be capturing packets on the correct channel, but make sure to select the same wireless network adapter that's in monitor mode first. Then, let's use the filter below to narrow down the traffic to just the hidden network.
wlan.ta == HIDDEN-MAC-ADDRESSThis Wireshark display filter should show me all of the transmissions coming from the hidden network.
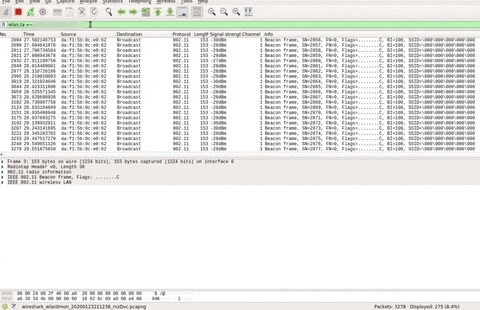
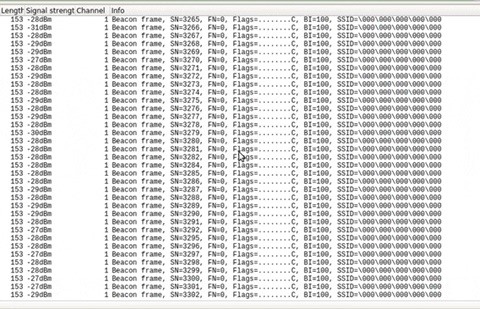
In the info column, you should see a lot of details, including the SSID, which should be a bunch of zeros:
SSID=\000\000\000\000\000So, even though the AP has no name, it still needs to transmit that it's available to connect to with details of its capabilities, but it's obscuring the SSID.
If you use something like Wigle WiFi to scan for networks, it will still record this, so even the MAC address would be something that could be geolocated and found later on a service like Wigli WiFi.
Step 6: Power Your Phone Back On
To find the hidden network's name, let's turn the phone or other device back on that previously connected to the network, making sure its Wi-Fi is enabled. As soon as it's ready to start hunting for networks, it forces the probe response. This is basically a packet containing the name of the network because it's necessary to form the key that the two will use to connect.
You should then see lines in Wireshark that show the SSID name "ESPap." There is no way to keep this a total secret, as you can see.
Step 7: Use MDK3 to Brute-Force the Name Instead
Another way to find the SSID is to use a tool called MDK3, which can figure out the name of a network by brute-forcing it. To do that, a good brute-force list is needed. For our test, let's just use the "commonssids" word list below. Download it onto your desktop.
https://gist.githubusercontent.com/jgamblin/da795e571fb5f91f9e86a27f2c2f626f/raw/0e5e53b97e372a21cb20513d5064fde11aed844c/commonssids.txtThen, in a new Terminal window, we can move into the desktop and cat the file to see all of the common network names it has listed.
~$ cd Desktop
~$/Desktop$ cat commonssids.txt

ssid
xfinitywifi
linksys
<no ssid>
BTWiFi-with-FON
NETGEAR
Ziggo
dlink
BTWifi-X
default
FreeWifi
hpsetup
UPC Wi-Free
optimumwifi
FreeWifi_secure
AndroidAP
eduroam
BTWIFI
TELENETHOMESPOT
cablewifi
...
Next, we'll use MDK3 to force the device to reveal its network name just by getting it to respond. Then, it will try associating the network with all the various Wi-Fi names in our word list, seeing if it gets a positive response. It's an old-school way of brute-forcing hidden network names if it doesn't work the first few times.
Use the following command to brute-force the network name. If you used a different word list or change the name from "commonssids," make sure to adjust that here. The target (-t) will be the MAC address discovered, and the file (-f) is the word list.
~/Desktop$ sudo mdk3 CARDNAME p -t HIDDEN-MAC-ADDRESS -f commonssids.txt

[sudo] password:
Now, before running the command, go into Wireshark so you can monitor what happens. After running the list and monitor Terminal and Wireshark, you'll see that it didn't work, and that's because the word list doesn't actually have "ESPap" in it.
Now, you can use a different word list or add new names to your current list. For this demonstration, just go into the file with the following command, and add "ESPap" to the list with nano. Save and exit.
~$ nano commonssids.txtNow, run the brute-force attack again and see what happens.
~/Desktop$ sudo mdk3 CARDNAME p -t HIDDEN-MAC-ADDRESS -f commonssids.txt

[sudo] password:
You should now see that it was able to correctly guess the network name, unmasking the previously hidden network without necessarily having a device connected to it. So even if no devices are trying to connect or trying to reconnect after being kicked off, we should still be able to scan MAC addresses to brute-force.
Once the network name is known, it can start being attacked as though it were an unhidden network. Hiding a network name is not really good security practice if you're looking to keep your network stealthy. That's because not only can people see that it exists, but they can easily extract the name as well.
No Hidden Network Is Truly Hidden
While hiding a Wi-Fi network might not make it appear on people's phones that are nearby, it's truly not a secure way of hiding your network or making it more secure. A phone can constantly scream out the plain text name of the network when it's within range.
If you want to keep your network more secure, I recommend turning down your Wi-Fi power, so it's not broadcasting as far. Also, make sure to set a really long and secure Wi-Fi password that you don't use in other places.
Just updated your iPhone? You'll find new emoji, enhanced security, podcast transcripts, Apple Cash virtual numbers, and other useful features. There are even new additions hidden within Safari. Find out what's new and changed on your iPhone with the iOS 17.4 update.


1 Comment
i can understand the steps it needs to be elaborate will and provide user manual
Share Your Thoughts