
If you've recently built a Wi-Fi spy camera out of an ESP32-CAM, you can use it for a variety of things. A baby monitor at night, a security camera for catching package thieves, a hidden video streamer to catch someone going somewhere they shouldn't be — you could use it for pretty much anything. Best of all, this inexpensive camera module can perform facial detection and facial recognition!
The low-cost ESP32-CAM is an interesting camera module because it has enough RAM to perform those facial detection and facial recognition processes. The detection can spot faces whenever they pop in the frame, while the recognition can spot intruders or identify faces that you've enrolled into its code. It's not the most accurate camera that can do these tasks, but it does it well enough.
It's pretty good as not mixing up faces (we couldn't trip it up at all), but it can show an enrolled ID as an intruder because of the limited number of facial scans it records for the database. You can overcome this by enrolling the same face multiple times at different angles and remembering to assign each ID to the right person.
- Previous Guide: How to Set Up a Wi-Fi Spy Camera with an ESP32-CAM
Parts Needed
This is the basic stuff you need to continue with this project. If you've already built and set up your Wi-Fi spy camera using our previous guide, you should have everything you need to dive right into using the facial recognition features.
- ESP32-CAM Camera Module with FTDI USB to TTL Serial Converter ($12.89)
- D1 Mini Battery Shield with Charging Module ($8.99)
- 3.7 V 500 mAh LiPo Battery ($9.20)
- Solderless Breadboard ($8.99)
- Jumper Wires ($5.99)
- Mini-USB Cable ($6.81)
- Arduino IDE Software (free)
Note that the battery required can be a different size if needed.
Step 1: Set Up Your Wi-Fi Spy Camera
We've already shown how to set up the ESP32-CAM in Arduino IDE, open the default CameraWebServer sketch, tweak the sketch's code to select the right camera module and add the Wi-Fi credentials, wire up the ESP32-CAM to the FTDI programmer, upload the sketch to the ESP32-CAM, power up the spy camera, find its IP address, and connect to its web server interface.
There's no need to go over all of that again when we have a full guide on it, so check that out if you haven't got your Wi-Fi spy camera online.
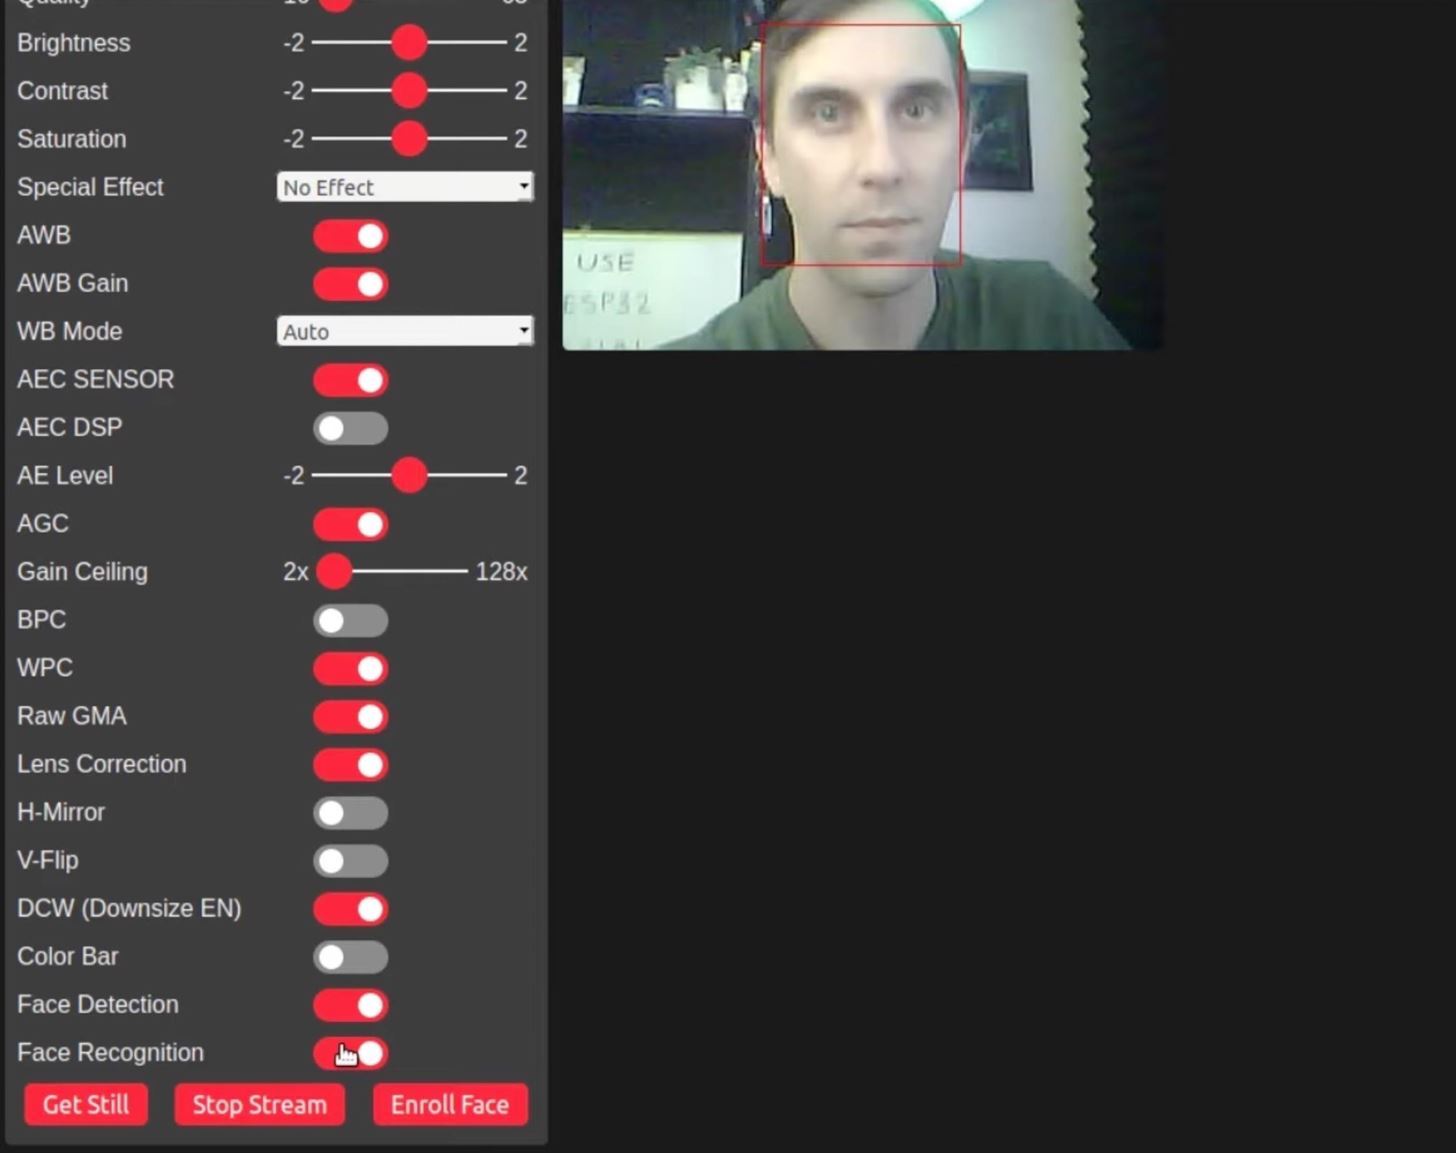
Step 2: Try Facial Detection
In a web browser, connect to your Wi-Fi spy camera's IP address to open up its web interface. Then, hit the "Start Stream" button at the bottom to start the live camera feed.

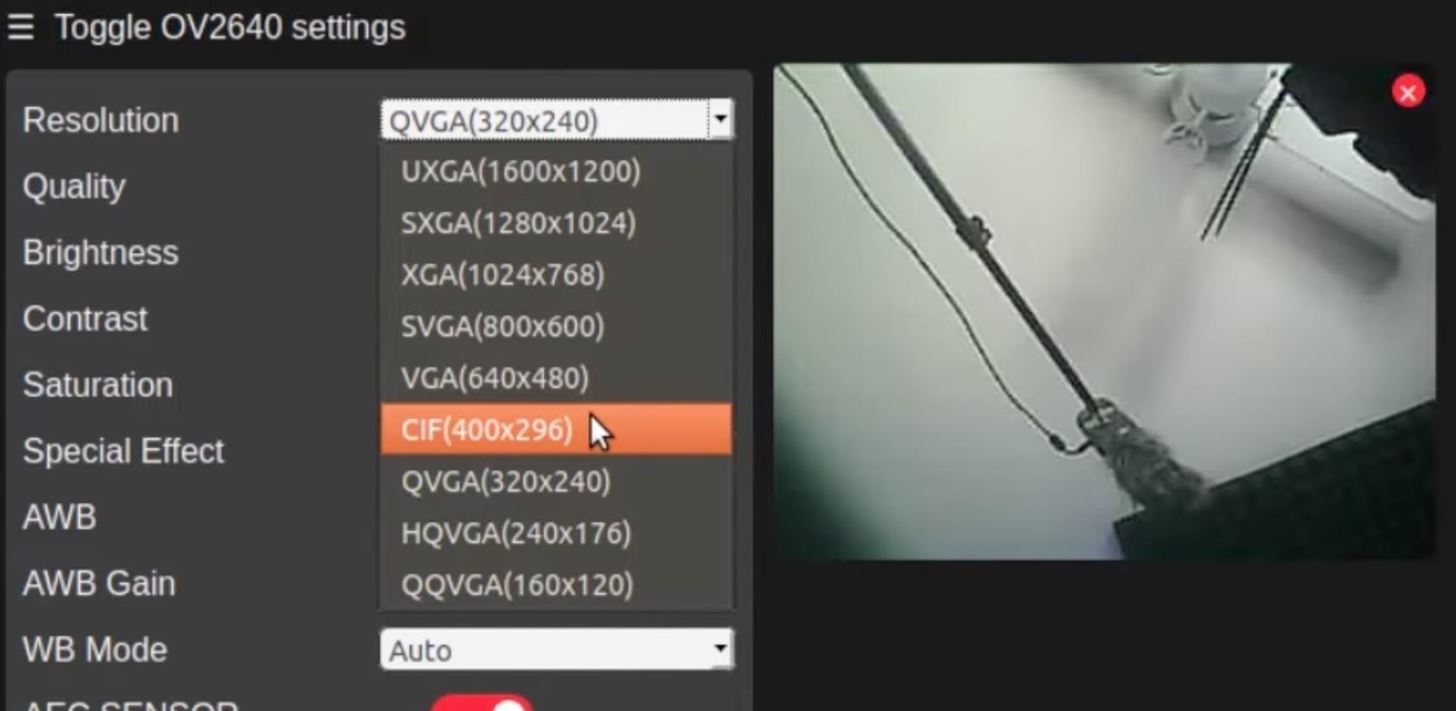
Next, increase the resolution if needed, but do not exceed 400 by 296 pixels because facial recognition will not work in any resolutions higher than that.
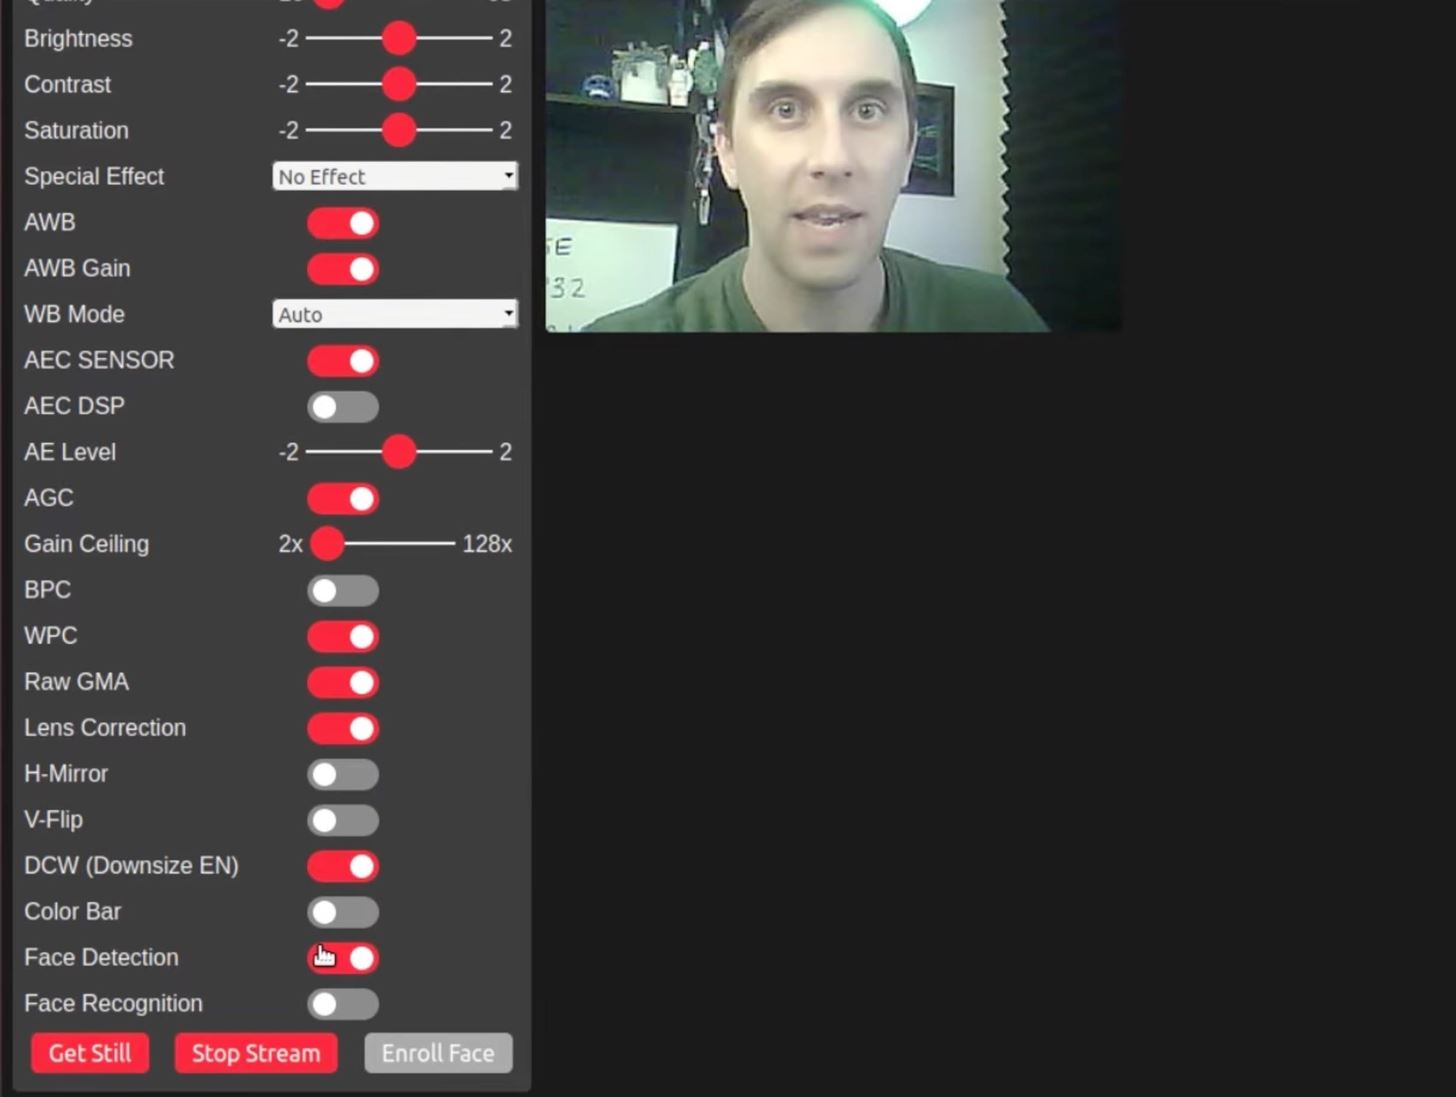
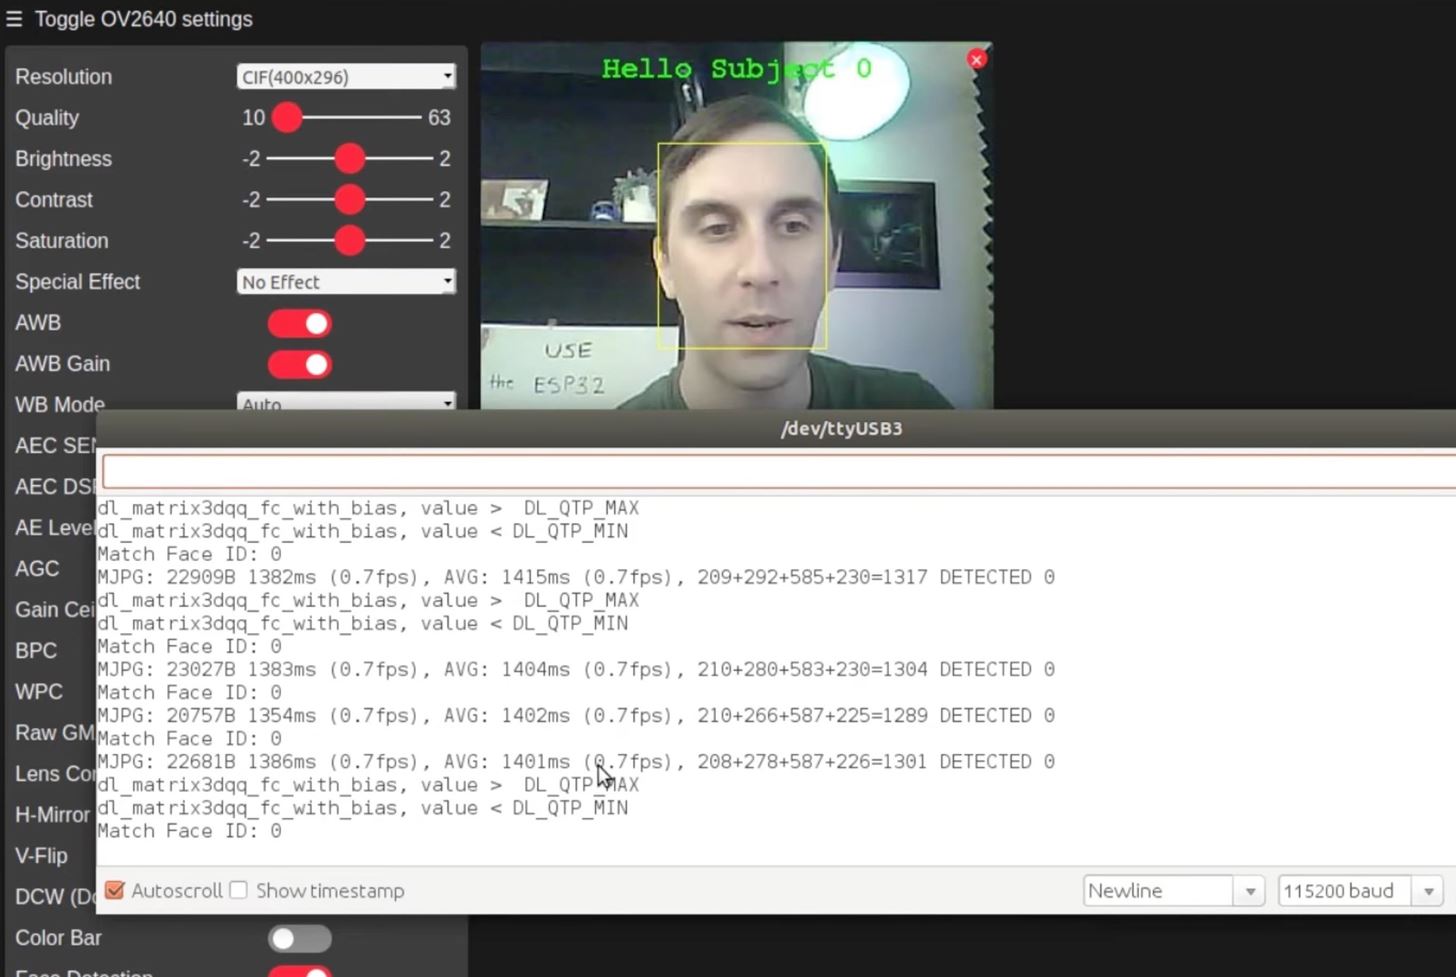
Now, go back to the bottom and toggle on the "Face Detection" switch. This mode will detect whenever a human face is in front of the camera lens, and you can see that it's working when a box appears around the face. (It's based on the ESP-WHO project, in case you were wondering.)
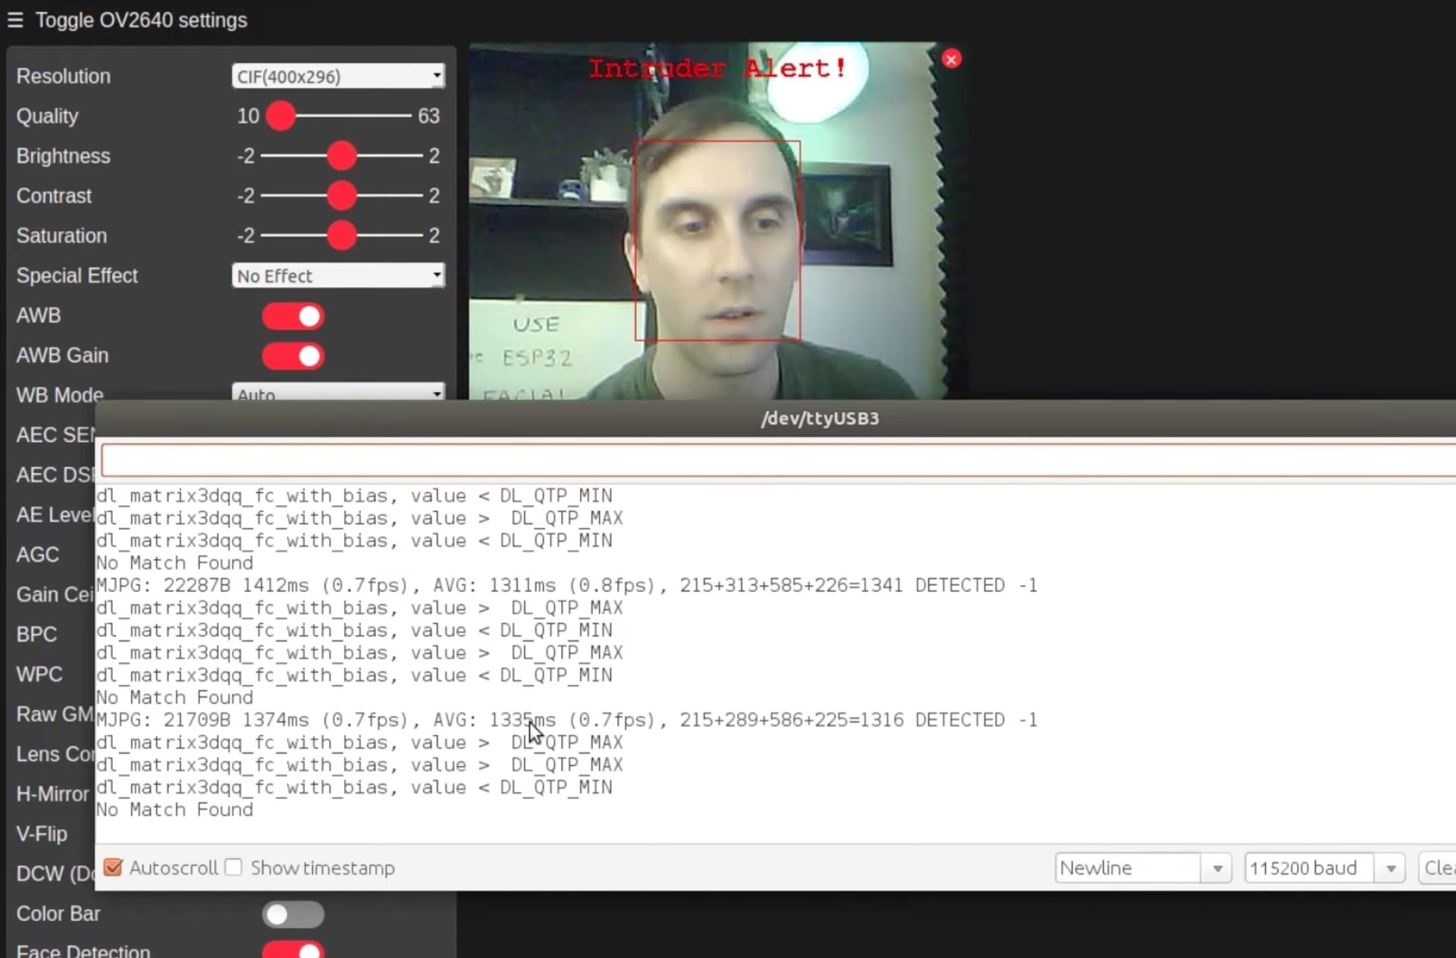
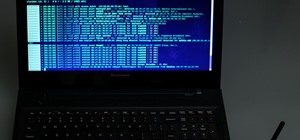
If you still have your ESP32-CAM connected to your computer with Arduino IDE running, you can open up the serial monitor in the IDE to view the serial output. Here, you'll be able to see that the face detections are logged.
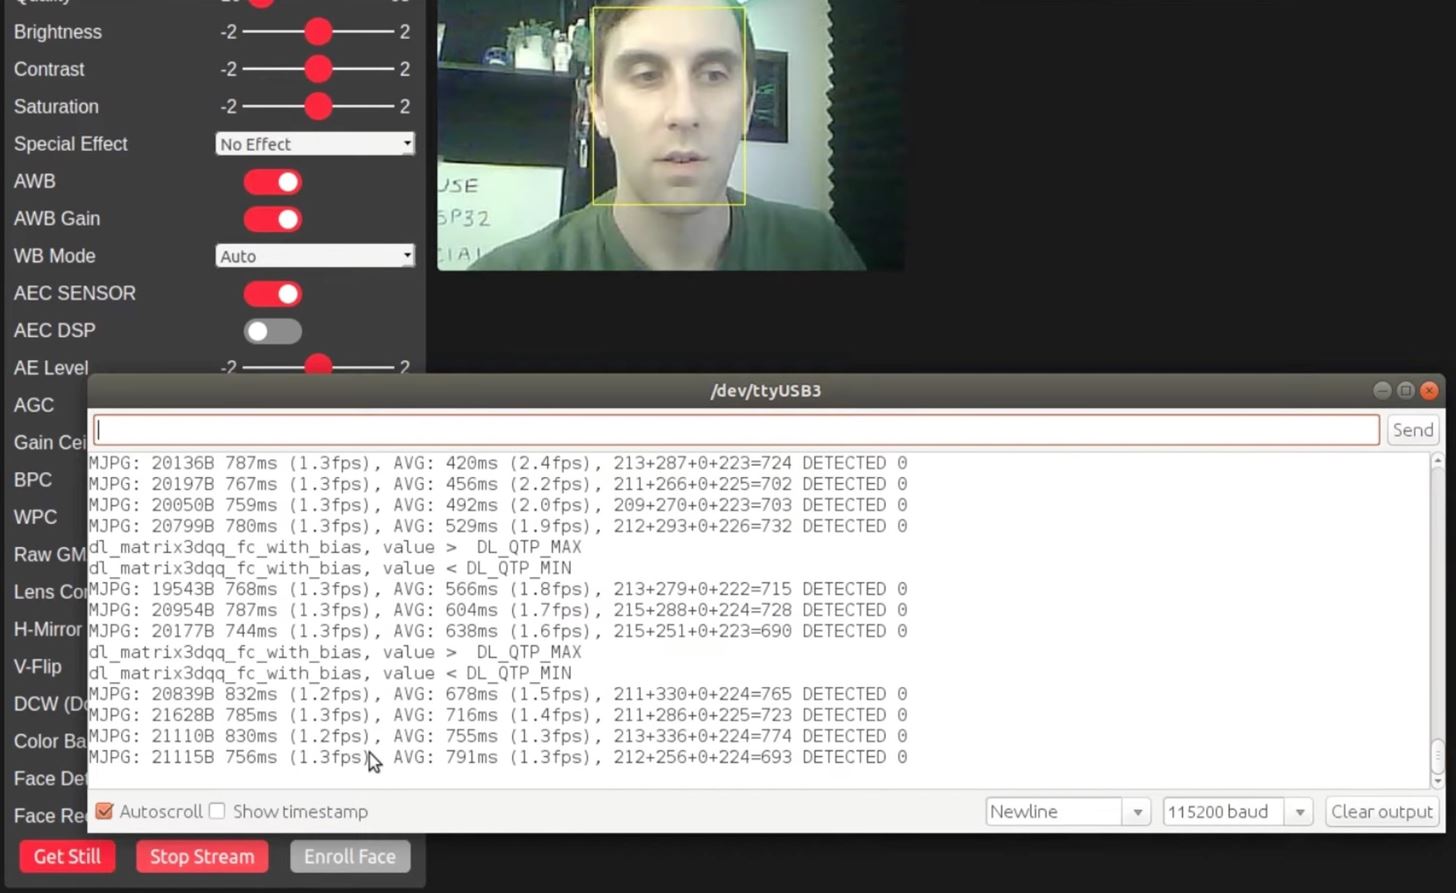
With this information, you could make a simple Bash script to grep and monitor a continuous stream, then build a program that detects faces and sends you notifications on your phone whenever, say, someone is outside your door. You could basically create a really bare-bones Ring Video Doorbell. This is beyond the scope of this article, but it could be a future Null Byte guide!
Step 3: Try Facial Recognition
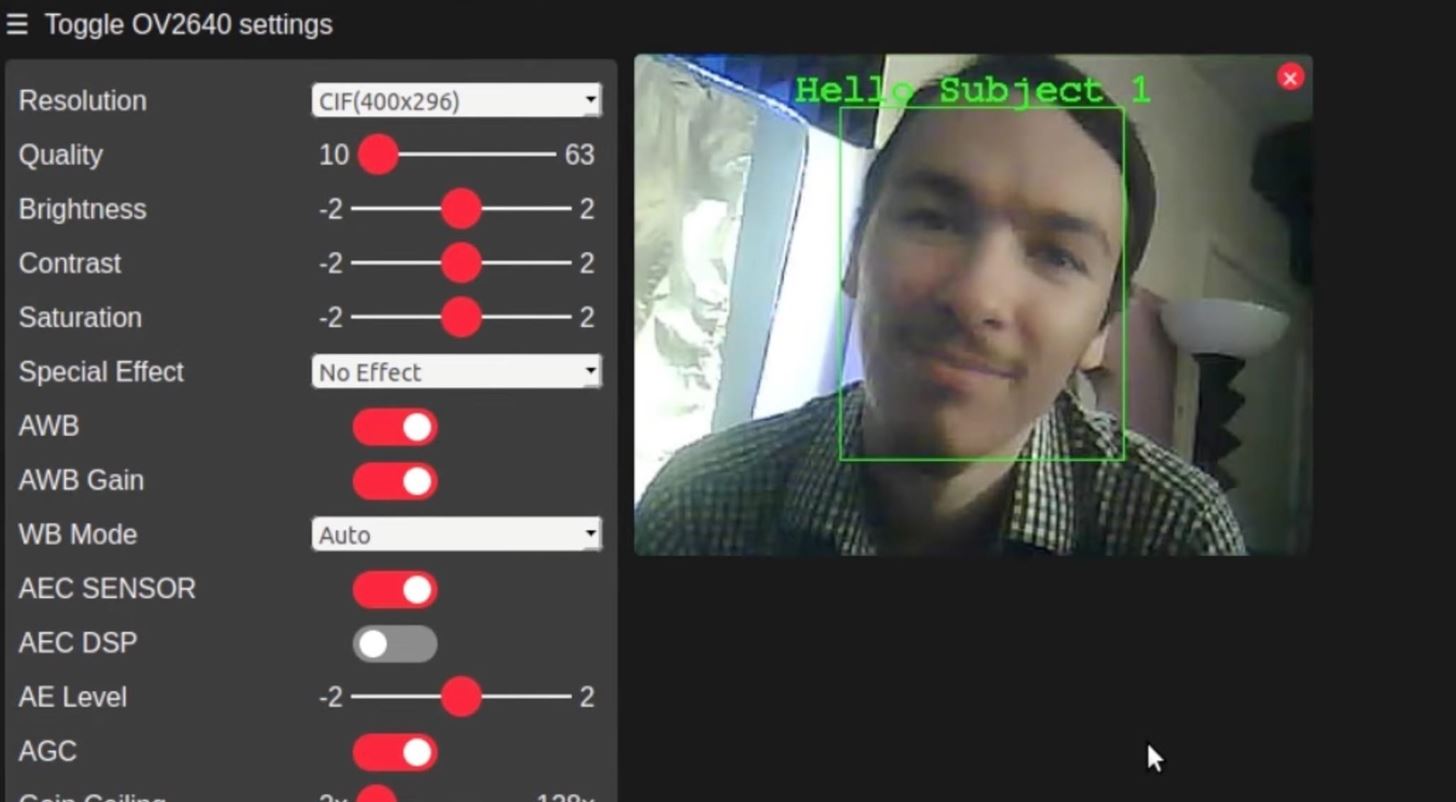
Now, go back to the bottom and toggle on the "Face Recognition" switch. This mode expands the detection capabilities to identify faces in the feed, and it's also part of the ESP-WHO project.
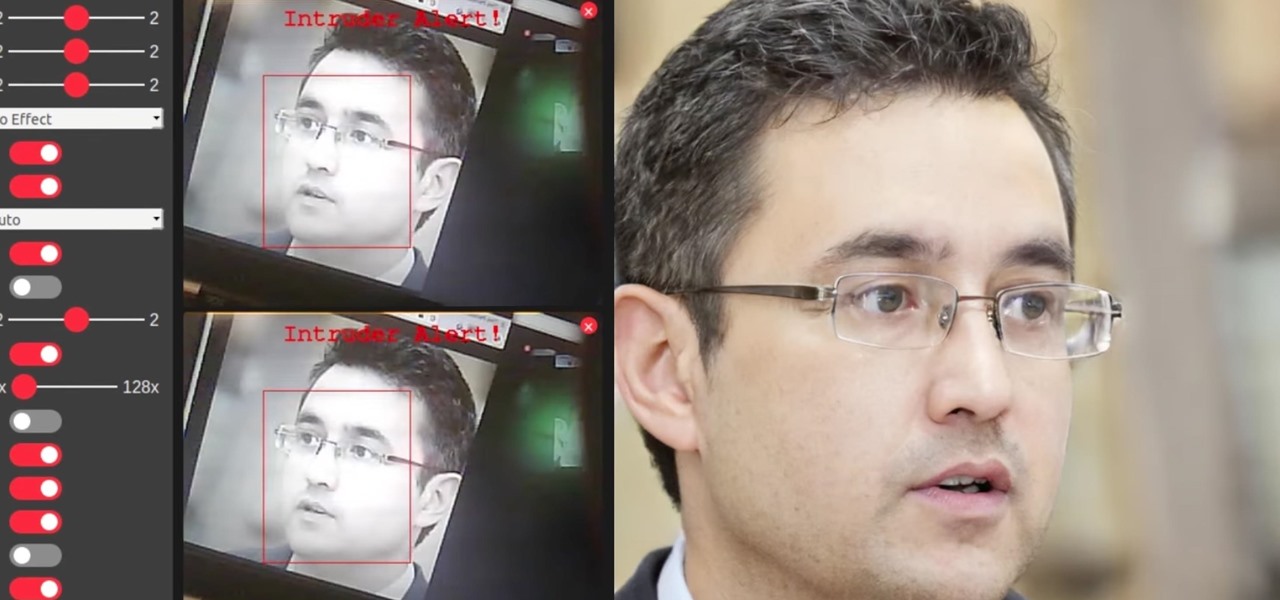
Whenever a face is unknown, a red box will be around it with an "Intruder Alert!" warning.
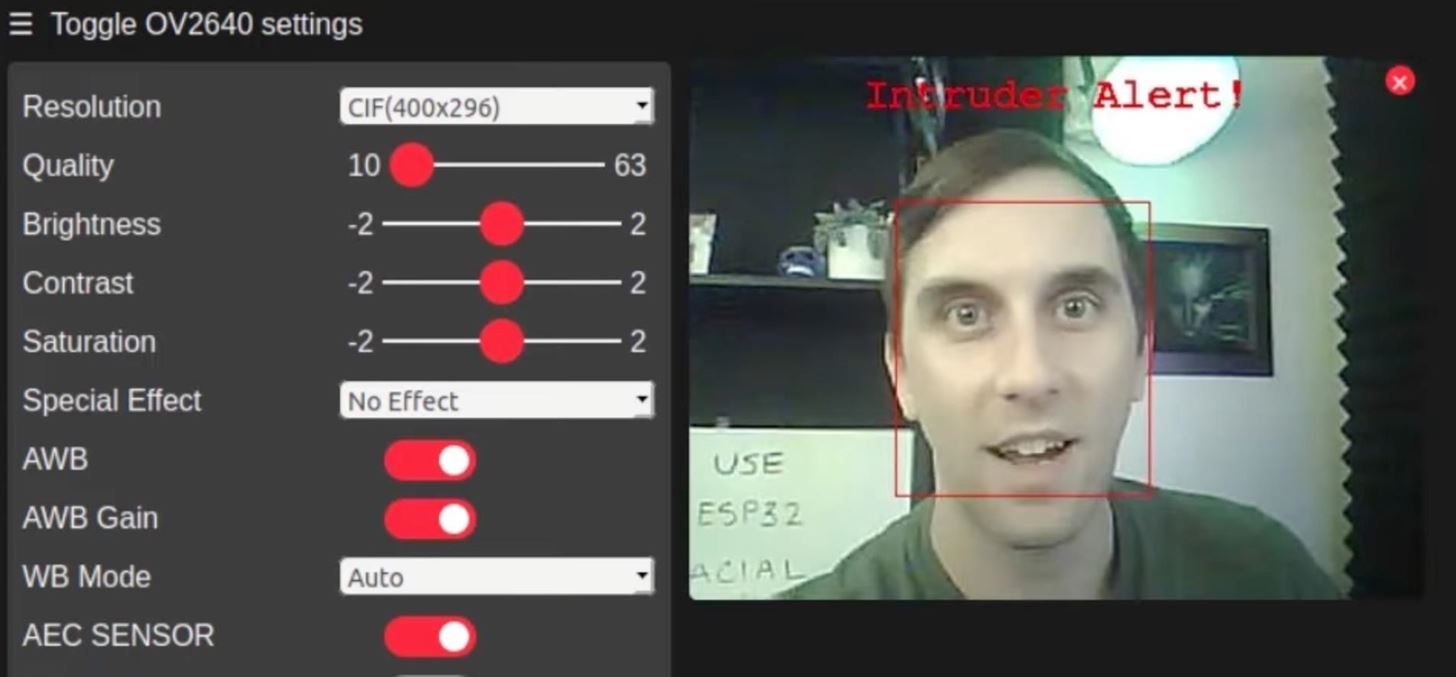
Back in the serial monitor, you'll be able to see these intruder alerts as well, which basically means that the face is not in your database.
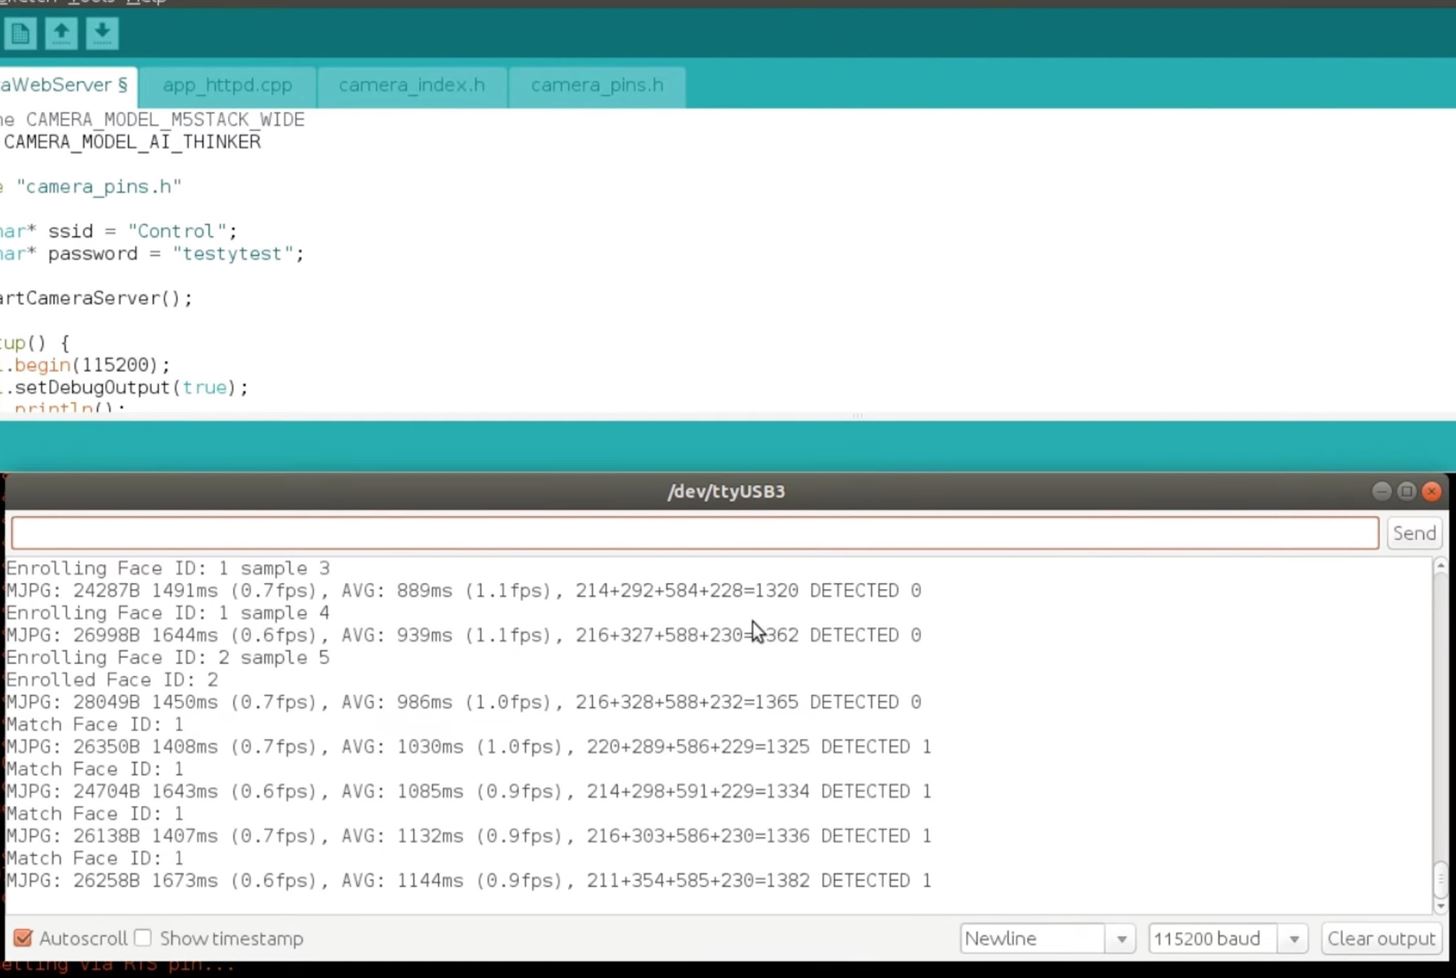
To have the facial recognition tool identify people's faces and name them, those faces need to be enrolled. Back at the bottom of the interface, whenever an intruder is in the feed that you want to give a name to, click "Enroll Face." It will then take different snapshots of the face until it has enough to recognize it, then it will say "Hello Subject 0" in green.
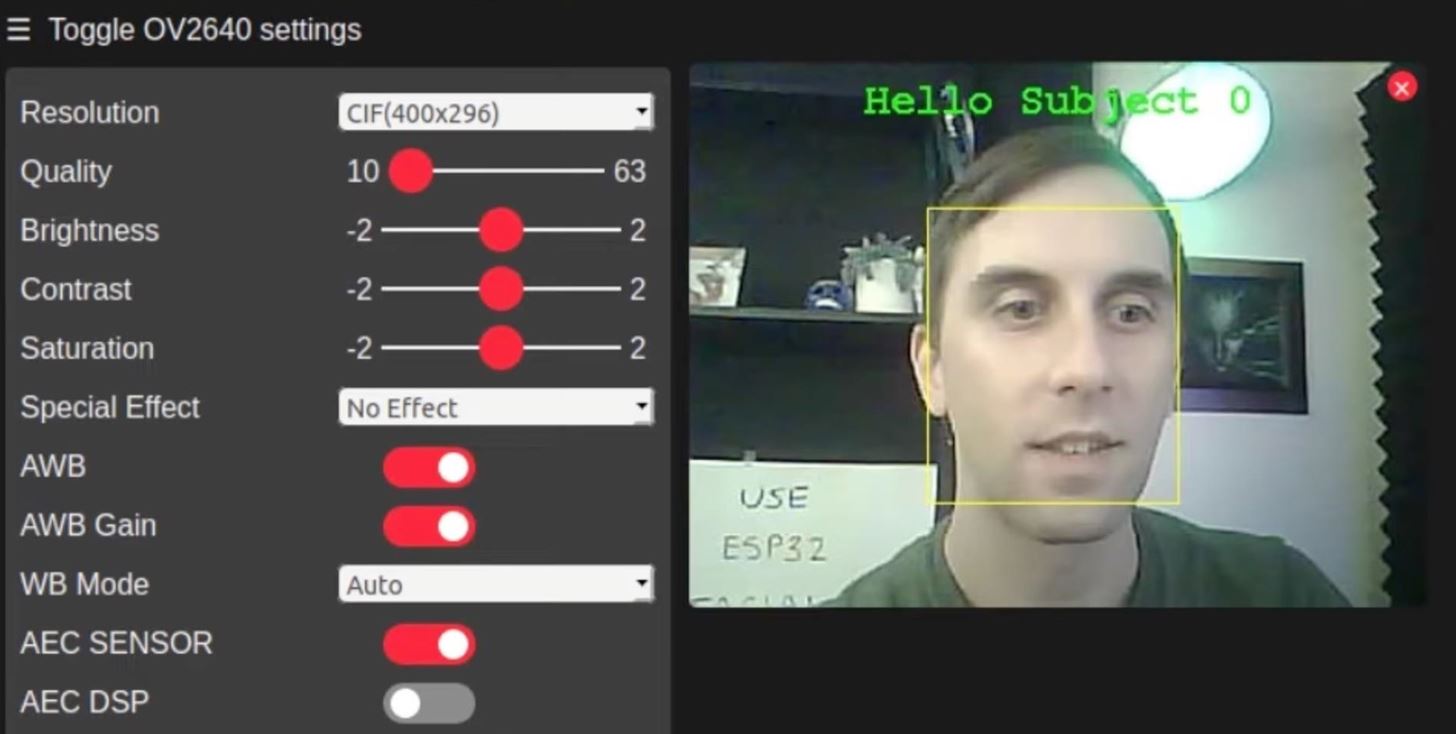
Back in the serial monitor, you'll be able to see that it identifies Subject 0.
Any subsequent faces you enroll will be labeled as Subject 1, then 2, and so on.
In the serial monitor, you'll be able to see that it identifies the subject by each's number.
How Accurate Is the Facial Recognition?
While it's a fairly basic program, it does a decent job at recognizing faces. In tests, we couldn't get any random images of people's faces to match a subject's real face and be identified as such.

We also couldn't get enrolled faces to be identified as other enrolled faces. However, because it only takes a few snapshots when enrolling a face, it may detect a subject as an intruder if the face angle is different than when recorded. Plus, the software is not sophisticated enough to detect faces when only partially seen or tilted too much, but it does work nicely for profile shots and slight angles.
Keep This in Mind for Other Projects
As you just saw, there are limitations when using a small microcontroller with a camera module to perform facial detection and recognition. But it's a great project if you want to take the next step and start coding your own applications that use facial detection and recognition as factors. The serial monitor can be constantly monitored to look for detected faces, intruders, and registered faces, and all it takes is a simple script to get it working.
Just updated your iPhone? You'll find new emoji, enhanced security, podcast transcripts, Apple Cash virtual numbers, and other useful features. There are even new additions hidden within Safari. Find out what's new and changed on your iPhone with the iOS 17.4 update.


Be the First to Comment
Share Your Thoughts