
When you don't have a steady cellular signal or immediate Wi-Fi access but need to communicate with others around you, you can set up an off-the-grid voice communications network using a Raspberry Pi and an Android app.
There are apps such as Bridgefy that will create a mesh network to communicate with other devices over Bluetooth. Still, when you're traveling in a convoy and want to message people in other vehicles, all the metal will make that nearly impossible. Even in situations where you're outside, but there are a lot of obstructions to block a Bluetooth signal, you're better off using something else.
In cases where a hotspot router won't be powerful enough to connect everyone, a Raspberry Pi with a decent wireless network adapter can help. With that and a PirateBox server running on it, you'll be able to anonymously share images, videos, audio files, documents, voice communications, and other content, as long as everyone is connected to its Wi-Fi hotspot.
With protests happening all over the world, law enforcement in some areas may try to disable cellular connections in the area to prevent demonstrators from talking with each other. The demonstrations in the US over police brutality and systemic racism are gripping the entire nation, and it's possible that mobile communications can be bogged down or blocked. Our wireless project here, a sort of Wi-Fi-based walkie-talkie system, can help with that, enabling everyone to alert each other of vital news, all connected to your Wi-Fi source.
What You'll Need
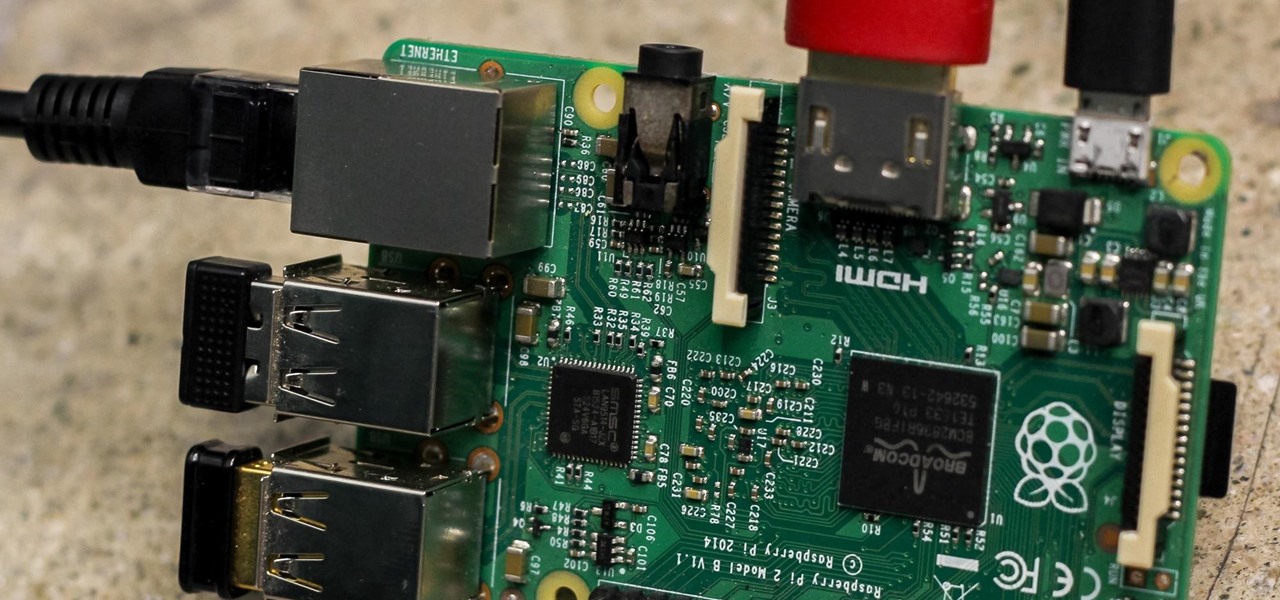
- Raspberry Pi 3: We're using one of these models because the newer Raspberry Pi 4 doesn't have a PirateBox image for it yet. However, any other Pi should work as long as you have a Wi-Fi dongle for them if they are not Wi-Fi capable. Specifically, we're using a Raspberry Pi 3 B+ model.
- USB flash drive: A flash drive is needed to act as the hard drive for your PirateBox. The size will depend on how you use it, so the larger, the better. If there will be lots of photos and videos being used, try a 1 TB external hard drive, and you'll never have to worry.
- MicroSD card: Make sure it's a 16 GB or more. We recommend at least 32 GB to play it safe.
- MicroSD card reader: There are tons of options out there, so any one will do.
- Power supply: This is needed for the Raspberry Pi unit.
- Ethernet cable: We use this to connect our Raspberry Pi to our router to set it all up. It won't be needed afterward.
- Wireless network adapter with a high-gain antenna: If you want a stronger signal, which you most likely will, you'll need a good, sturdy, and rugged Wi-Fi adapter (the Alfa Tube-U is a good choice) with a nice big omnidirectional antenna that's made for outdoor use, such as for RVs and marine use. Make sure it works with Kali Linux so you can use it for other purposes when needed. Plus, doing so will almost guarantee it will work with PirateBox. Also, a Wi-Fi booster can help make sure you all stay connected. If you want to get fancy, you can get an adapter with a panel antenna and point it at your target, but having one you don't have to mess with, located in the middle of the communications zone (for instance, the middle car in a convoy or caravan), is ideal.
Step 1: Set Up a PirateBox
PirateBox is a really cool tool that you can load onto a Raspberry Pi that acts as an offline communications box, where you can connect to the wireless network and use its chat, file server, and other features with nearby devices. What we're interested in for this project is the fact that it's based on an open-source router technology that should have all the switching that we need to communicate over voice.
We won't cover the PirateBox setup here since we've already gone over it in detail in another guide, so make sure to check that out before continuing. Our Cyber Weapons Lab video for that is embedded below for your convenience. You'll basically load the PirateBox image on the Raspberry Pi, power it all up, and you should be able to connect to its Wi-Fi network where you can log in over SSH.
so I recommend that you download then the Raspberry Pi 3 image here for the pirate box you'll go ahead and flash that onto the SD card of the Raspberry Pi and then once you power it up you should be able to connect to the Wi-Fi network that it makes and then log in over SSH
Step 2: Connect to the PirateBox
To find out what the IP address of your PirateBox Pi is, do an arp-scan for it. Below, we can see that one of them is indeed a Raspberry Pi, most likely our PirateBox Pi, if there are no other Pis around.
~$ arp-scan -l

Interface: en0, datalink type: EN10MB (Ethernet)
Starting arp-scan 1.9.5 with 256 hosts (https://github.com/royhills/arp-scan)
192.168.77.1    b8:27:eb:4d:1f:f2       Raspberry Pi Foundation
192.168.77.128  b4:f1:da:ec:4c:e7       (Unknown)

516 packets received by filter, 0 packets dropped by kernel
Ending arp-scan 1.9.5: 256 hosts scanned in 1.858 seconds (137.78 hosts/sec). 2 responded
Now, let's test it out to make sure that's it. Make sure to swap out your Pi's address with the one we have in the command below. Choose "yes" when asked to connect, then enter in your PirateBox Pi's password.
~$ ssh alarm@192.168.77.1

The authenticity of host '192.168.77.1 (192.168.77.1)' can't be established.
ECDSA key fingerprint is SHA256xxxxxxxxxxxxxxxxxxxxxxxxxxxxxxxxx.
Are you sure you want to continue connecting (yes/no)? yes
Waarning: Permanently added '192.168.77.1' (ECDSA) to the list of known hosts.
alarm@192.168.77.1's password:
When you see the PirateBox screen, you're golden.
____________________.__               __        __________
\______   \______   \__|___________ _/  |_  ____\______   \ _______  ___
 |       _/|     ___/  \_  __ \__  \\   __\/ __ \|    |  _//  _ \  \/  /
 |    |   \|    |   |  ||  | \// __ \|  | \  ___/|    |   (  < > >    <
 |____|_  /|____|   |__||__|  (____  /__|  \___  >______  /\____/__/\_ \
        \/                         \/          \/       \/            \/

Website: http://piratebox.cc                 PirateBox Version: 1.1.4
Forum:   http://forum/piratebox.cc           Build date: 11-05-2018
IRC:     #piratebox irc.freenode.net         Be open  --  Share freely!

First Steps After Flashing
1. Change password of alarm user
 > passwd
2. Change password of root user
 > sudo password root
3. Enable Fake-Timeservice
 3.1 Set date and time
  # Disable network time sync
  > sudo timedatectl set-ntp false
  # Set time to "Mon May 23 17:42:00" (Format: CCYYMMDD hhmm)
  > sudo date -s "20170523 1742"
  > cd /opt/piratebox && sudo ./bin/timesave.sh ./conf/piratebox.conf install
 3.2 Enable on startup
  > sudo systemctl enable timesave
4. Enable the Kareha Image and Discussion Board
  > sudo /opt/piratebox/bin/board-autoconf.sh
5. Enable USB thumb drive share OR extend SDCard
 USB: > sudo /opt/piratebox/rpi/bin/usb_share.sh
 SDCard: > sudo /opt/piratebox/rpi/bin/sdcard_share.sh
6. Enable UPnP Media Server
  > sudo cp /etc/minidlna.conf /etc/minidlna.conf.bkp
  > sudo cp /opt/piratebox/src/linux.example.minidlna.conf /etc/minidlna.conf
  > sudo systemctl stsart minidlna
  > sudo systemctl enable minidlna
7. Enable RealTimeClock timekeeping (needs DS3231 or 1307 RTC module!)
  > sudo systemctl enable rpi_hwclock
[alarm@alarmpi ~]$
Step 3: Change the Wi-Fi Card (Optional)
Now that we're in our PirateBox Pi, if you're using an external Wi-Fi adapter and not the internal one, we need to change one variable in the /boot/wifi_card.conf file to switch from its internal card to the network adapter we want to use instead. First, we need to find the card's name, so let's use ifconfig.
[alarm@alarmpi ~]$ ifconfigIf you only see one card, such as wlan1, then you'll need to do an ip a scan instead, where you'll likely see wlan1 and wlan0, which is what I got.
[alarm@alarmpi ~]$ ip aTo get the second card up and running, use the following, replacing the card's name with your own. Type in your password afterward. Then, if you go back up and use just ifconfig, you should see both cards now.
[alarm@alarmpi ~]$ sudo ifconfig wlan0 up

[sudo] password for alarm:
Now, open up that config file mentioned earlier in nano and make sure it says the name of the Wi-Fi adapter you're using. Press Control-X on your keyboard to quit nano. If you changed the name, hit Y, then Enter, to save it.
[alarm@alarmpi ~]$ sudo nano /boot/wifi_card.conf

GNU nano 2.9.6              /boot/wifi_card.config

wlan1
So, now we have changed the Wi-Fi card that the Raspberry Pi is using. In our case, we're currently using the external card, but if you need to switch back, it's as easy as going back into the config file and changing it.
Step 4: Install Intercom & Connect to PirateBox
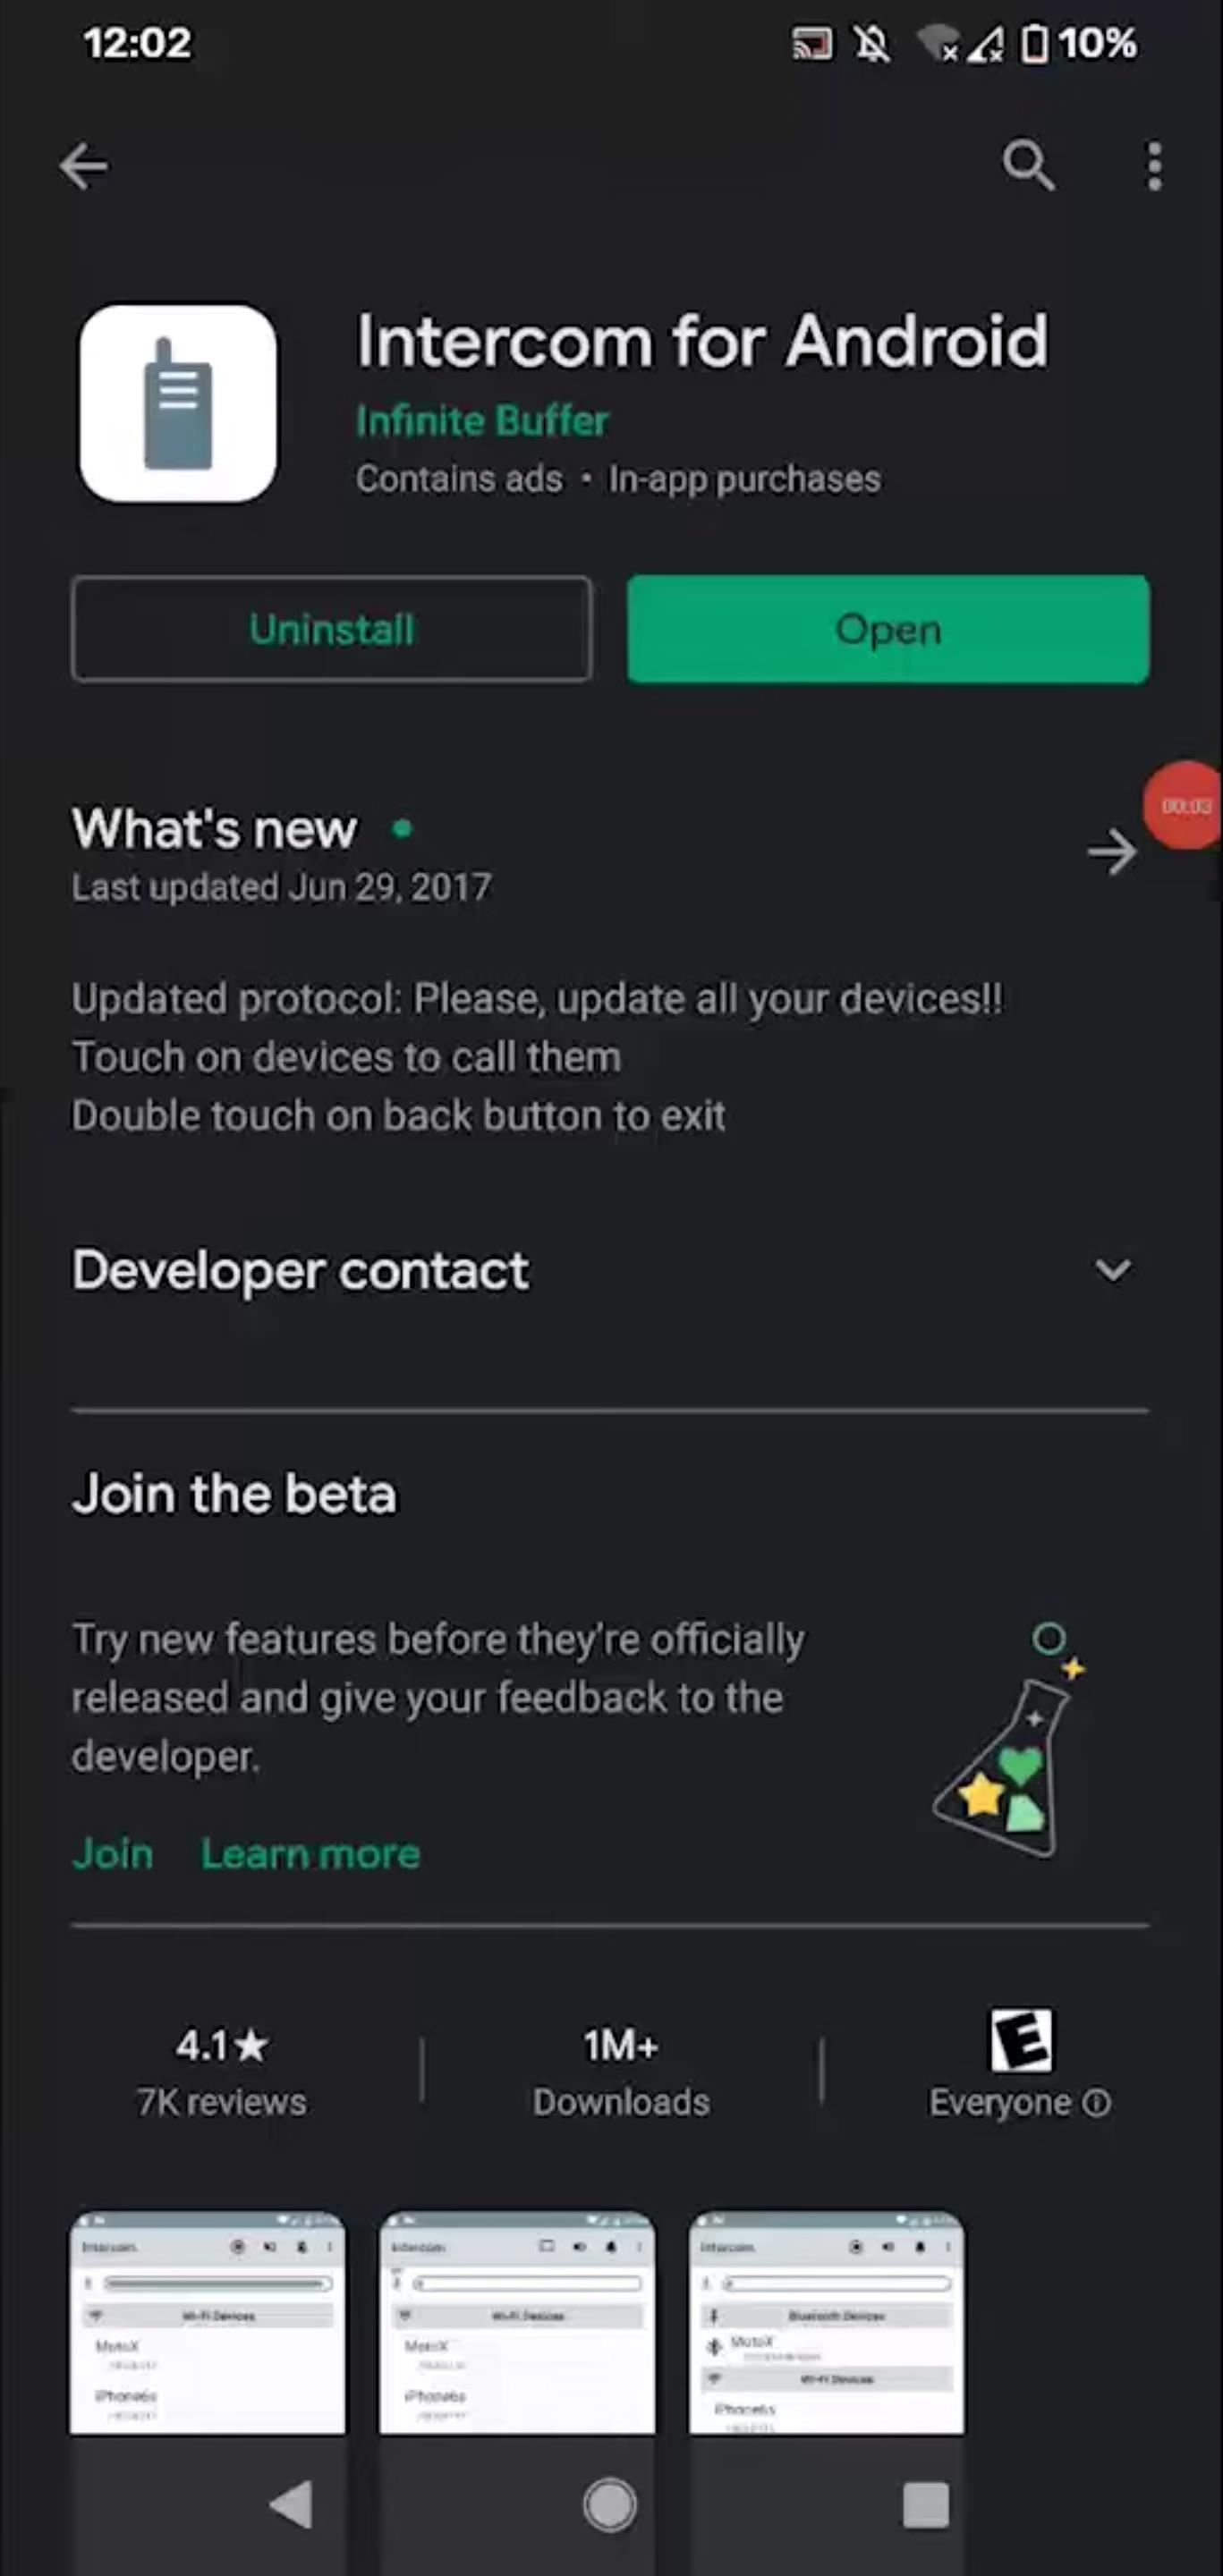
Now, download and install the app we're using for our communications on all of the Android devices that will be talking with one another using the PirateBox Pi. That app is called "Intercom for Android."
- Play Store Link: Intercom for Android (free)
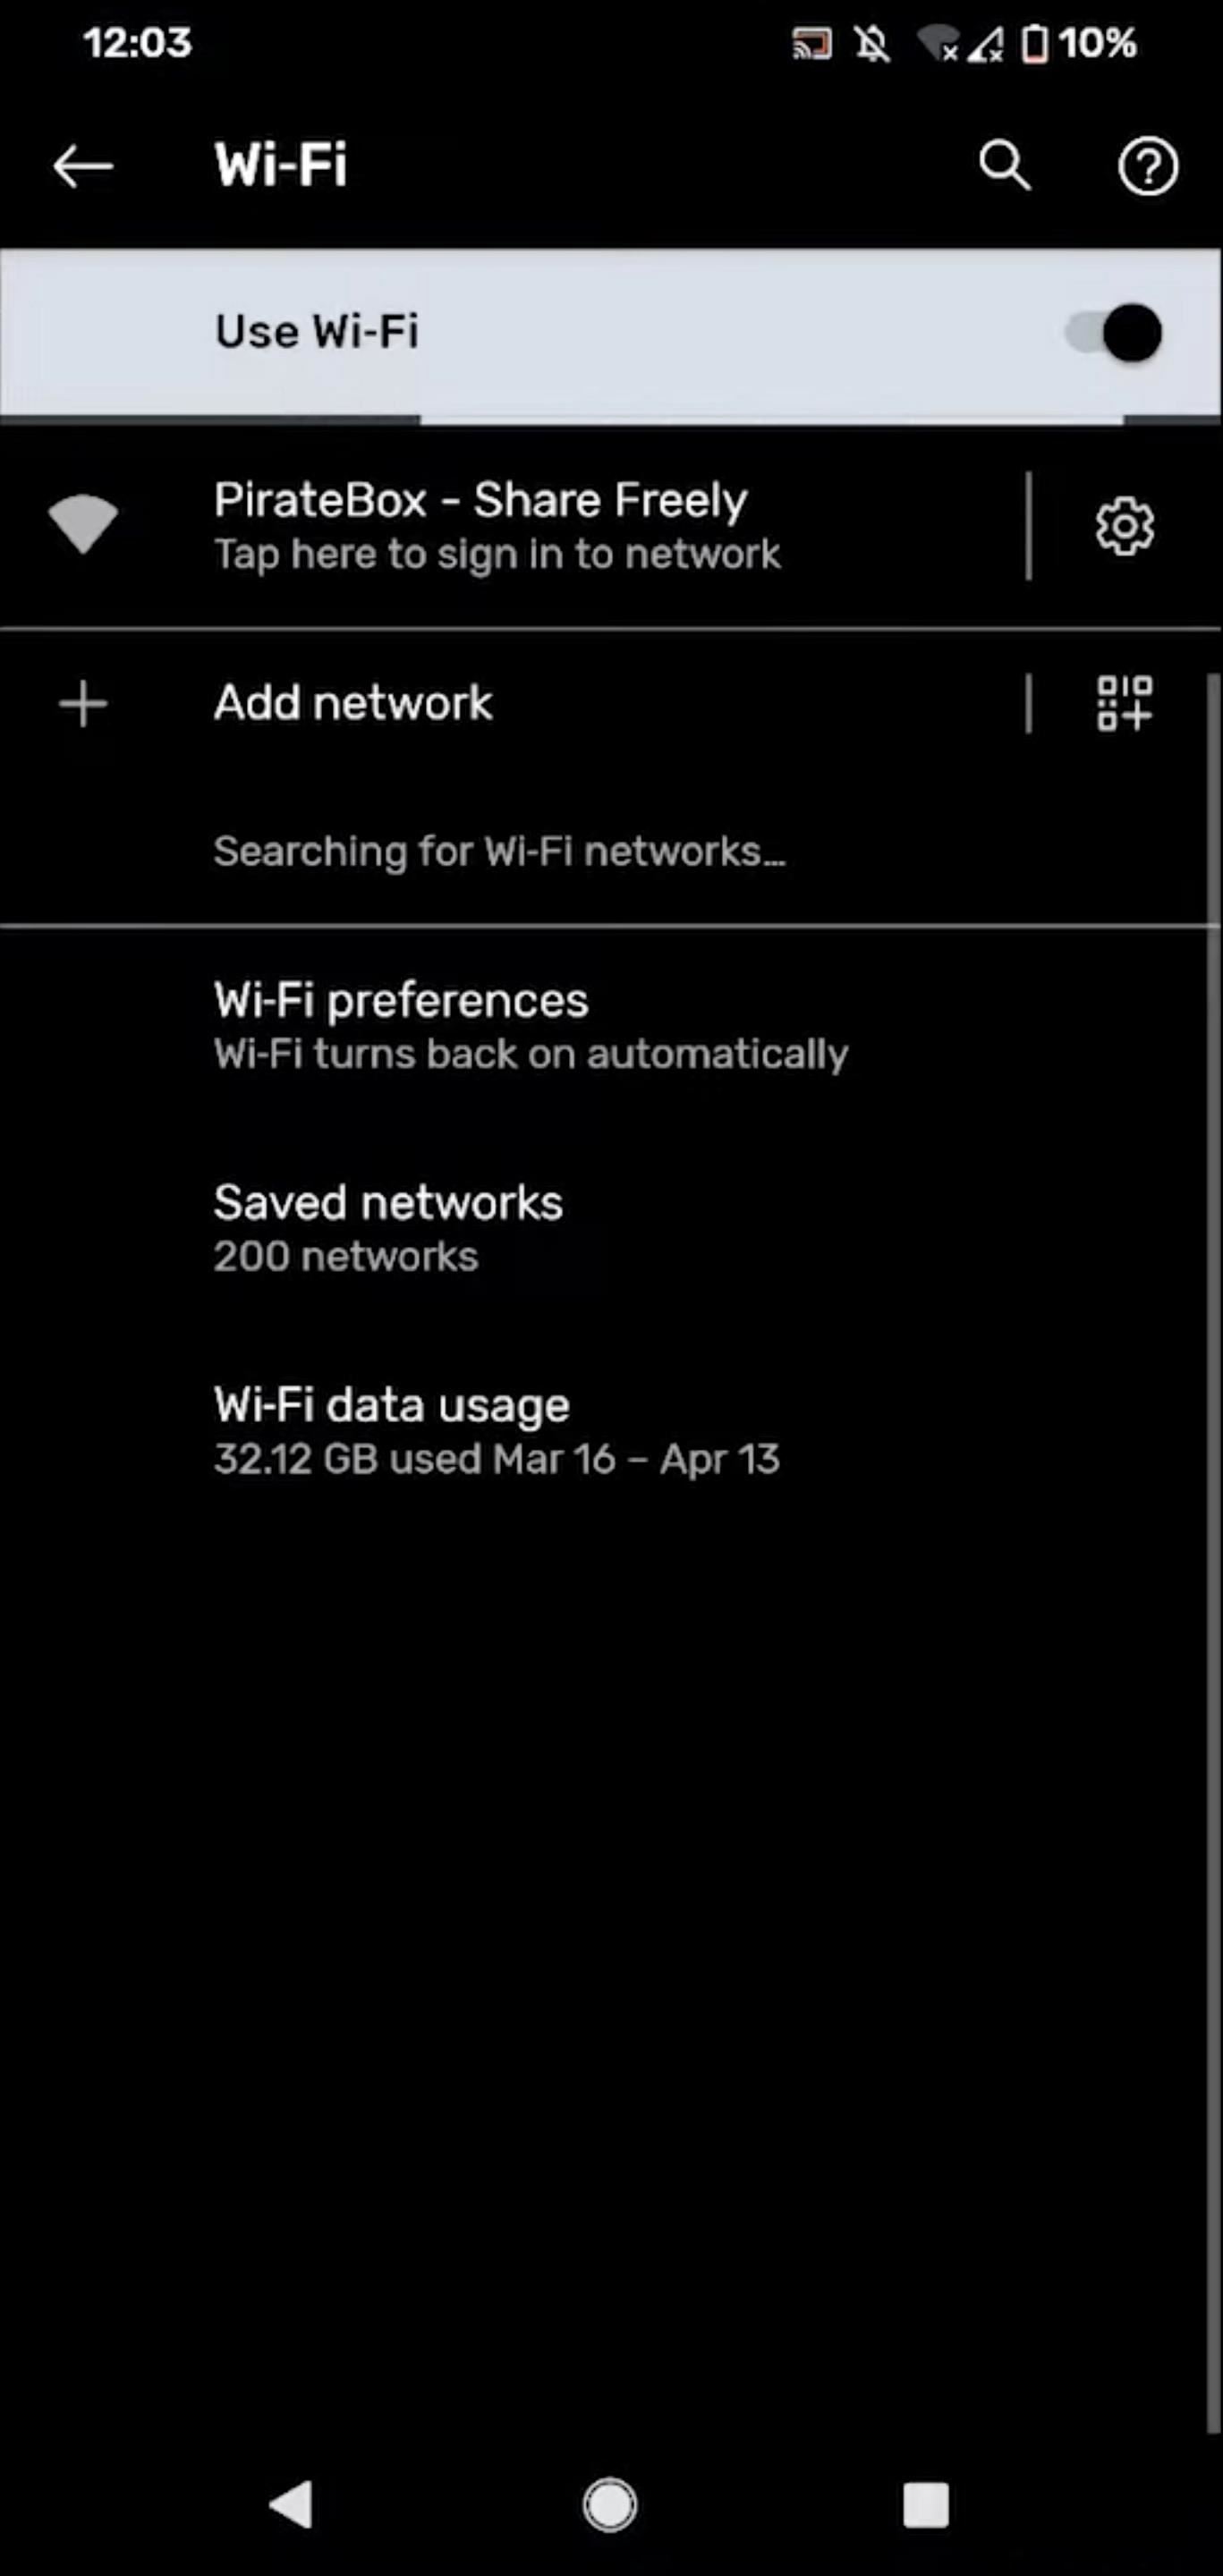
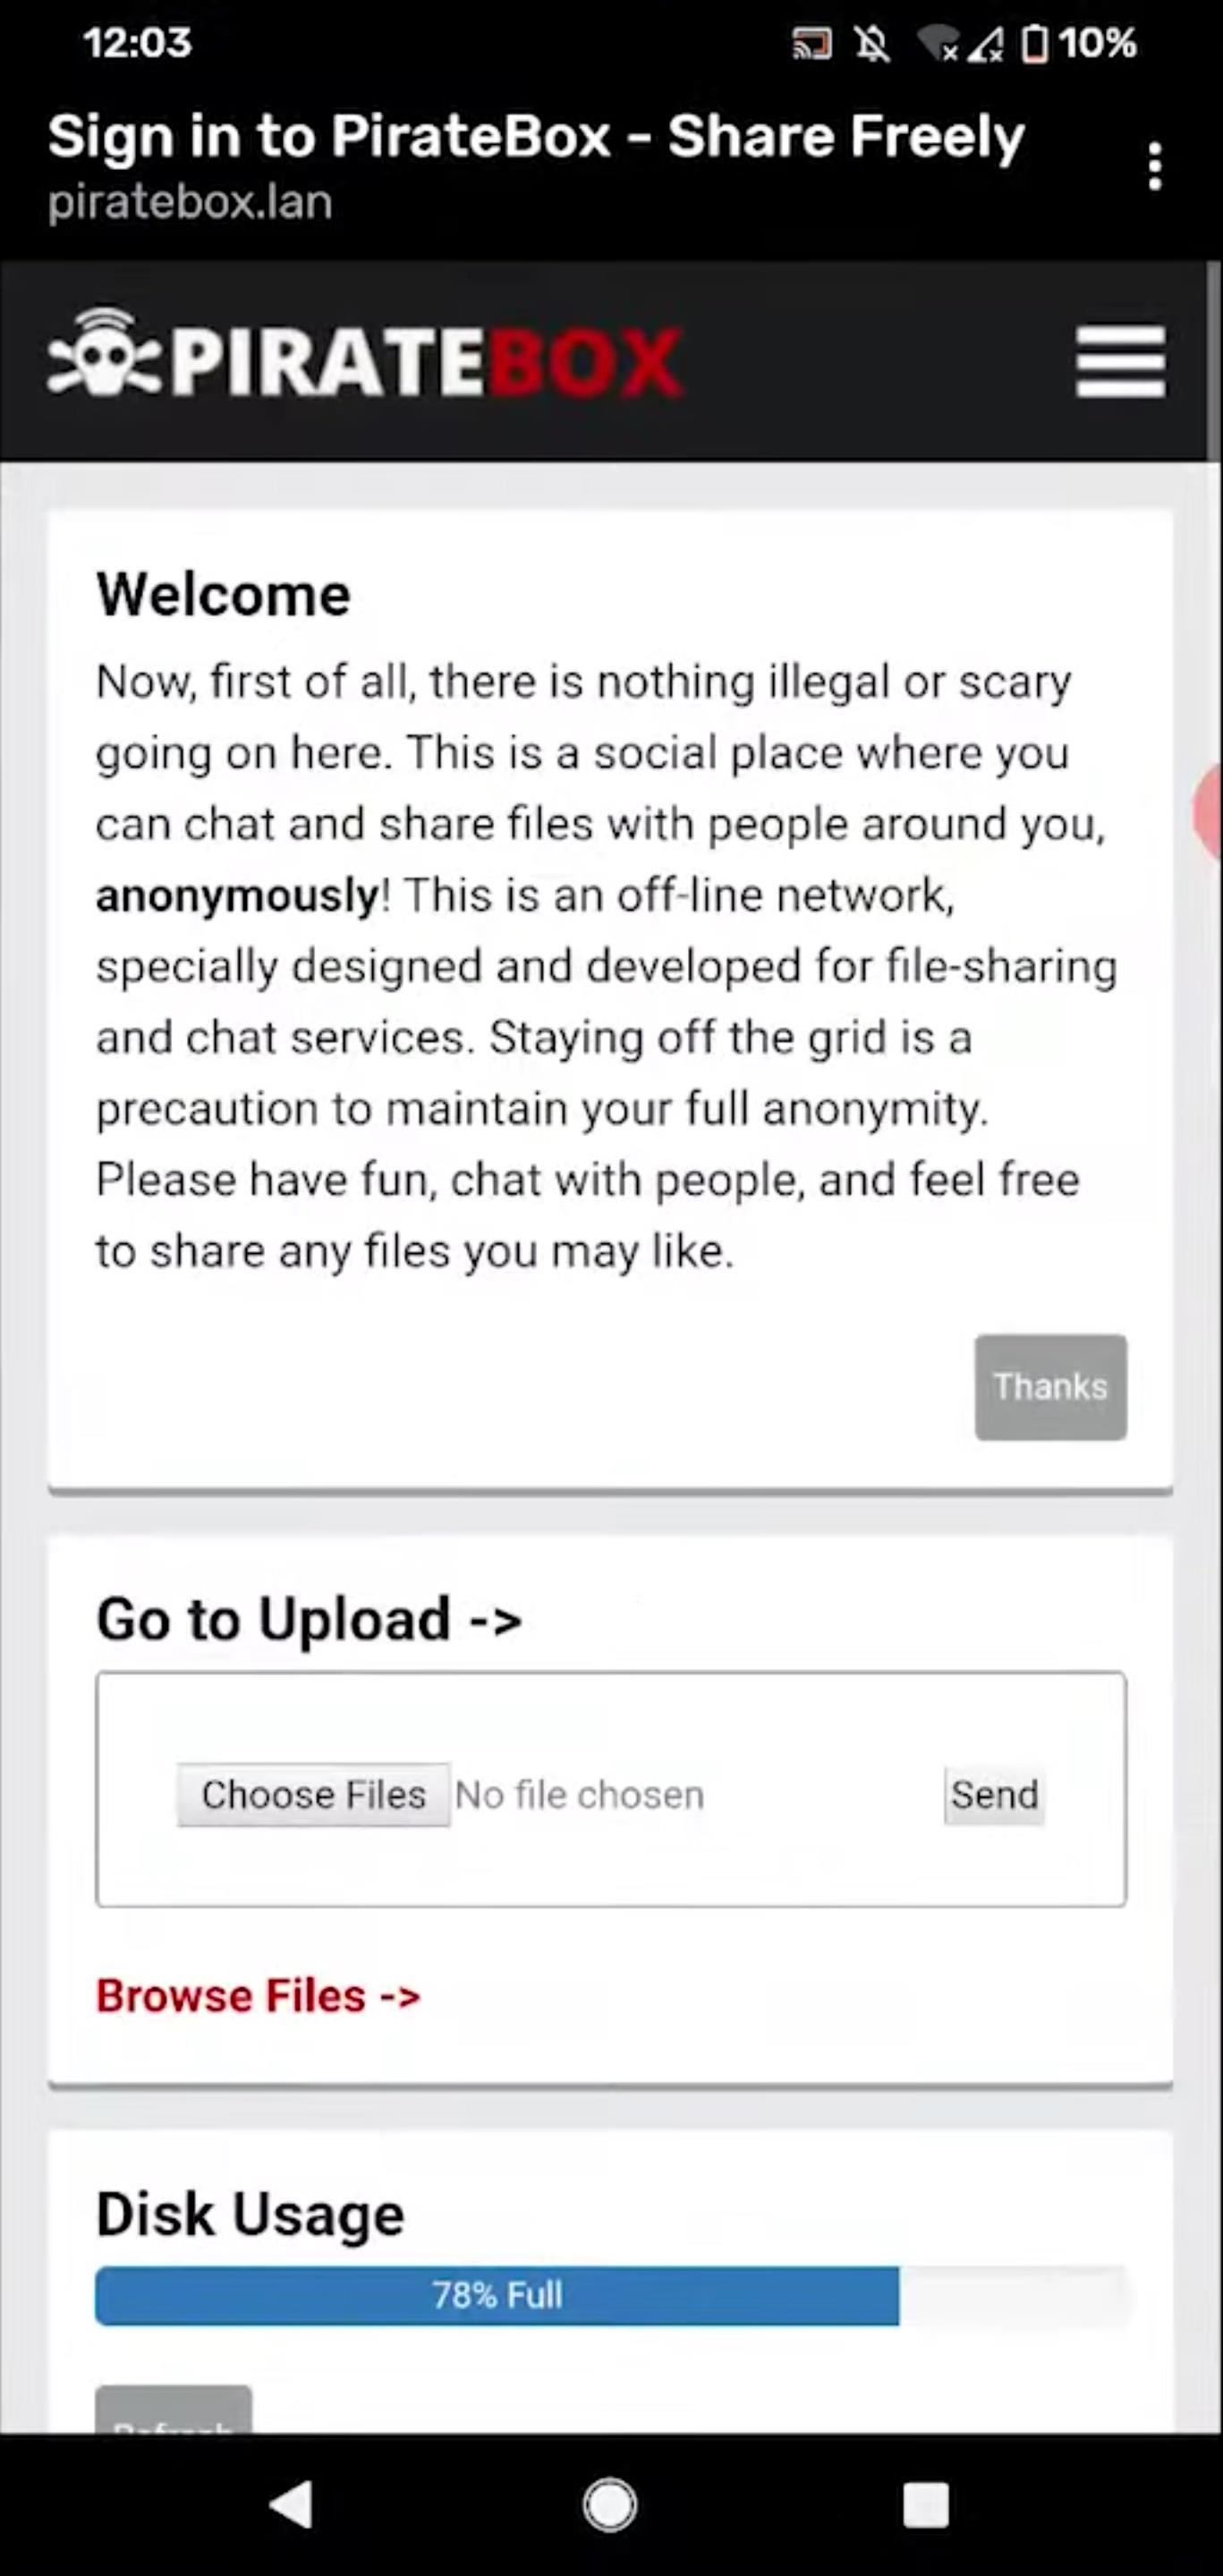
With the app all ready, to test it, disconnect from your mobile data on your Android phone, then open up your Wi-Fi settings, find your PirateBox Pi, and connect to it. Your phone may warn you that there is no internet available, but we don't need it. When you connect to PirateBox, the PirateBox page should open right away, but we're not interested in the PirateBox interface right now.
Step 5: Talk to Others on the Same Wi-Fi Network
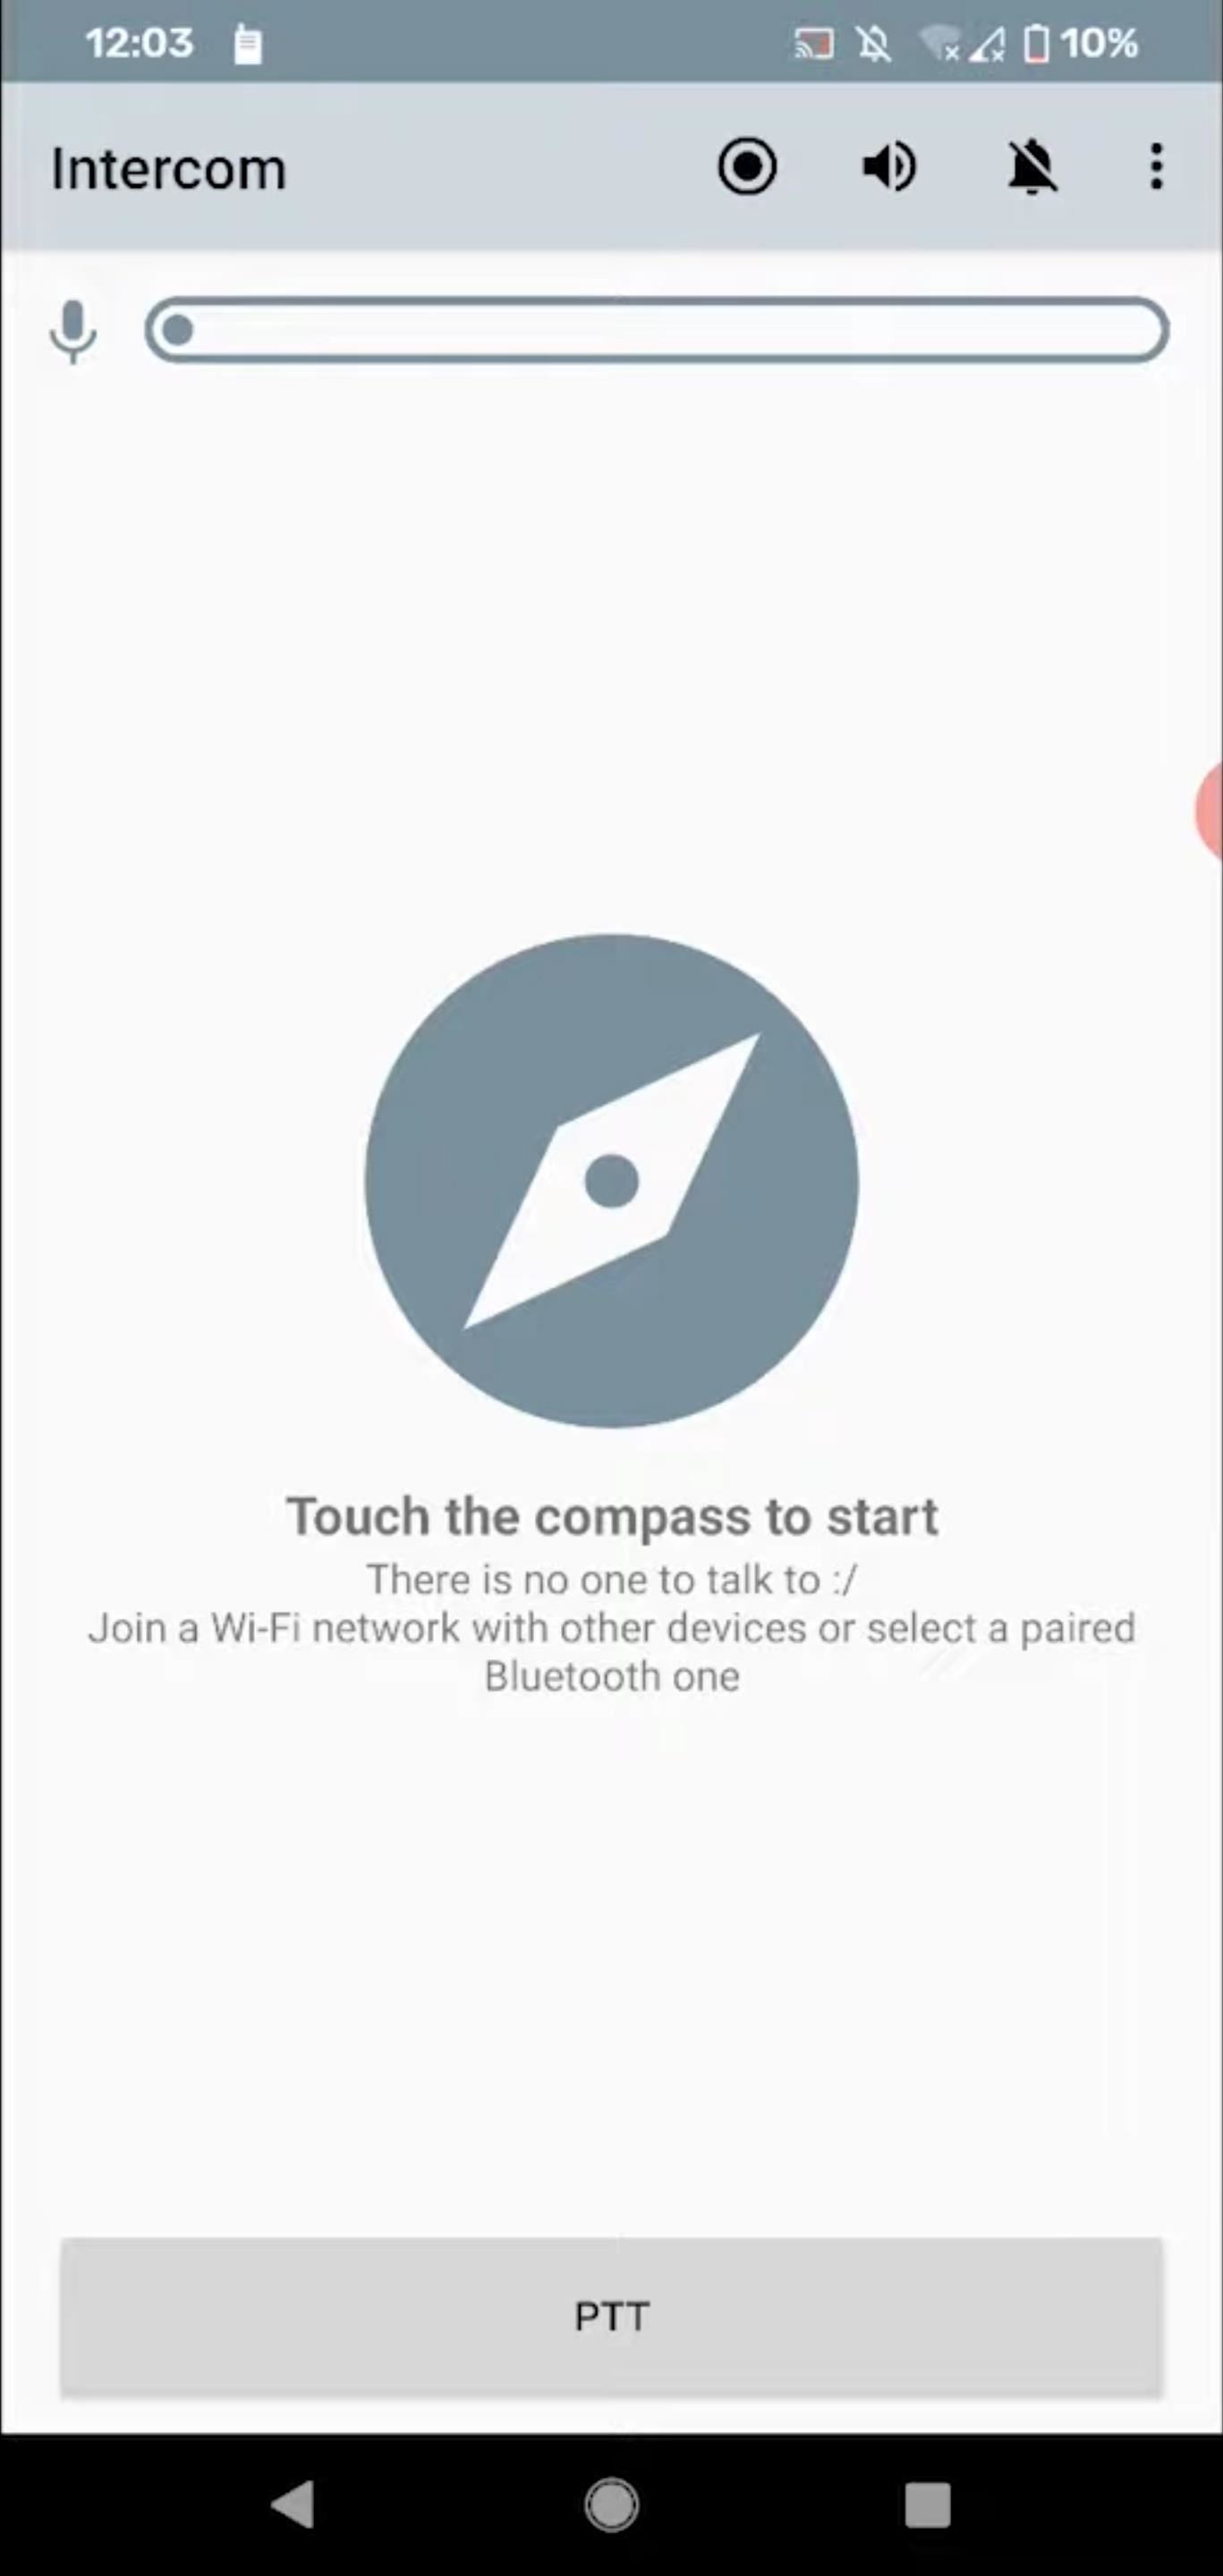
Now, open up Intercom for Android. You should see a list of devices that are connected to the PirateBox Pi. If not, touch the compass to see if that makes them appear. And if that doesn't work, you may need to connect to the other devices via Bluetooth at first, which seems to jog the app into recognizing them. Hopefully, that's not the case for most of you since it should be easy for anyone to connect without additional work.
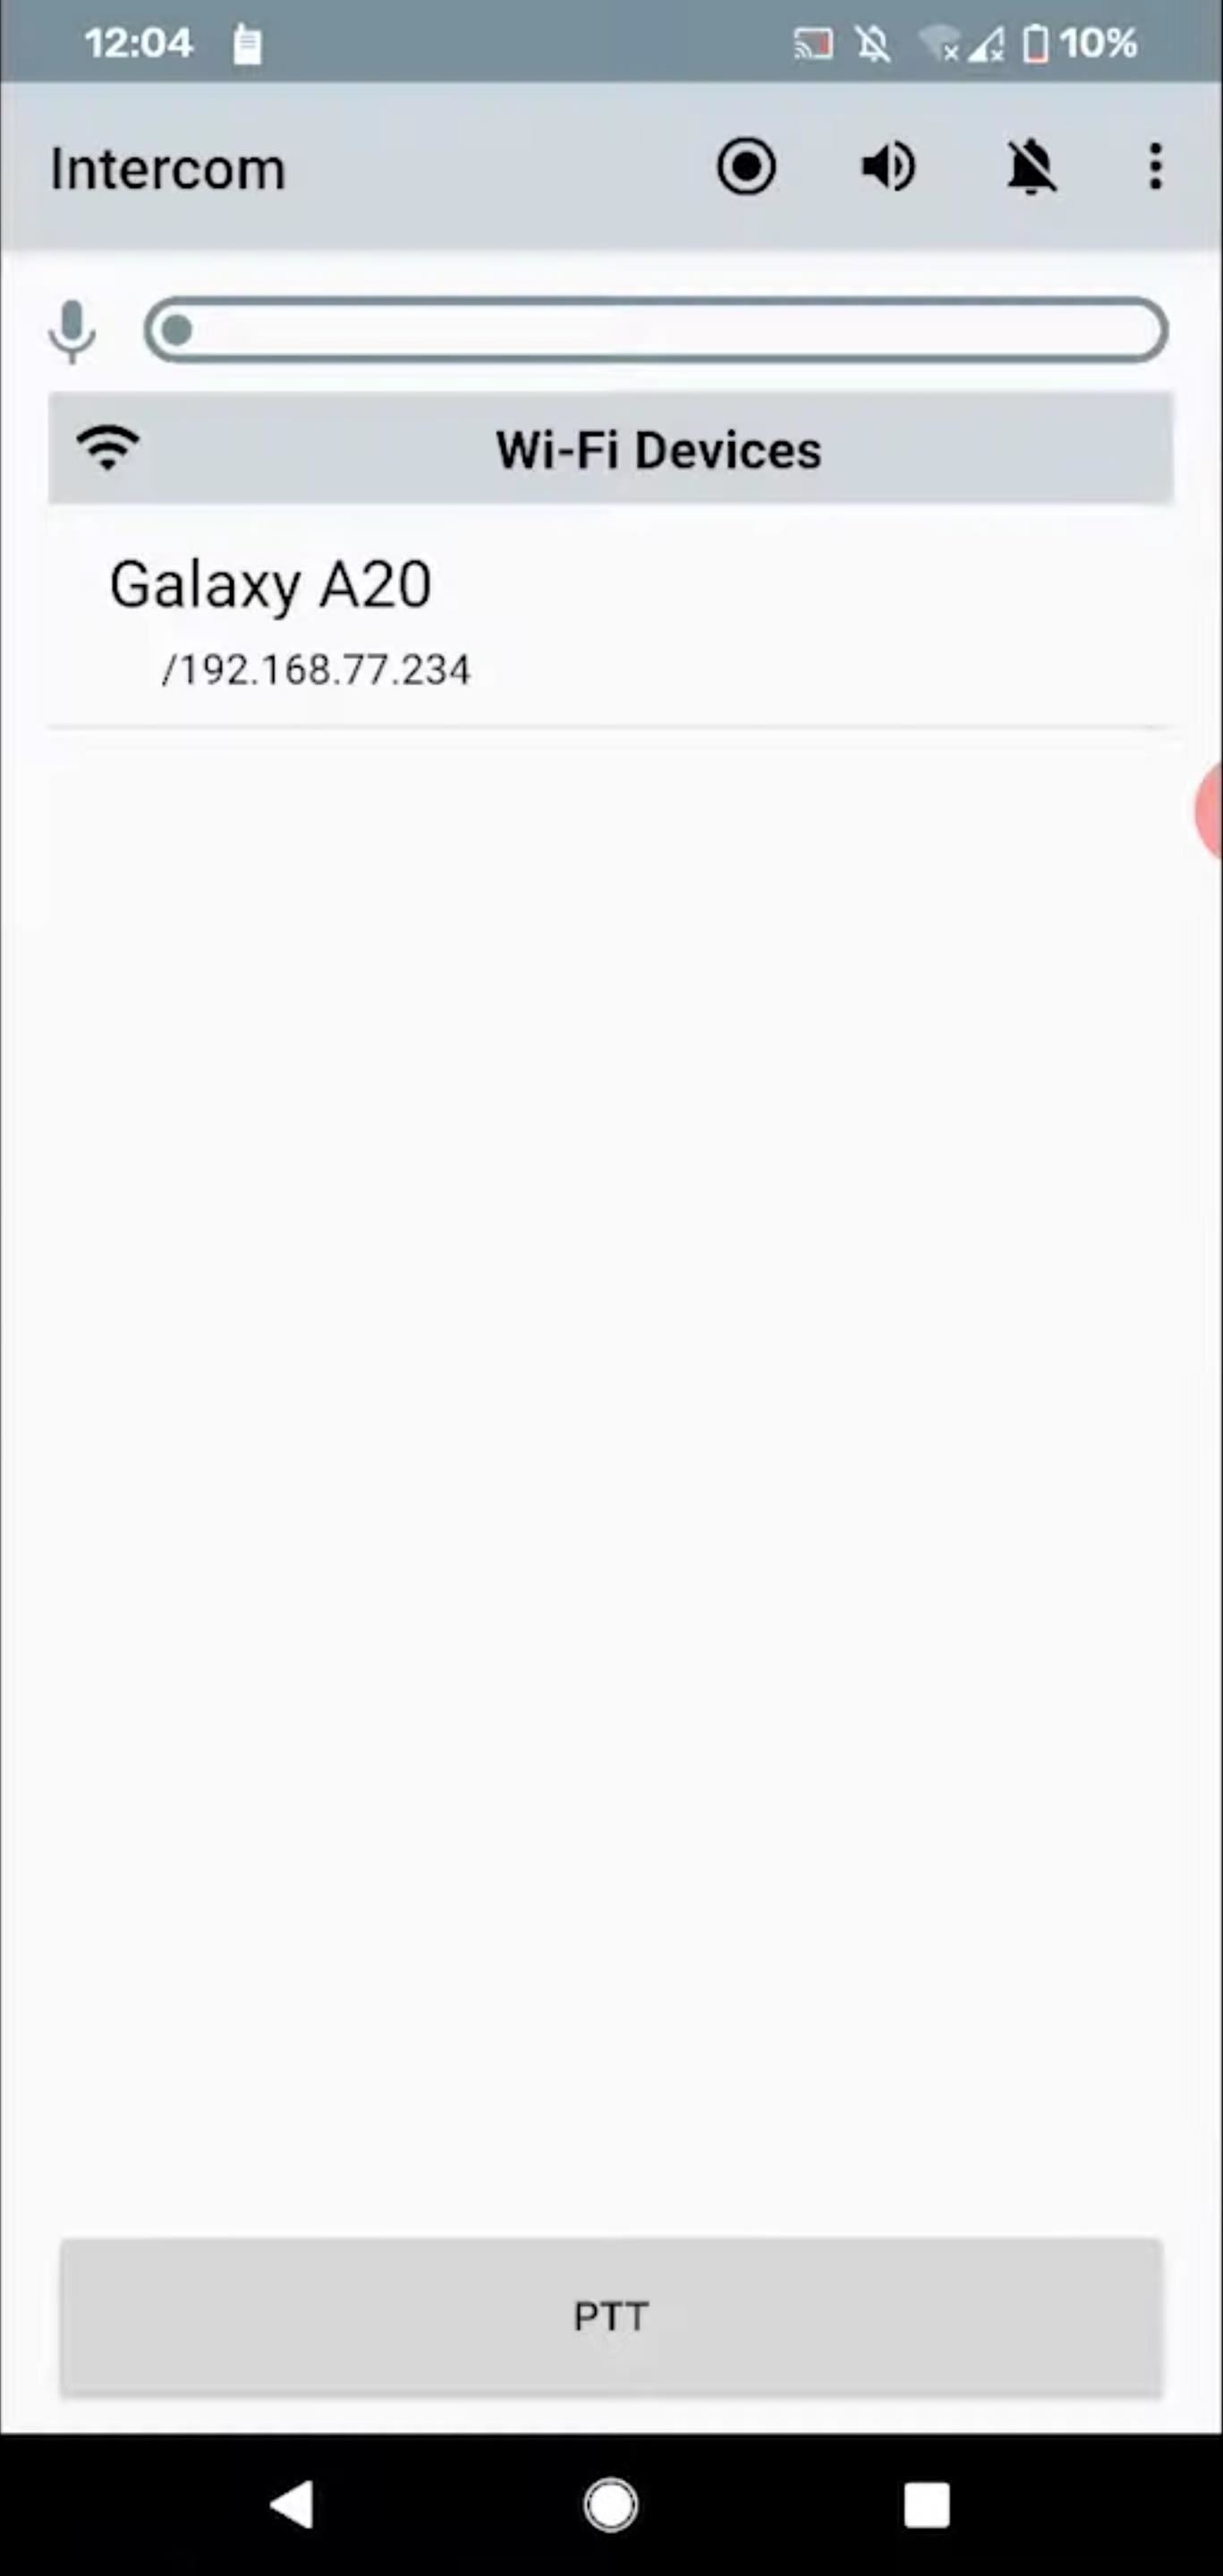
I can see a device, and if you tap the Wi-Fi icon, it should ping it so that it makes a noise to tell that you are connected and can communicate. To talk them, press-and-hold the "PTT" button and start talking. All connected devices should hear you if their apps are open too.
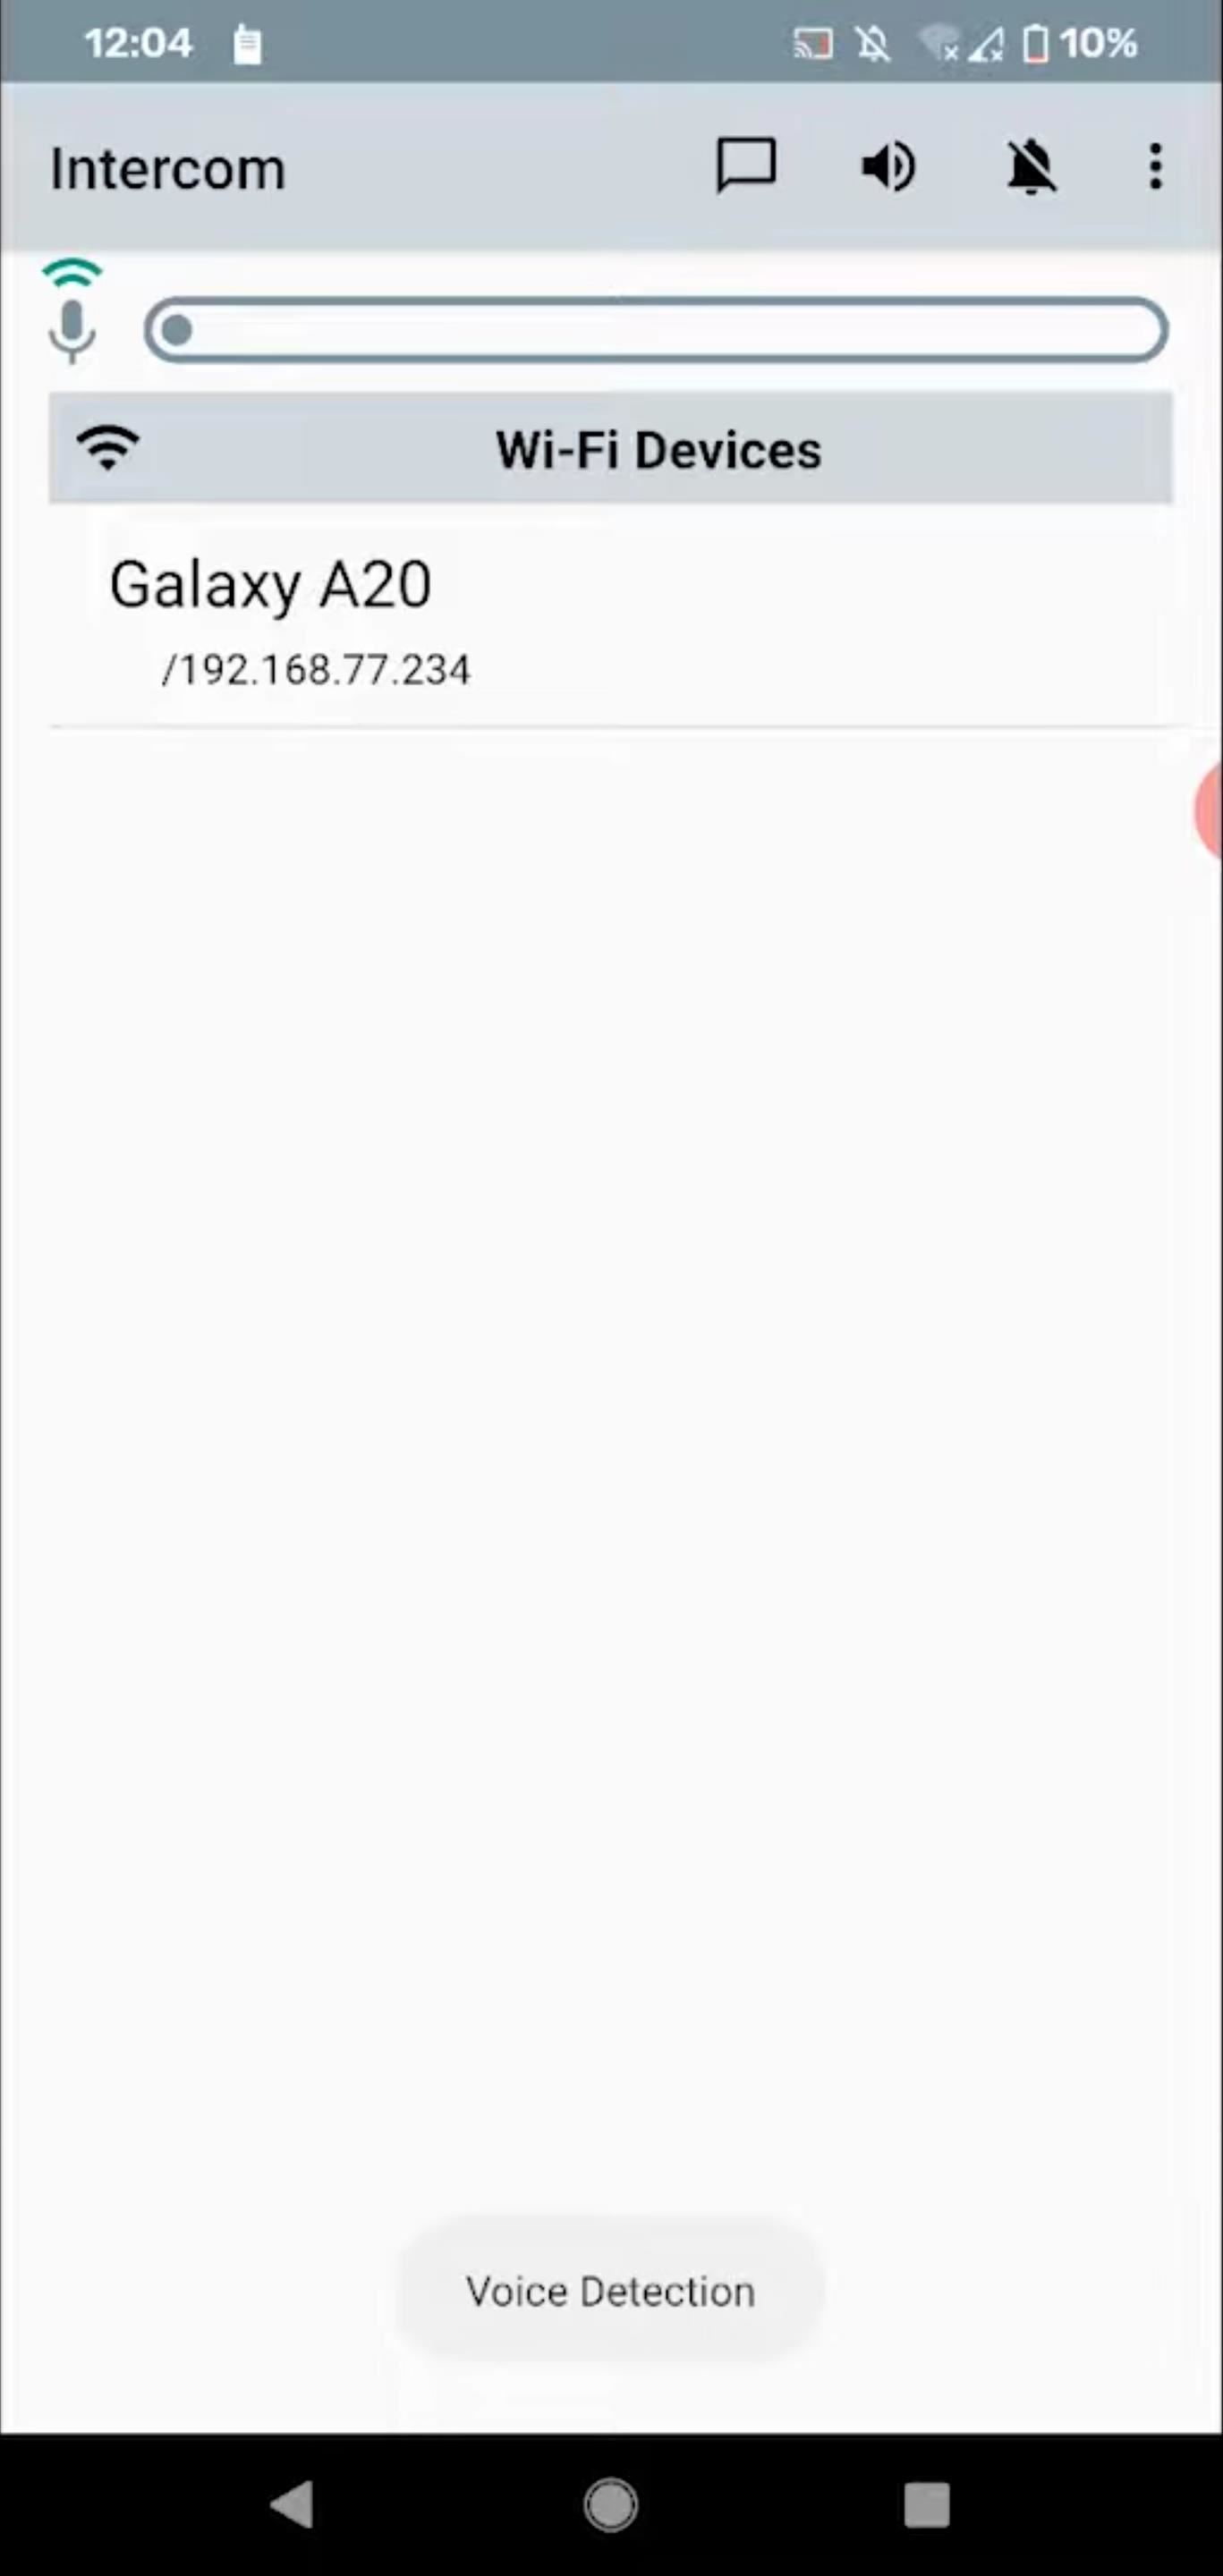
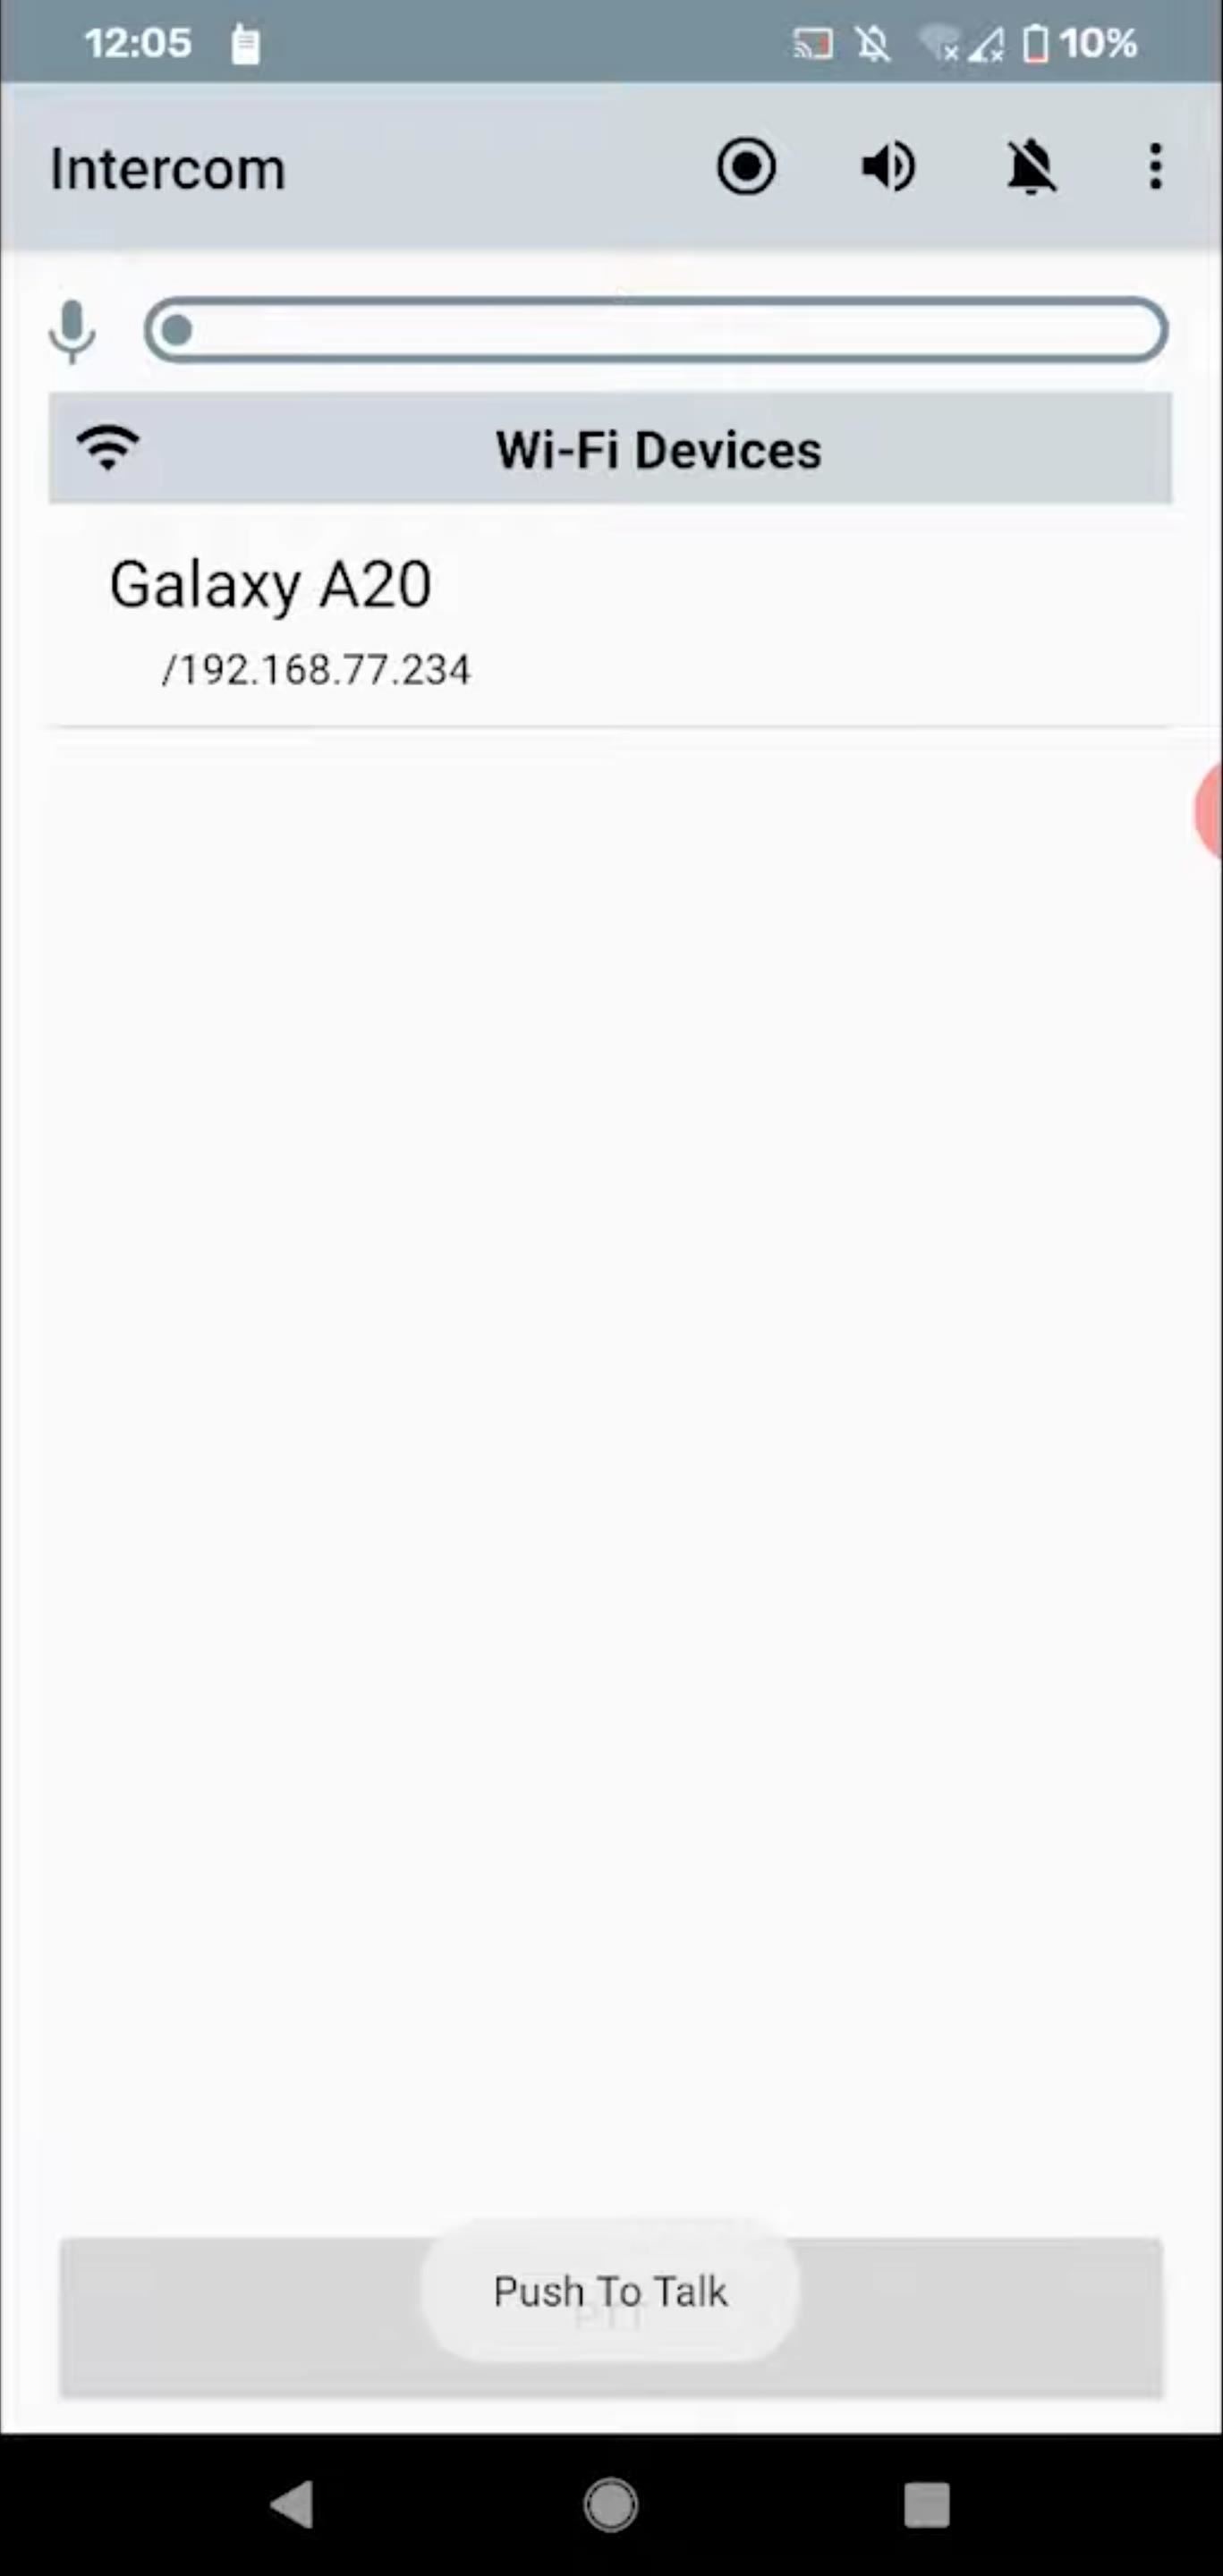
Alternatively, you can tap the dot-within-a-circle icon up top to switch modes. Doing so will enable voice detection, so you won't have to keep pushing the "PTT" button. Just talk, and it will hear you and transmit the communications to others on the network. To switch back to push-to-talk, tap the comment box icon.
After following our guide, you should be able to connect multiple Android phones together — even if there's no cellular network available. Pretty cool, right?
There Are More Advanced Things You Can Do
There are some limitations to this project, but in general, if you want to dive even deeper, you can load up a Raspberry Pi with OpenWrt. It's a really cool open-source router firmware that will allow you to dig into the options and do all sorts of interesting things. However, it's a bit more complicated to set up, and the project above is more beginner-friendly.
Just updated your iPhone? You'll find new emoji, enhanced security, podcast transcripts, Apple Cash virtual numbers, and other useful features. There are even new additions hidden within Safari. Find out what's new and changed on your iPhone with the iOS 17.4 update.


3 Comments
Loved the idea and the tutorial. But can't we do just that using a simple router instead of the Pi? It seems like the Android app only needs a Wifi hotspot to work, so why the Raspberry and Piratebox?
Because We are Pirates. ;)
Hi,
I've set up this babe smoothly thanks to you. :)
Idk if you are aware that there is now an app available on the App Store for iOS as well, called Infinite iNtercom. I tried it with an iPhone and an Android smartphone (with intercom for Android), and it appears to be cross-platform ! :D
Hope you can keep up to date the guide with this good news. ^^
Sincerely,
John
Share Your Thoughts