
If you're getting into automation, Bash scripting is usually the way to go. However, there are a couple of limitations, and one of them is logging into another device like a Raspberry Pi and running a script automatically. To help in those situations, we're going to automate delivering an SSH payload with an "expect" script.
Bash scripting is more like duct-taping things together, so it isn't able to do everything, including predicting and then reacting to certain variables. So we're going to use an "expect" script to log in to our Raspberry Pi and automatically shut it down. We could also adapt the script to pass pretty much any payload we want to the Pi.
It's a pretty awesome use of an expect script, and there are lots of different things you can do with it, so know that our guide is just scratching the surface of how you can take an expect script and use it to actually do things that otherwise would require a lot more user interaction.
To follow along, you'll need a Linux computer running something like Kali or Ubuntu — even a Mac will work. Also, you'll need to have the arp-scan and expect tools installed. On Kali, you can do that with apt install arp-scan expect, and you'll be set.
Step 1: Create the Expect Script
Expect scripts are usually used in conjunction with Bash scripts to automate certain things like scanning a network or delivering a payload. Because the two work so well together, it's possible to automate all sorts of interesting things. Here, we're going to be knocking any Raspberry Pis on the network using default credentials off the network.
Expect is a unique scripting language that emulates keystrokes by responding to expected responses from a local or remote system. Think of Expect as an automated, virtual you.
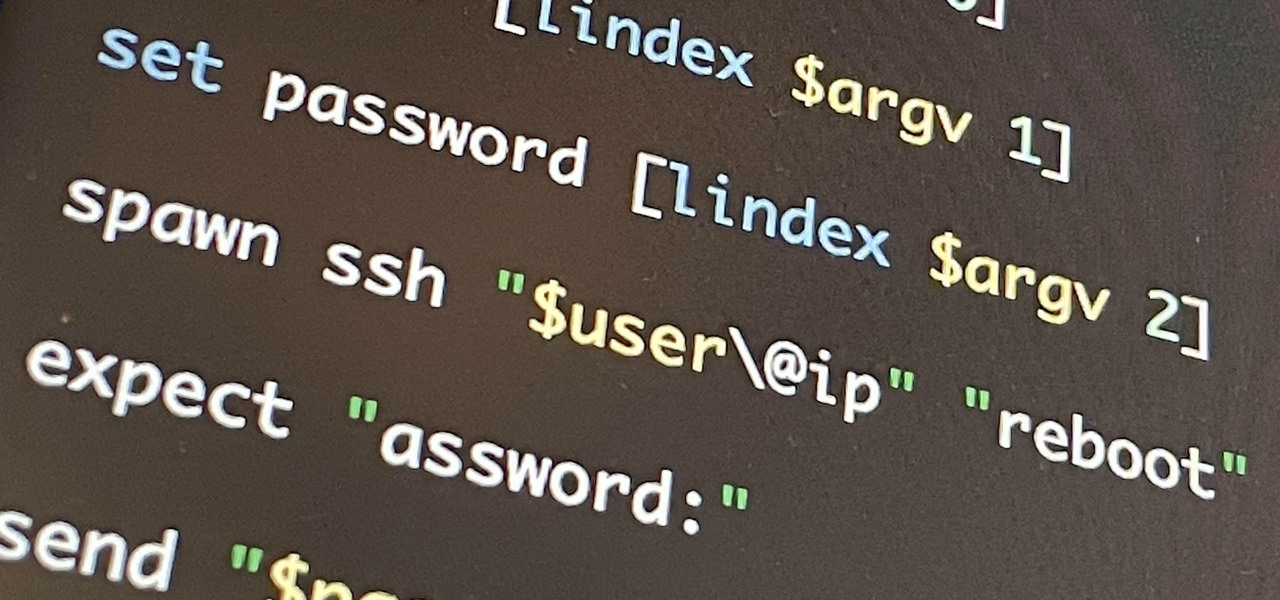
The expect.exp script we're showing off is incorporated into our trigger.sh script, so we need to create it first. If you want, start a new directory (mkdir) and nano into expect.exp to start the script draft. Then, copy and paste the script seen below into it, hit Control-X to exit, Y to add it to buffer, and Enter to save the file.
#!/usr/bin/expect -f

set timeout 20

set ip [lindex $argv 0]

set user [lindex $argv 1]

set password [lindex $argv 2]

spawn ssh "$user\@ip" "reboot"

expect "assword:"

send "$password\r";

interact
Step 2: Create the Trigger Bash Script
Before we dive into what all of that is doing, let's create trigger.sh, our Bash script. So in the same directory, use nano to create a new trigger.sh file. In it, copy and paste the following code. Hit Control-X to exit, Y to add it to buffer, and Enter to save the file.
#! bin/bash
echo What is the passcode?
read loginpass
expect expect.exp $(arp-scan -l | grep Raspberry | awk '{print $1}') root $loginpass
You can see that it starts with the standard shebang (#!) and the bin/bash; this just forces the Bash language to be used for the rest of the script.
On the second line, we use echo to show the user a prompt that says, "What is the passcode?" We then read whatever the input was and save it as a loginpass variable.
Lastly, trigger.sh opens our expect script, where we're essentially passing three variables to it. As discussed in a previous Bash lesson, the parentheses ( ) mean that everything within it will happen before continuing with the rest of the commands in the one-liner, and a dollar sign ($) indicates a variable. So whatever is the answer to the content inside the parentheses will be a variable.
So, the first part of the equation is that an arp-scan is run. This sends out ARP packets to hosts on the local network, then displays its responses. Then, grep, a command-line utility for searching through text, looks at the scan results for the word Raspberry to hunt for Raspberry Pis. Next, awk, another tool for searching through text, looks for the microcontroller's IP address found from the arp-scan and grep, and print prints the final results.
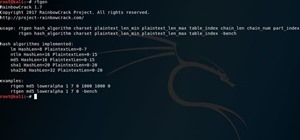
After all of that is done, it passes the username root to the Pi, which is the default on Pis. This is slightly inspired by the Raspberry Hunter, or rpi-hunter, which is something that hunts for Pis using default credentials on the network, attempts to log into them, and then send payloads.
Lastly, it passes the password to the Pi via the password that the user input and stored as the loginpass variable.
Step 3: Run the Trigger Bash Script
Now, let's run the script. After it starts, you'll be asked for the enemy's passcode. Let's first see what happens when we enter the wrong password.
~$ bash trigger.sh

What is the enemy passcode?
kdsjsdgliyea

spawn ssh root@192.168.1.183 reboot
The authenticity of host '192.168.1.183 (192.168.1.183)' can't be established.
ECDSA key fingerprint is SHA256:wG9YqeFrX90eEjV9+APhnxVkA3DduuZ+d9RbypwKFp4E.
Are you sure you want to continue connecting (yes/no)? yes

kdsjsdgliyea
yes
Please type 'yes' or 'no': yes

Warning: Permanently added '192.168.1.183' (ECDSA) to the list of known hosts.
Welcome to meye-16b312e&!
root@192.168.1.183's password:
As you can see, it tried spawning an SSH script to pass the reboot command to the Raspberry Pi. Since we gave it the wrong password, it didn't work, so then it asked us if we wanted to continue, which was a "yes." Next, it asks us if we wanted to log in. We said "yes," and it attempted to log in to the Raspberry Pi, but it couldn't because it had the wrong password.
Though it failed, it could still find a Raspberry Pi on the network and tried to SSH into it. Now, let's see what happens when we have the real password. One thing to keep a note of is that if you're logging into something via SSH for the first time, it'll first ask you to confirm, and this will probably break the Bash script. To make sure it works, log in first.
~$ bash trigger.sh

What is the enemy passcode?
starstar

spawn ssh root@192.168.1.234 reboot
root@192.168.1.234's password:
Connection to 192.168.1.234 closed by remote host.
As you can see, it detected a Raspberry Pi on the network successfully, spawned an SSH session, and gave it the reboot command. Then, it entered the password that was entered by the user as a variable. After logging in, it closed the host, causing the Raspberry Pi to reboot and kick us out.
How the Expect Script Works
We detailed the trigger.sh file and what it does, but now let's look at the expect.sh code to see what it does with all of the information passed by the Bash script.
First, it starts with the standard shebang (#!), the usr/bin/expect, and tack f (-f); this just forces the Expect interpreter to be used for the rest of the script.
Next, we set a timeout of 20 seconds, so the script times out after that amount of time. Then, we have the set ip line, which takes the first argument passed to expect.sh, and that would be the arp-scan results in trigger.sh — the Raspberry Pi's IP address. The lindex $argv 0 just tells it to look for the first argument passed, and it starts with zero, which is important to remember.
We then have the set user line, which looks for the second argument passed, in this case, root. After that, the set password line looks for the third argument passed, in this case, the user's password that was supplied to trigger.sh.
Now things start getting interesting. Expect scripts can spawn processes, and here we're spawning an SSH process (spawn ssh) and using the variables the same way we would in Bash pretty much. It takes the $user variable, root, then adds @ with the $ip variable, the Pi's IP address. That's how it connects to the Pi. Then, as soon as it gets logged in, it issues a reboot command.
However, before all that can happen, we need to use the expect part of the script, where we are looking for something that is basically coming to us and typing the string assword. That's funny, but there's a reason we do that. If it is a capital "P" or a lowercase "p," it really doesn't matter depending on what server it is. It's always going to ask us for a password. So unless it's in all caps, which is a little bit less probable, then we're likely to get most of the different ways of asking us for a password.
So what the script is doing is expecting a request, or a text string, to say "password" or "Password." If it gets that, then it goes ahead and sends the result, which, in our case, is the password the user typed way back at our Bash script. The interact line puts the whole script into play.
You Can Do a Lot with Expect Scripts
Expect scripts are not interactive, so we have to use Bash scripts to pass in information. For example, we can't have user input directly in this expect script. It's very annoying that we can't, so as a result, it works very well to have a Bash script that gathers all the information you need, passes it to an expect script, and then that expects script will automate something.
Overall, expect scripts are handy for creating chatbots or dealing with anything where you have an input you're expecting and a response you want to automate. Now, combined with Bash scripts, you can automate all sorts of powerful tools, so this is just a beginning, and I hope you can use it to create some really interesting automations.
Just updated your iPhone? You'll find new emoji, enhanced security, podcast transcripts, Apple Cash virtual numbers, and other useful features. There are even new additions hidden within Safari. Find out what's new and changed on your iPhone with the iOS 17.4 update.


1 Comment
"Expect scripts are not interactive, so we have to use Bash scripts to pass in information. For example, we can't have user input directly in this expect script. It's very annoying that we can't."
5 minutes on the man page would alleviate your annoyance. Do you really think TCL and expect have no way to get input from a user??? In fact, the bash part of your little project here is completely unnecessary.
send _user "What is your username?"
expect_user -re "\(.*)\n"
set user [string trim $expect_out(1,string)]
send_user "What is the password?"
# Let's not show the response on the screen
stty raw -echo
expect_user -re "\(.*)\n"
set password [string trim $expect_out(1,string)]
set arpoutput [exec arp-scan -l | grep berry]
set ip [lindex $arpoutput 1]
spawn ssh $user@$ip
expect {
"yes/no" {exp_send "yes\n" ; expect_continue}
"ssword" {exp_send $password\n}
}
expect "\\$"
exp_send "sudo reboot now\n"
expect {
"ssword" {exp_send $password\n}
eof
}
Would be nice if the editor didn't require double underscores to prevent italics, that makes it really hard to post pastable code. Double [ and ] too apparently. Sigh.
Share Your Thoughts