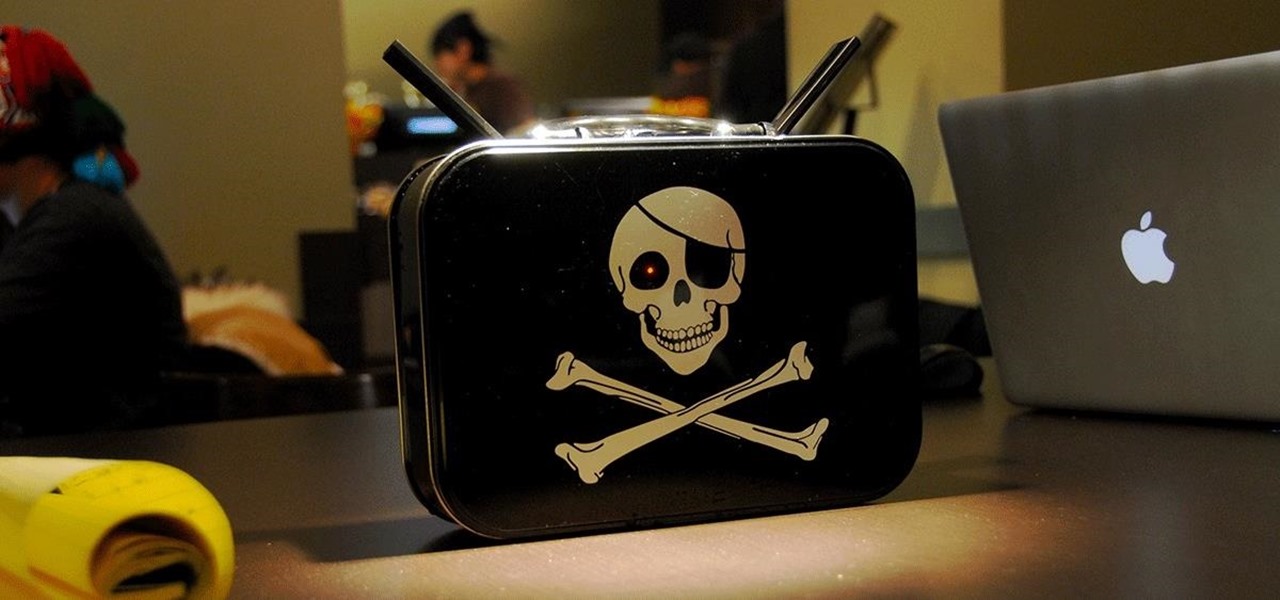

A PirateBox creates a network that allows users to communicate wirelessly, connecting smartphones and laptops even when surrounding infrastructure has been disabled on purpose or destroyed in a disaster. Using a Raspberry Pi, we will make a wireless offline server that hosts files and a chat room as an educational database, a discreet local chat room, or a dead-drop file server.
The Need for Offline File Sharing
If you can't think of a use for an offline file server with a built-in wireless hotspot, the list is nearly endless. Imagine you're a Red Cross volunteer in Florida after Hurricane Irma, and the power goes out. You're volunteering in a center to help storm victims find their lost pets, but with no cellular data, Wi-Fi, or Ethernet, cell phones and laptops aren't able to send photos of missing animals and everything must be done by paper.
With a PirateBox and a big battery, you're able to host a server that anyone can post their missing pet photos and information to, as well as a live chat with updating information about found pets. Rather than waiting in line and having to check back for updates, everyone is connected with the data they need, and communication and updates are managed without waste.
A spy working in a country under an oppressive dictatorship obtains a document which reveals several of her fellow spies are due to be arrested. Worse, her name is on the list, so she must assume all of her communications are under surveillance. While walking through a park, she briefly connects to a wireless network that mimics the details of a nearby Wi-Fi hotspot, appearing only a few times per day to minimize the risk of detection.
She drops the document file with a warning into the PirateBox hosting the access point (AP), hidden in the wiring of a street lamp, for a fellow agent to exfiltrate and facilitate a rescue. The information is spread to fellow agents without touching the heavily monitored networks of the hostile host country, and the agent is rescued.
During a protest, police shut down cellular data in an effort to disrupt the organization of protesters. Hoping to catch the protesters by surprise, the police start trying to surround part of the group, only to watch in frustration as the protesters organize to escape the trap by sharing videos of police movement and alerting each other in real-time via chat. A single protester with a PirateBox taped below his skateboard ties everyone together, allowing information to flow even in the absence of infrastructure.

Those are a few very specific examples of why someone might need to have a way to share and communicate offline. You can probably think of more examples, but the ability to create your own network and tie people and data together is very, very useful.
The PirateBox Solution
Enter the PirateBox. To better explain what PirateBox is, I'll let them do the talking:
Inspired by pirate radio and the free culture movement, PirateBox is a self-contained mobile collaboration and file sharing device. PirateBox utilizes Free, Libre and Open Source Software (FLOSS) to create mobile wireless file sharing networks where users can anonymously share images, video, audio, documents, and other digital content.
PirateBox is designed to be safe and secure. No logins are required and no user data is logged. The system is purposely not connected to the Internet in order to prevent tracking and preserve user privacy.
Don't be afraid of the PirateBox just because it has the word pirate in it — there's nothing illegal going on here. We aren't stealing digital content or robbing ships on the high seas. In fact, what we are doing is quite noble when you think about it — it's an attempt to banish censorship and promote free speech by creating your own little network.
There is an offshoot of PirateBox called RACHEL Offline, created by Hackers for Charity, that even focuses specifically on education, providing books and other content in places where it wouldn't normally be available.
Now that we've explained a little about what the PirateBox is used for, let's see what this thing can actually do. If you're impatient, then you can look at this demo page. Otherwise, it should only take us 15–20 minutes to get it working on our Raspberry Pi with a custom image.
What You'll Need to Get Started
- Raspberry Pi: This guide uses the Pi 3, because of the built-in Wi-Fi. Another option is the Pi Zero W. Any of the Pi versions will work, but you will need to buy a Wi-Fi dongle for them if they aren't Wi-Fi capable (see our guide to Wi-Fi adapters).
- USB flash drive: This will be the hard drive for your PirateBox, so go as large as you think you need. Get a 1 TB hard drive and you'll never worry about it again.
- MicroSD card: It's recommended to use one in the 16–32+ GB range as they will be most useful and the best value.
- MicroSD card reader: Pretty much anyone will work for our task today.
- Power supply: This is needed for the Raspberry Pi unit.
- Ethernet cable: To connect our Pi to our router.
Step 1: Download the Piratebox Image
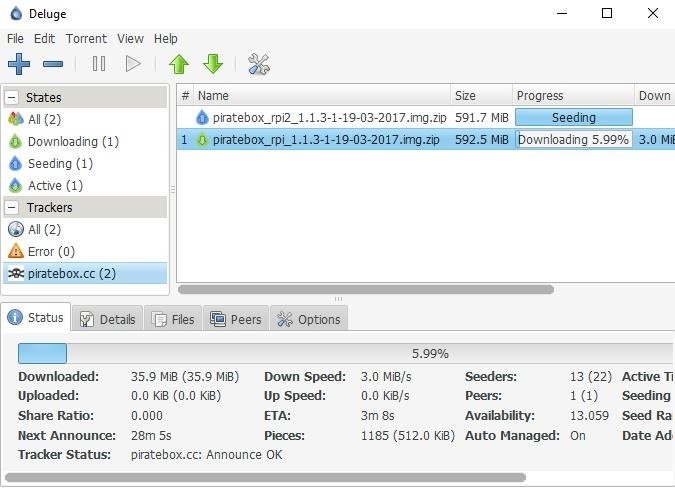
First, we need to download the custom Raspberry Pi image, but to do this we need a BitTorrent client. If you already have one, then that's great, use it. Otherwise, we need to download one. This guide uses Deluge which works for Windows, Mac, and Linux. Once you navigate to the website, download the latest version for the operating system you are using and follow the on-screen instructions to install it.
Now that we have a working BitTorrent client, we need to download the proper image based on which Raspberry Pi we are using. Click on the link below for the image that matches your Pi.
- For Raspberry Pi Zero W: piratebox_rpi_1.1.3-1-19-03-2017.img.zip
- For Raspberry Pi 3: piratebox_rpi2_1.1.3-1-19-03-2017.img.zip
Click on the torrent file once it downloads, and it should open Deluge with the PirateBox file selected. To begin, click add. If you've done everything correctly, then it should start downloading as seen below. It's good practice to seed the file for awhile after you download it.
As an alternative, if you can't get the torrent working, then Christian Sievers has a download on Twitter for the Pi 3 image.
Step 2: Flash the Image to the MicroSD Card
Now, we need to write the image to our microSD card. Best practice is to unplug any external hard drives or other USB devices you have, and then insert your microSD into its adapter and plug it in. This is important because you don't want to accidentally flash the wrong device.
If you already have a program to flash the image to the card, then you can use that. Otherwise, download Etcher, as it's the easiest to use. It works on Windows, Mac, and Linux while also having the simplest user interface. Etcher should detect what operating system you are using, but if not, make sure you download the correct version based on your operating system (OS) and follow the on-screen installation directions. Open Etcher (if it doesn't automatically after installation), and select the image you just downloaded.
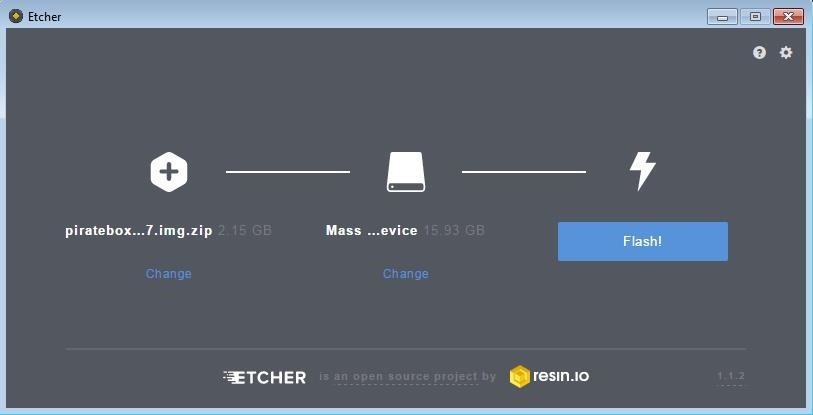
Next, be sure the proper drive is selected and flash the image. Once it's done, it will safely eject the SD card. There is a rare chance that Etcher will cause an error. If that does happen, use ApplePiBaker for Mac or Win32 Disk Imager for Windows.
Step 3: Start Your Pi
First, insert the SD card into the slot at the bottom of your Raspberry Pi and plug the Pi into both Ethernet and power. The other end of the Ethernet cable goes into your router (which is wired or wirelessly connected to your computer). Now, we need a program to open a Secure Shell (SSH) into our Pi. This guide uses PuTTY (download). Alternatively, if you are a Chrome user, you can add the secure shell extension, but you can SSH however you like.
In Windows, open PuTTY and select SSH Port 22, and provide alarm@(replace with Pi's IP address) in the host name field. The IP address can be found a number of ways, including opening your router's admin page and looking at connected devices or using a program like Nmap or Fing.
Using username "alarm".
alarm@192.168.1.8's password:
____________________.__               __        __________
\______   \______   \__|___________ _/  |_  ____\______   \ _______  ___
 |       _/|     ___/  \_  __ \__  \\   __\/ __ \|    |  _//  _ \  \/  /
 |    |   \|    |   |  ||  | \// __ \|  | \  ___/|    |   (  < > >    <
 |____|_  /|____|   |__||__|  (____  /__|  \___  >______  /\____/__/\_ \
        \/                         \/          \/       \/            \/

Website: http://piratebox.cc                 PirateBox Version: 1.1.3
Forum:   http://forum/piratebox.cc           RPi Image Version: 1.1.3-1
IRC:     #piratebox irc.freenode.net         Be open  --  Share freely!

First Steps After Flashing
1. Change password of alarm user
 > passwd
2. Enable Fake-Timeservice
 2.1 Set date and time
  # Disable network time sync
  > sudo timedatectl set-ntp false
  # Set time to "Mon May 23 17:42:00" (Format: CCYYMMDD hhmm)
  > sudo date -s "20170523 1742"
  > cd /opt/piratebox && sudo ./bin/timesave.sh ./conf/piratebox.conf install
 2.2 Enable on startup
  .........
On a Mac, you can simply open a terminal window and type the following.
ssh alarm@(replace with Pi's IP address)Once you have a successful SSH connection, you will be prompted for a login and password. The password is alarm. Best practice would be to immediately run the passwd command to change the password.
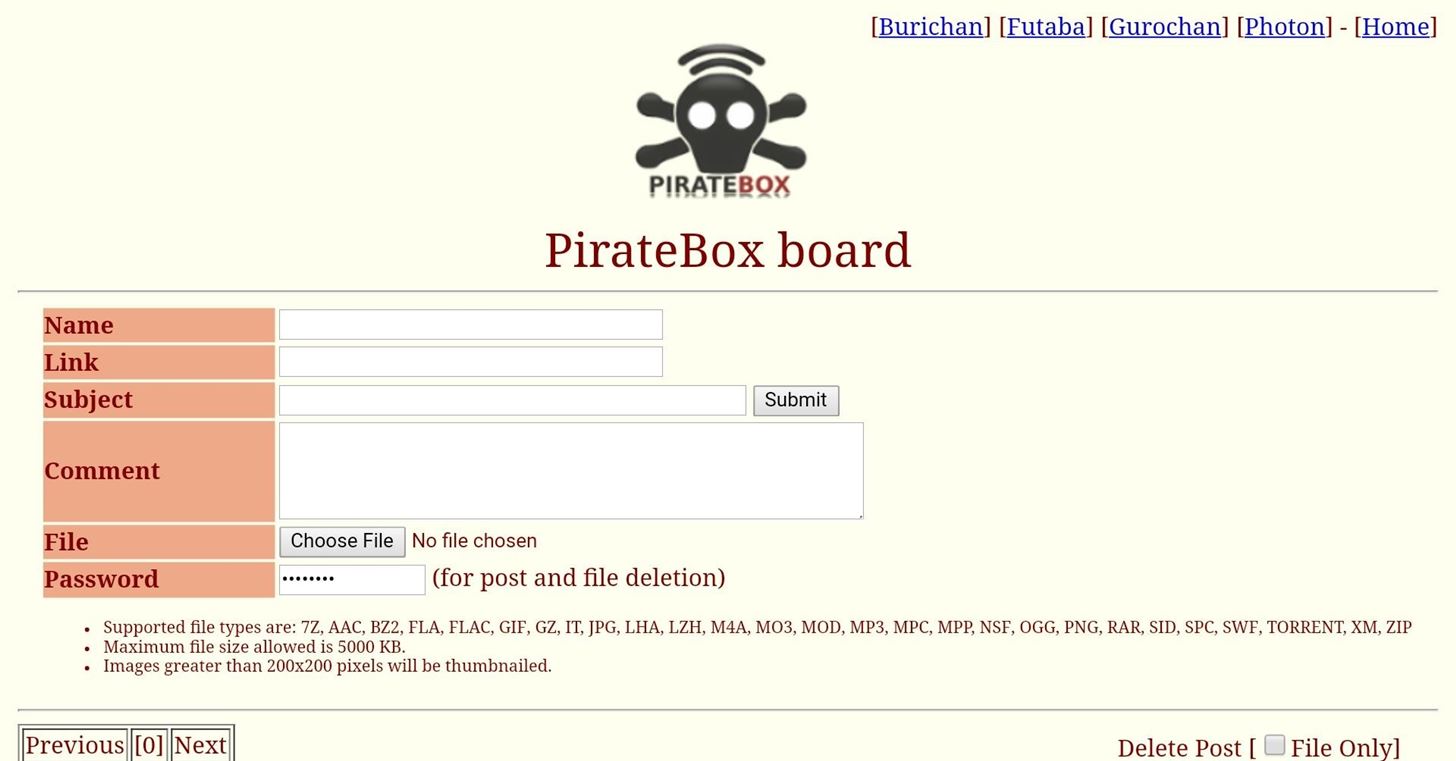
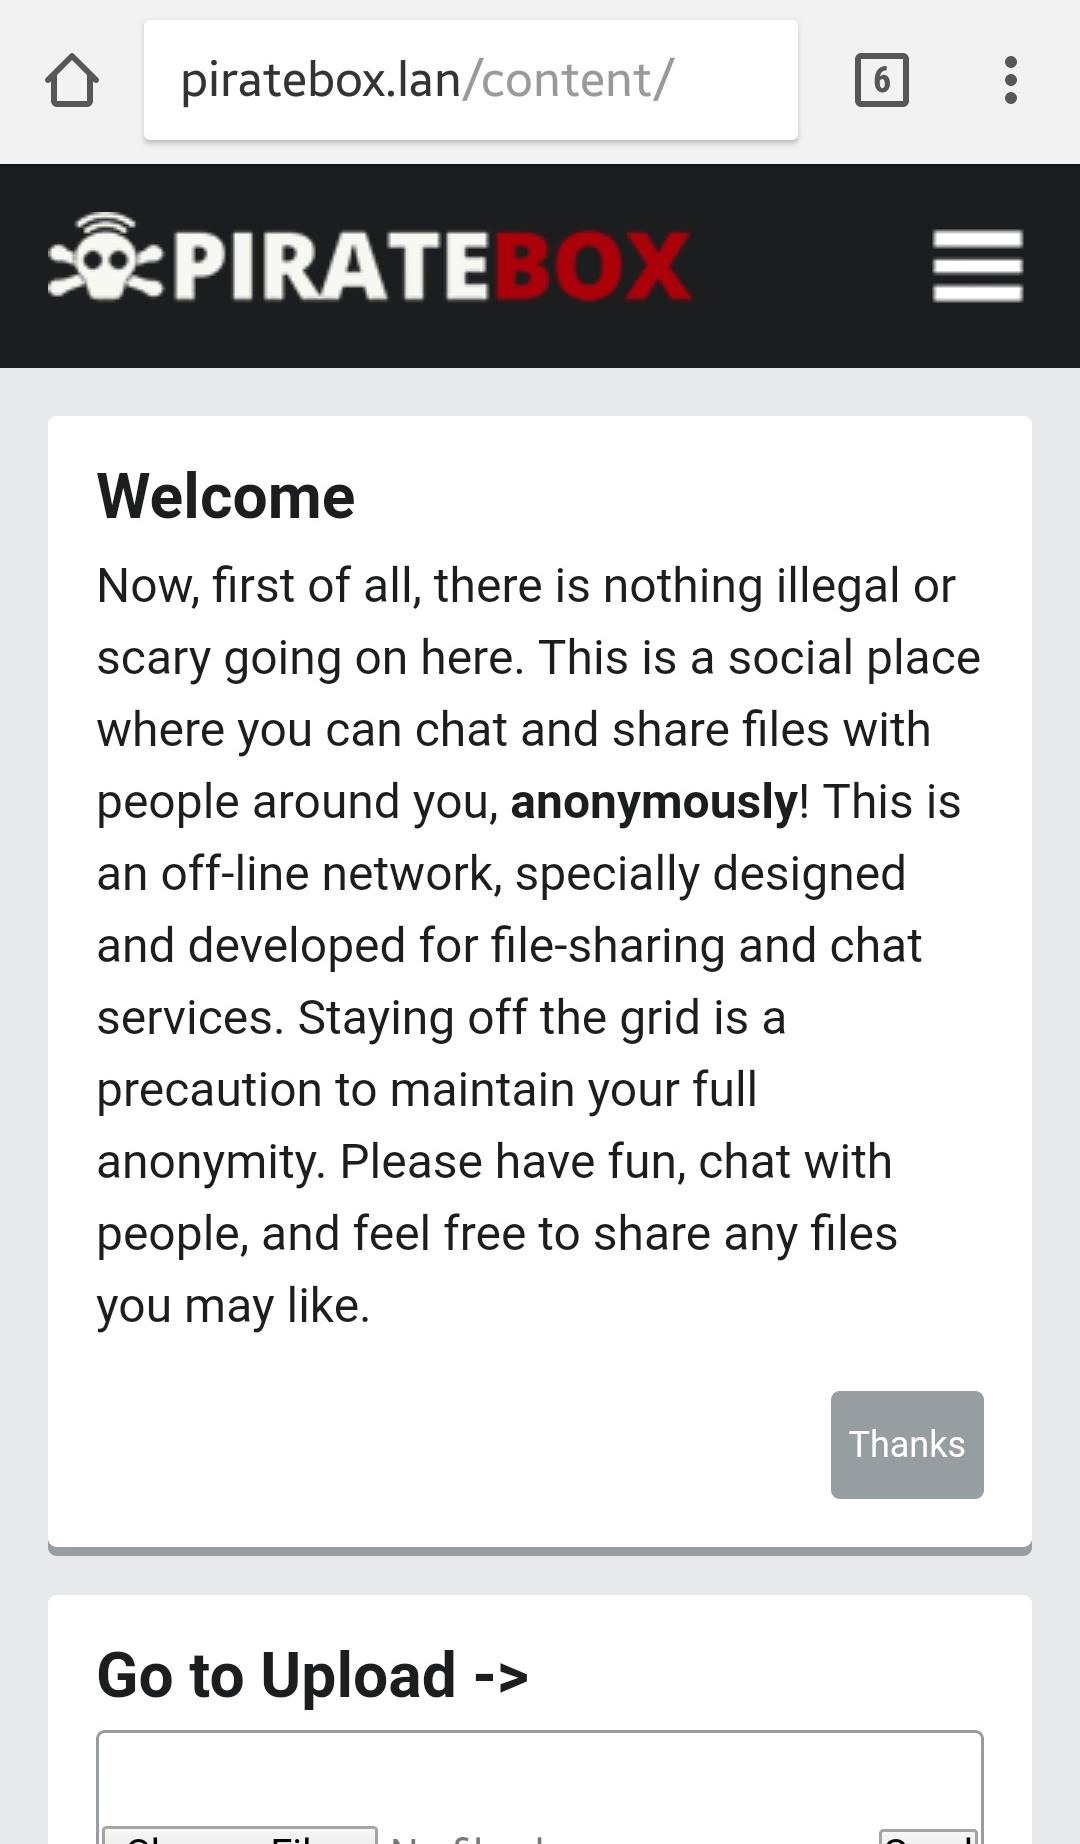
Now our PirateBox access point is available!

Once you connect to the PirateBox AP, open your browser and try to go to any page. It should throw you back to the PirateBox landing page. After you connect wirelessly, you can disconnect the Pi from the Ethernet connection, unless you need to update it. The Pi is now a functional PirateBox!
As you can see below, it claims the disk space is pretty full. This is because it is using the root folder and not putting anything in our USB. Let's change that.
Step 4: Configure the PirateBox
Now that we have the PirateBox up and running, we need to customize it. We can start by solving our storage issues. To do this, we need to tell the Pi to use the USB with the following command.
sudo /opt/piratebox/rpi/bin/usb_share.sh

We trust you have received the usual lecture from the local System Administrator. It usually boils down to these three things:

    #1) Respect the privacy of others.
    #2) Think before you type.
    #3) With great power comes great responsibility.

[sudo] password for alarm:
## Adding USB share...
## Moving files...

OK. File last modified 1010 minutes ago. Updating now...
<html><body>ok</body></html>
It will prompt you for a password, which you will have changed earlier because you're a good little hacker. Use that new password (or alarm if you didn't change it) from now on when it asks you for a password. Then, we are ready to get our very own discussion board working by running the command below.
sudo /opt/piratebox/bin/board-autoconf.sh
[sudo] password for alarm:
Imageboard admin password:
Next, switch on the timesave functionality with this:
sudo /opt/piratebox/bin/timesave.sh /opt/piratebox/conf/piratebox.conf install
[sudo] password for alarm:
initialize timesave file
Remember MAY have to cron active...
  on OpenWrt run: /etc/init.d/piratebox enable
And then this:
sudo systemctl enable timesave
Created symlink /etc/systemd/system/multi-user.target.wants/timesave.service -> /etc/systemd/system/timesave.service.
Finally, we can activate the UPnP Media Server, and we're finished setting everything up.
sudo cp /etc/minidlna.conf /etc/minidlna.conf.bkp
sudo cp /opt/piratebox/src/linux.example.minidlna.conf /etc/minidlna.conf
sudo systemctl start minidlna
sudo systemctl enable minidlna
Created symlink /etc/systemd/system/multi-user.target.wants/minidlna.service -> /usr/lib/systemd/system/minidlna.service.
Step 5: Load Her Up & Connect
It's up to you how you use your PirateBox. Take it to help organize a peaceful protest, help incarcerated youth get a better education, or use it around your Dungeons & Dragons table to share documents. Be creative! From now on, you can connect to its Wi-Fi network and SSH with:
alarm@(replace with Pi's IP address)Just remember to safely shut down your PirateBox with:
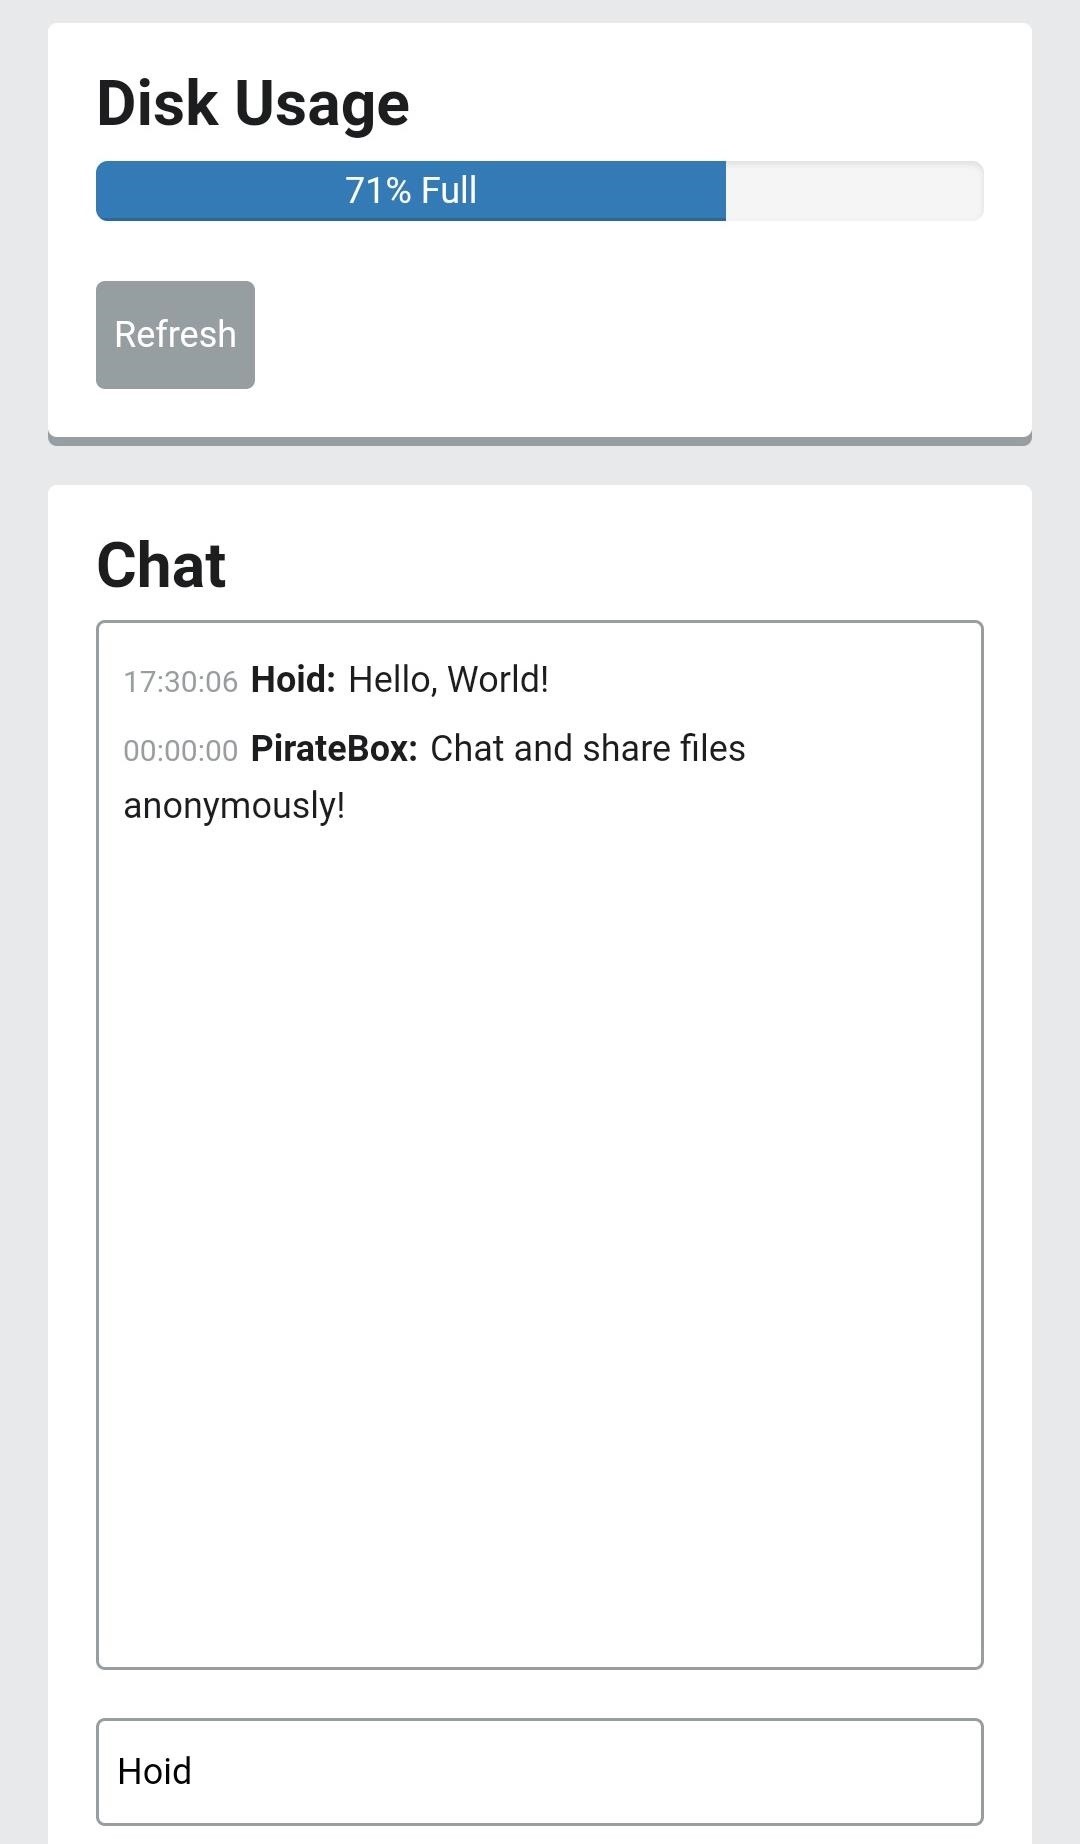
sudo shutdown -h nowAll other users need to do is open up their Wi-Fi settings on their device, connect to the PirateBox, and then open up a browser window which will automatically direct them to the PirateBox's homepage where they can use live chat, the forum, and file-sharing features.
That's all for now. If you make a PirateBox or have any questions, please share and comment below.
Just updated your iPhone? You'll find new emoji, enhanced security, podcast transcripts, Apple Cash virtual numbers, and other useful features. There are even new additions hidden within Safari. Find out what's new and changed on your iPhone with the iOS 17.4 update.


12 Comments
How far can the signal go on this thing? This thing is only as good as it's signal strength, no?
Correct, signal strength is important and the Pi only uses a chip antenna. The stock range isn't going to be super great. I haven't done a lot of testing with the range but I would expect to start running into trouble after 10-15 meters or a room or more away. For some setups that would be fine e.g., if you set a small area like a coffee shop or park bench as a wireless dead drop. If you want to improve the range you can hack the Pi to add an external antenna or use one of these WiFi dongles.
Very good article and tutorial! Is the live chat available for mobile devices? For instance, in an area with no reception, could two smartphone users connect to this dead drop and communicate via the live chat?
If so, can users of the chat the names of every connected user? Looking forward to building this for my neighbors and I. Thanks!
Thanks, I'm glad you enjoyed it! Yes, live chat is available for mobile devices, the page is even mobile friendly.
You set your name as anything you want to and change the color of the text when you send the message.
And yes after you have set it up you can use it anywhere that you can give it power, from a battery or the grid. For example, I've used it with a small USB battery pack while camping with friends and we left messages for each other and exchanged pictures on it.
I hope that answers all of your questions if you have any more just ask.
Thank you for this prompt response. Yes, I imagine it can add a techie twist to camping/travel adventures. Can't wait to give this a try!
Will it be possible to use this as a web server? I have created a photo album using html and javascript and can use the browser on my pc for viewing it, but I would like my wife to access it from her iPad. The browser on the iPad seems to be unable (or blocked) to access local files, so it is necessary to host the files on a web server.
Yes, I believe you can modify it to do that. If you SSH in then cd /opt/piratebox/www/ you will find the "index.html" file there and you could try to change that to the html code for your page. There is also a video on editing the landing page. But, I don't have any experience doing that. I'd recommend going to the pirate box forums under mods and themes the people there will likely be able to provide more helpful answers.
Thank you for the references. On my pc this was easy because I just put all my files under the /var/www/html directory (linux). The total size is over 65 GB however, so I presume on this device I will have to locate it on the USB attached flash disk and manage to redirect the document root there.
Yeah, if it's 65 GB you need to either use a very big micro SD card or an equally large USB. If you use a large micro SD then you may be able to just do it all within the root directory like on your Linux system.
Is there a way to easily change the name of the AP and/or add a password?
It's too bad the software isn't available for pi zero anywhere else. The torrent isn't getting any activity.
I followed the doc but unfortunately get blank white screen on web browser on both Mac and Android phones. I can connect and use the Android Intercom app and communicate with no issues.
Share Your Thoughts