

Shodan calls itself "the search engine for internet-connected devices." With so many devices connected to the internet featuring varying levels of security, the special capabilities of this search engine mean it can provide a list of devices to test and attack. In this tutorial, we'll use Python to target specific software vulnerabilities and extract vulnerable target IP addresses from Shodan.
Any device connected to the internet must reveal some sort of information regarding itself. This can be relatively limited, as clever system configurations can block most undesired requests. On some devices, one might be able to scan ports to reveal things such as the services running on a web server or the name of a webcam connected to a wireless network.
In "eps3.0_power-saver-mode.h," the first episode of the third season of Mr. Robot series, the titular character, played by Christian Slater, uses the Shodan search engine in order to gather information about his corporate advisory, Evil Corp. Tyrell (Martin Wallström) and Angela (Portia Doubleday) are at his side, watching in disbelief, as Mr. Robot, the shadow personality of Elliot (Rami Malek), does an "Apache Tomcat" search.

A search like the one used in the show can reveal essential information about a potential target. Using this same technique, we'll look at exactly what can be found using Shodan's search function and how it can be used to execute a hack.
Step 1: Using Shodan
Shodan can be accessed like most other search engines, by navigating to shodan.io in a web browser.

Rather than using traditional search terms to search the content of a publicly indexed website, when searching Shodan, we'll generally look for the information found in device headers or other information besides the device's HTTP web content, which is indexed by traditional search engines.
In Mr. Robot, the titular character searches the string below.
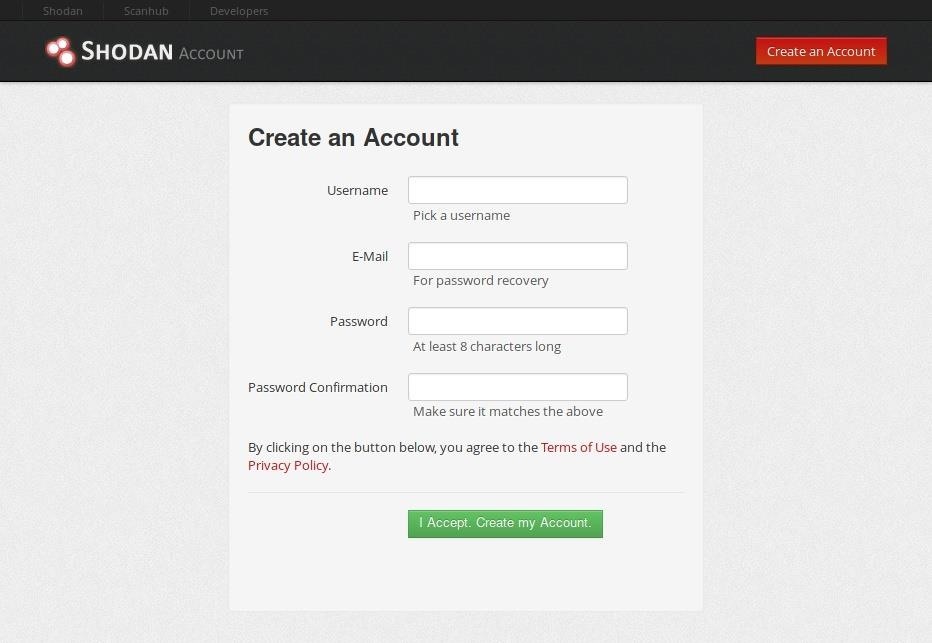
org:"Evil Corp" product:"Apache Tomcat"While we could search this same search command, the fictional company Evil Corp. most likely will not return any results (or will it?!). The second component of the string, the "product" filter, is still a functional and useful search. This search string does require usage of filters, an option only available to registered users. A Shodan account can be registered by clicking on the "Login/Register" button at the top right of the homepage or by visiting account.shodan.io/register directly.
After a Shodan account is registered, a number of additional search capabilities will become available in the form of filters. Some of these filters are shown in the list below.
- country: filter to a specific country
- city: filter to a specific city
- geo: filter by coordinates
- hostname: look for a matching hostname
- net: limit to an IP/prefix
- os: filter based on operating system
- port: filter based on open ports
These filters can be applied using the same format as in the example used in Mr. Robot, where the filter is included in the search followed by a colon and the search term. The format shown below can be used for any of the filters available within Shodan.
filter:"Keyword"In this example, "filter" would be the name of the filter used, and "Keyword" would be the search term which is sought within the filter's category. Multiple filters can be applied, so long as they are separated by spaces.
The "Apache Tomcat" search, as shown in the show, will indeed return legitimate results when used on Shodan. We can test this by searching the string shown below.
product:"Apache Tomcat"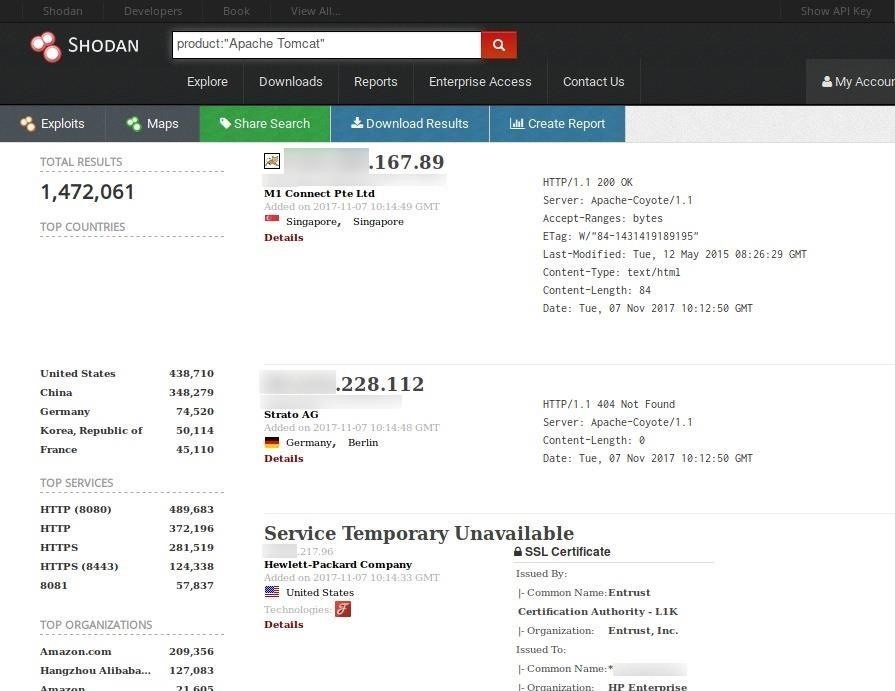
After searching, we can see that over 1.4 million results are returned. This search provides some interesting data regarding the locations and organizations which are using Apache Tomcat, but to a hacker, these results can have a different sort of utility.
An attacker might specifically search for servers or web-connected devices using out-of-date software with known vulnerabilities in order to find devices to exploit. This process could be completed manually by copying results from a Shodan search in a web browser and choosing addresses to attack manually. However, the process can also be automated by using scripting languages and Shodan's API, which is something Mr. Robot did not show.
Step 2: Retrieving a Shodan API Key
In order to use Shodan's API to directly request and receive data while bypassing the web interface, we'll need to use our API key. This API key can be retrieved by navigating to the "My Account" section of the Shodan website, linked at the upper right of the homepage or simply by opening account.shodan.io.
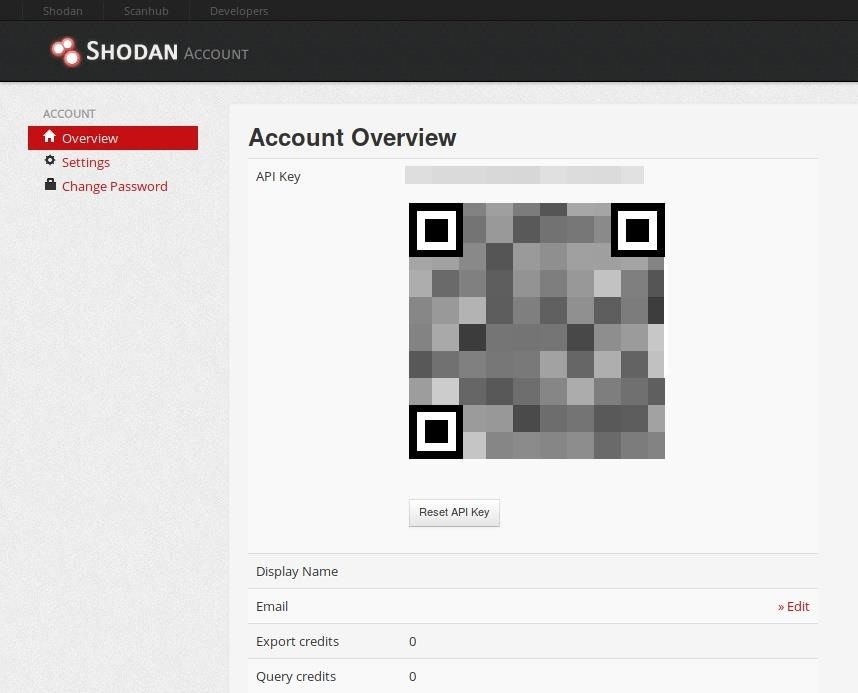
This key will be inserted into the Python code used to make API calls, so it may be useful to copy it to your clipboard or save it to a file.
Step 3: Calling the Shodan API with Python
In order to use Python to make requests using the Shodan API, we'll need to have a functional Python environment as well as the Shodan Python module installed. In the examples used in this tutorial, Python 2.7 is used. Python 3 also works using the module but would require a number of syntax changes to be functional with the scripts shown in this tutorial. On Debian-based Linux operating systems, Python 2.7 can be installed by opening a terminal emulator and running the command below.
~$ sudo apt-get update && sudo apt-get install python2.7
With Python installed, we can also install the Shodan Python module. This can be done using pip or by using Easy Install. Pip can also be installed using apt-get with the command below.
~$ sudo apt-get install python-pipAfter pip is installed, we can use pip to install the Shodan Python module.
~$ sudo pip install shodanIf you have multiple versions of Python present on your device, and potentially multiple versions of pip, you may need to specify you wish to install the module for Python 2.7 by using the command below instead, with pip2.7 specified.
~$ sudo pip2.7 install shodanIf neither of these techniques succeed, the library can also be installed by running the command below.
~$ easy_install shodanOnce Python and the Shodan library are installed, we can begin writing a new Python script. On the Linux command line, we can create a new file and begin editing it using nano. Be sure to choose a filename other than "shodan" so that there are no conflicts between referencing the library and the script itself. Below, we'll create a file called "search.py."
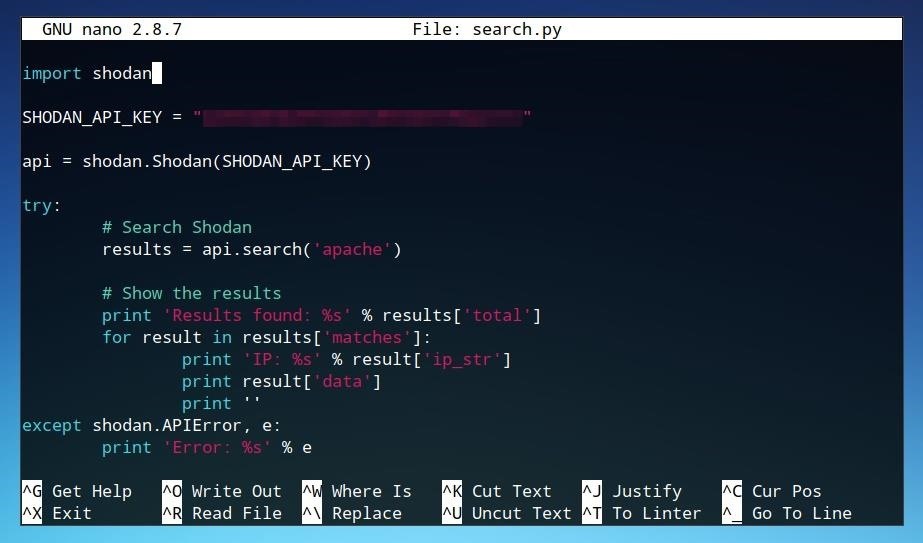
~$ nano search.pyThe first thing we'll want to add to this file is a line which will load the Shodan library. We can use the import function of Python to do this, as seen below.
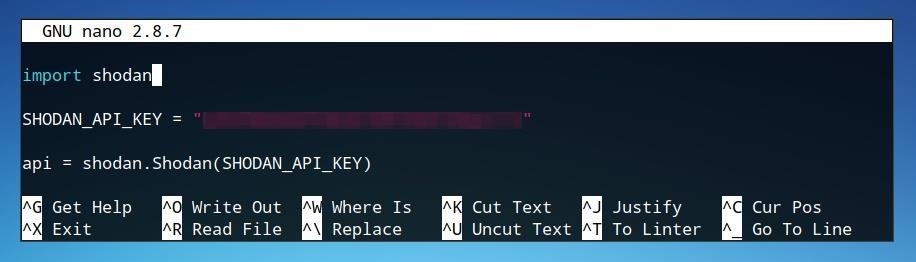
import shodanNext, we can define our Shodan API key so that the script can use it to make API queries. Add the following lines to do so.
SHODAN_API_KEY = "insert your API key here"

api = shodan.Shodan(SHODAN_API_KEY)
Replace "insert your API key here" with your API key retrieved from Shodan's website, leaving the quotation marks enclosing the field.
Next, we can use a try declaration to define what the script should attempt. Following this, we can add a command which uses the api.search unit of the Shodan API to actually request a search's results.
try:
        # Search Shodan
        results = api.search('apache')
In this example, the search string is simply apache, however, this can be replaced with any search desired, including searches with filters such as those shown earlier in the tutorial. We can return the results of this search using the set of print commands shown near the end of the code below.
# Show the results
print 'Results found: %s' % results'total'
for result in results'matches':
print 'IP: %s' % result'ip_str'
print result'data'
print ''
except shodan.APIError, e:
print 'Error: %s' % e
The script should now appear similar to the code displayed in the image below. More information on the Shodan API and this code can be found at its documentation page.
The script can now be saved and tested. Within nano, we can save the script with Ctrl+O, and exit nano with Ctrl+X. From within the same directory, we can run the script using the command below.
~$ python2 script.pyRunning the script should return a number of IP addresses and some information associated with them, including HTTP status, location, and other device information indexed by Shodan. This information is formatted very similarly to the data shown when searching within the web interface.

While this additional information may allow for additional criteria to be processed by other scripts and tools, if one wished to automate the process of gathering and testing attacks against IP addresses, this format is largely unnecessary.
To only return IP addresses, we can change the formatting of our Python script. First, we can remove the IP: prefix from the line shown below.
print 'IP: %s' % result'ip_str'Such that it looks like this line instead:
print '%s' % result'ip_str'We can also delete the line which precedes it, and the two lines which follow it.
print 'Results found: %s' % results'total'
print result'data'
print ''
The script should now appear like the one shown below.
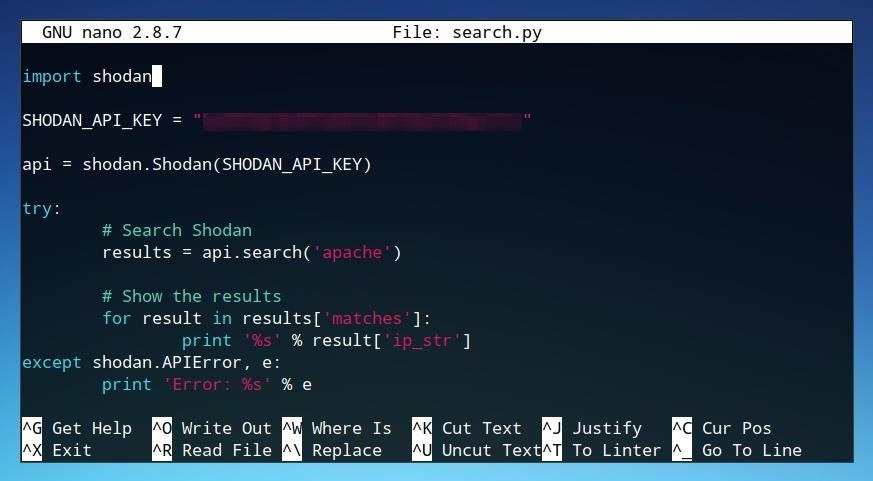
When we run this script, it will instead return a list of IP addresses without any other unnecessary content.

This list is much more useful for automating attacks against the list, but we need to have an effective way to save it. We can use shell operations in order to send the output directly to a log file. When running the script, include the >> operator followed by the name of the file you wish to send the output to.
~$ python2 search.py >> log.txtNow we have a text file containing a list of IPs which we can use to test various attacks, depending on what search terms we've used to identify particular kinds of vulnerable systems.
Step 4: Automating Tasks with Shodan Results
For an example of a command line utility which can use an IP address as an argument, we'll use ping. Using something which actively attempts to attack or exploit the devices found by Shodan would be illegal and irresponsible, so make sure to only run tools you have permission to use on a target if you're actually exploiting anything. First, we'll create a new shell script using nano the same way we did earlier.
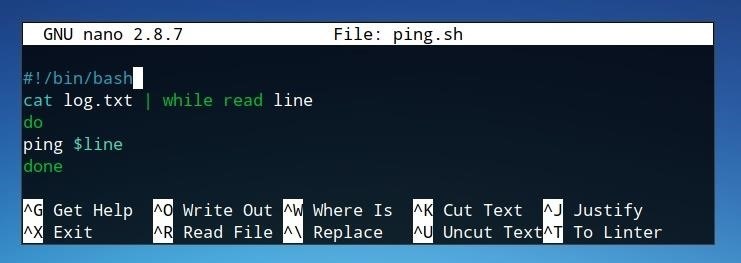
~$ nano ping.shWe can begin the script with the "crunchbang" (the #! symbols) and shell declaration. This states that it is a shell script, to be run by the bash shell.
#!/bin/bashNext, we can add a statement which allows us to do something with each line of our IP list file individually.
cat log.txt | while read line
do
ping $line
done
The script should now look like the one shown in the image below.
We can now save this script with Ctrl+O, and exit nano once again with Ctrl+X. To be able to run the script, we'll need to mark it as executable by our operating system by granting it this privilege using chmod.
~$ chmod +x ping.shNow, we can run the script from the command line.
~$ ./ping.shThe script should iterate through each IP in the address and send a ping to each IP.
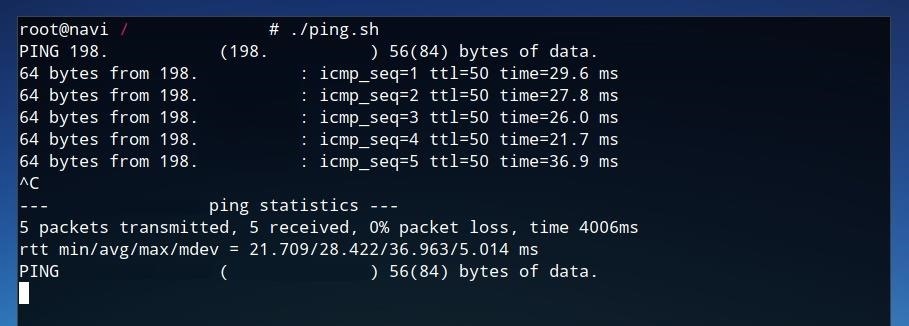
If this works, you've now successfully retrieved Shodan results and individually processed them! Ping is hardly an attack vector, but with a few minor changes, a similar script could be used by an attacker for malicious purposes.
Step 5: Weaponizing the Attack
The string which initiated the "ping" within the shell script would be one easy area to manipulate the action which is done with the IPs retrieved from Shodan. The original Python script could also be updated for more complicated exploits or tests. The basic ping command of the "while" iteration of the shell script is shown below.
ping $lineThe $line variable in this command represents each line of the IP list file, log.txt. We can replace this ping command with any other string which would include an IP address as an argument. We could use nmap to port-scan the target IPs by using the command below, using the -sS argument to conduct a service scan.
nmap -sS $line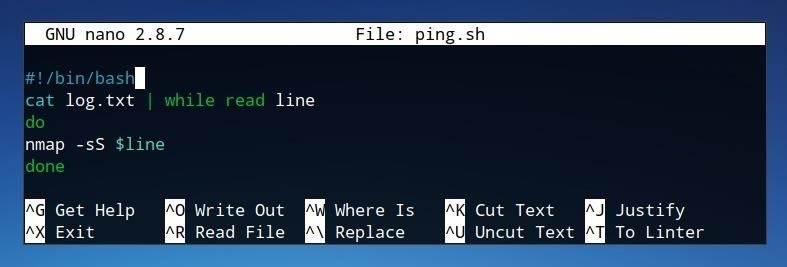
While each internet-connected device has a variety of ways in which it could be indexed by scanning services such as Shodan, one can check the security of their local network and router by checking their external IP at a website like whatsmyip.org and searching this IP on Shodan to see what sort of information is available.
Other Applications
This format could be expanded to practically any other attack which could be launched from a command line and includes an IP. This sort of scanning and attacking of multiple targets is an extremely effective method for discovering vulnerable systems without having to take the time to individually find and attack them manually.
This methodology can be applied to all sorts of different attacks, using Shodan, Python, shell scripting, or other tools, so long as they have the capability of finding devices and attacking them without user input.
I hope that you enjoyed this tutorial on Shodan! If you have any questions about this tutorial or Shodan usage in general, feel free to leave a comment below or reach me on Twitter @tahkion.
Just updated your iPhone? You'll find new emoji, enhanced security, podcast transcripts, Apple Cash virtual numbers, and other useful features. There are even new additions hidden within Safari. Find out what's new and changed on your iPhone with the iOS 17.4 update.


7 Comments
Excellent tutorial! I was able to get everything working by following along and changing some of the syntax to work with Python 3. The only issue I'm running into is trying to search with a filter. For example, the line below throws an error:
results = api.search('os:"unix"')
Does a search without the filter work? Can you post the specific error message if there is one?
My first guess is that the quotation marks within the search string need to have an escape character before them, most likely a backslash. If that is the case, the string would look like the one below:
However, I can't really be sure without the error or the script to test it. Would you be able to test this, and potentially post your Python 3 version of the script?
Hope to get this working for you!
At first I couldn't figure out the Python 3 syntax for this:
So I wasn't getting a specific error message. Once I figured it out, though:
I was able to get the actual error message:
I know, I'm a fool. Thank you for the help.
No worries! It's still strange that you're having an issue with filters though - maybe you ran out of the number of requests for your specific API key?
Either way, glad the script is sorted, seems that now the issue is more with the Shodan account privileges.
Filter For Hacked Website's http.title:"hacked by"
So for me everything has worked fine up until i need to do the ./ping.sh
every time I do this command my terminal always says cat: log.txt: No such file or directory. I was just wondering if anyone knew how to fix this? Just let me know thanks!
Be sure to execute the python script like this:
$ python2 search.py >> log.txt
if this doesnt work, run
$ touch log.txt
and try again with
$ python2 search.py >> log.txt
I am very sure that you may run ping.sh without issues.
Also make sure that all files are stored in the same directory.
:)
Share Your Thoughts