

OpenBSD implements security in its development in a way that no other operating system on the planet does. Learning to use the Unix-like operating system can help a hacker understand secure development, create better servers, and improve their understanding of the BSD operating system. Using VirtualBox, the OS can be installed within a host to create a full-featured test environment.
This extremely secure operating system boasts features with which no other OS can compare. While OpenBSD is often regarded as a server OS, it can also be used on the desktop or within a virtual machine and still offer these same security features to regular users. This can be valuable to a device that stands at a higher risk of being attacked or to anyone who wants greater protection against the possibility of remote code execution exploits such as those found in Microsoft Windows.
OpenBSD is derived from the Berkeley Software Distribution, or BSD, a Unix-like operating system developed initially at the University of California, Berkeley. Theo de Raadt forked OpenBSD from NetBSD in 1995, and the project continues to develop and grow today. The OpenBSD project also maintains several other popular tools, including OpenSSH and LibreSSL.
The OpenBSD development team's focus on security has led to an extensive amount of specific changes to the OS. These modifications include memory protections during compilations to prevent buffer or integer overflow attacks, extensive use of cryptography, randomization of various system signatures, and extensive privilege separation. These factors combine to form an extremely secure operating system for servers and desktops alike. The OpenBSD homepage itself boasts that the system has had "only two remote holes in the default install, in a heck of a long time!"
To test and learn more about the OpenBSD operating system, you can install and use it within a virtual machine, in our case, VirtualBox.
Step 1: Download an OpenBSD Image
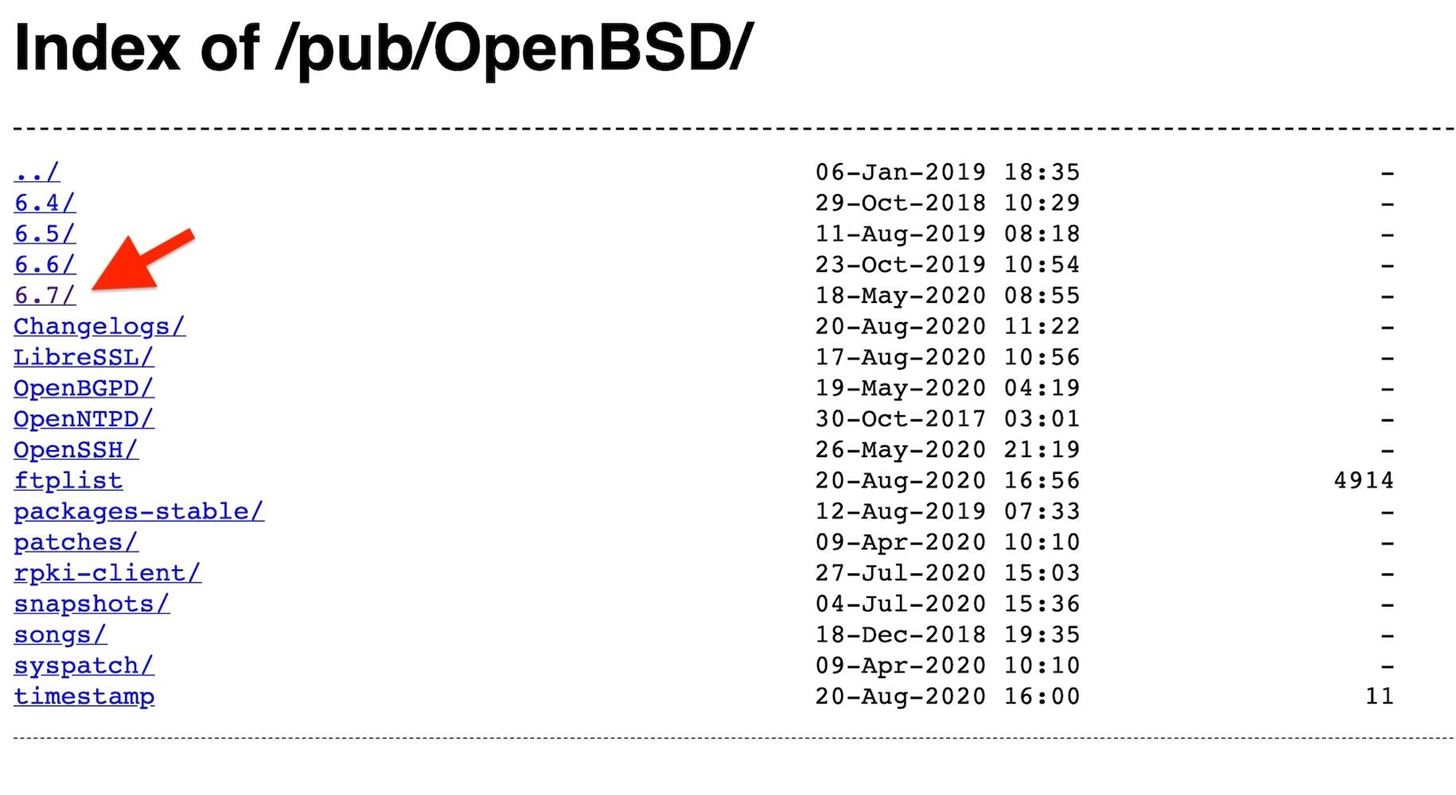
OpenBSD can be downloaded from one of its HTTP/FTP mirrors. Select the location of the mirror closest to your location if you wish for the fastest speed.
Once you've selected a mirror, you will be brought to a page with several directories. To download the most recent disk image, select the highest release number. The "6.7" folder should include the most recently updated version as of August 2020, but if you see anything newer, use that.
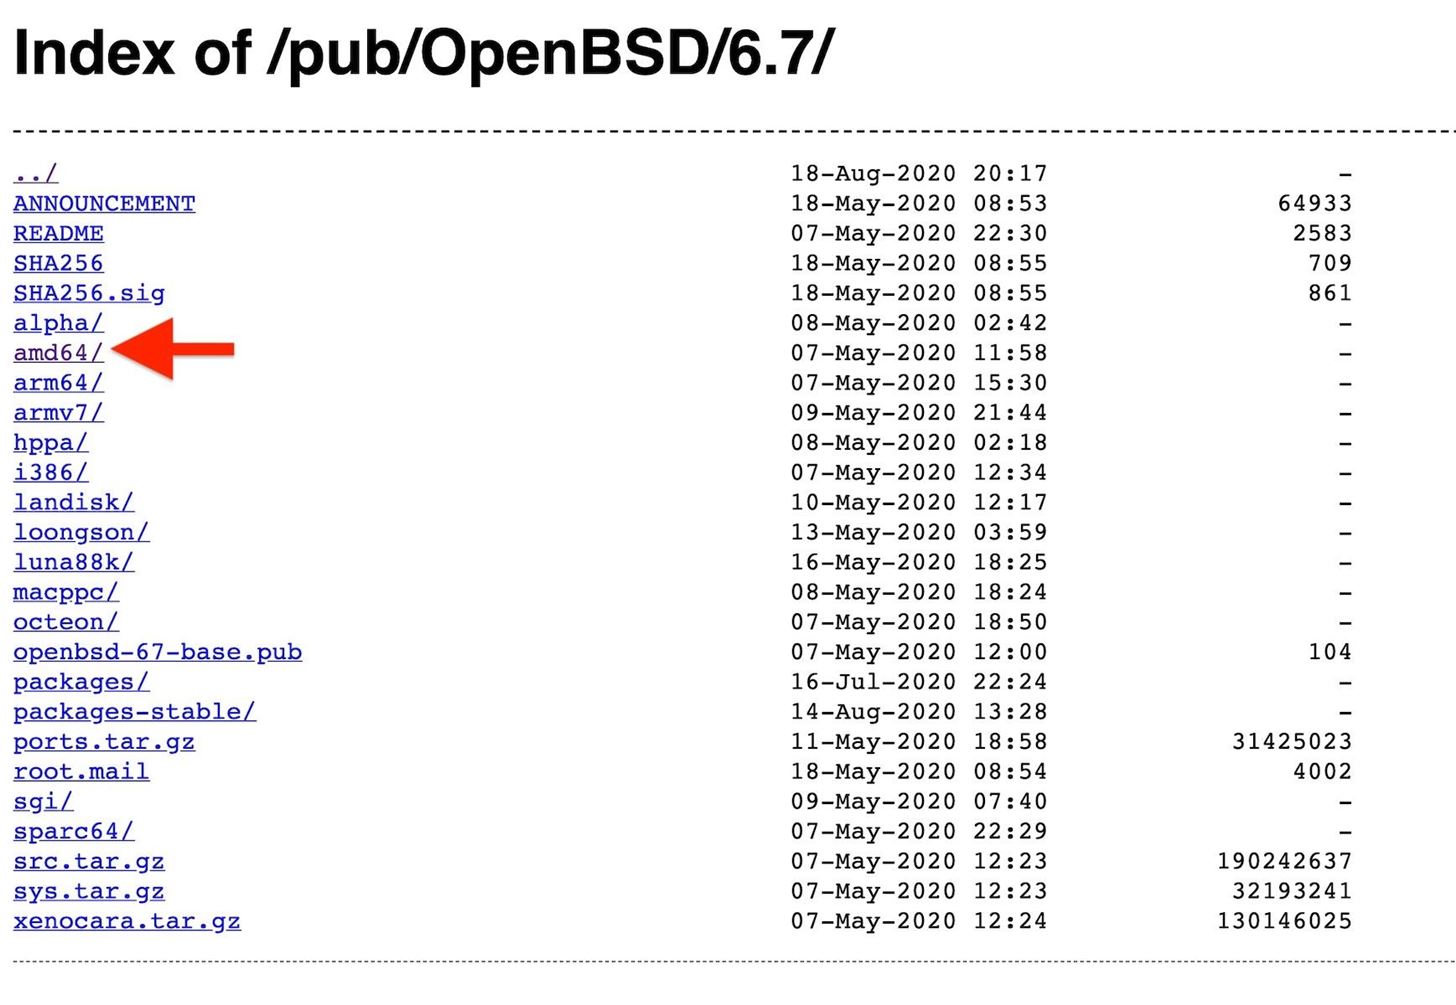
Once in the most recent version directory, there should be subdirectories for different system architectures. For most users, amd64 or i386 images will be the most useful. After selecting a system architecture subdirectory, a number of files will be available for download.
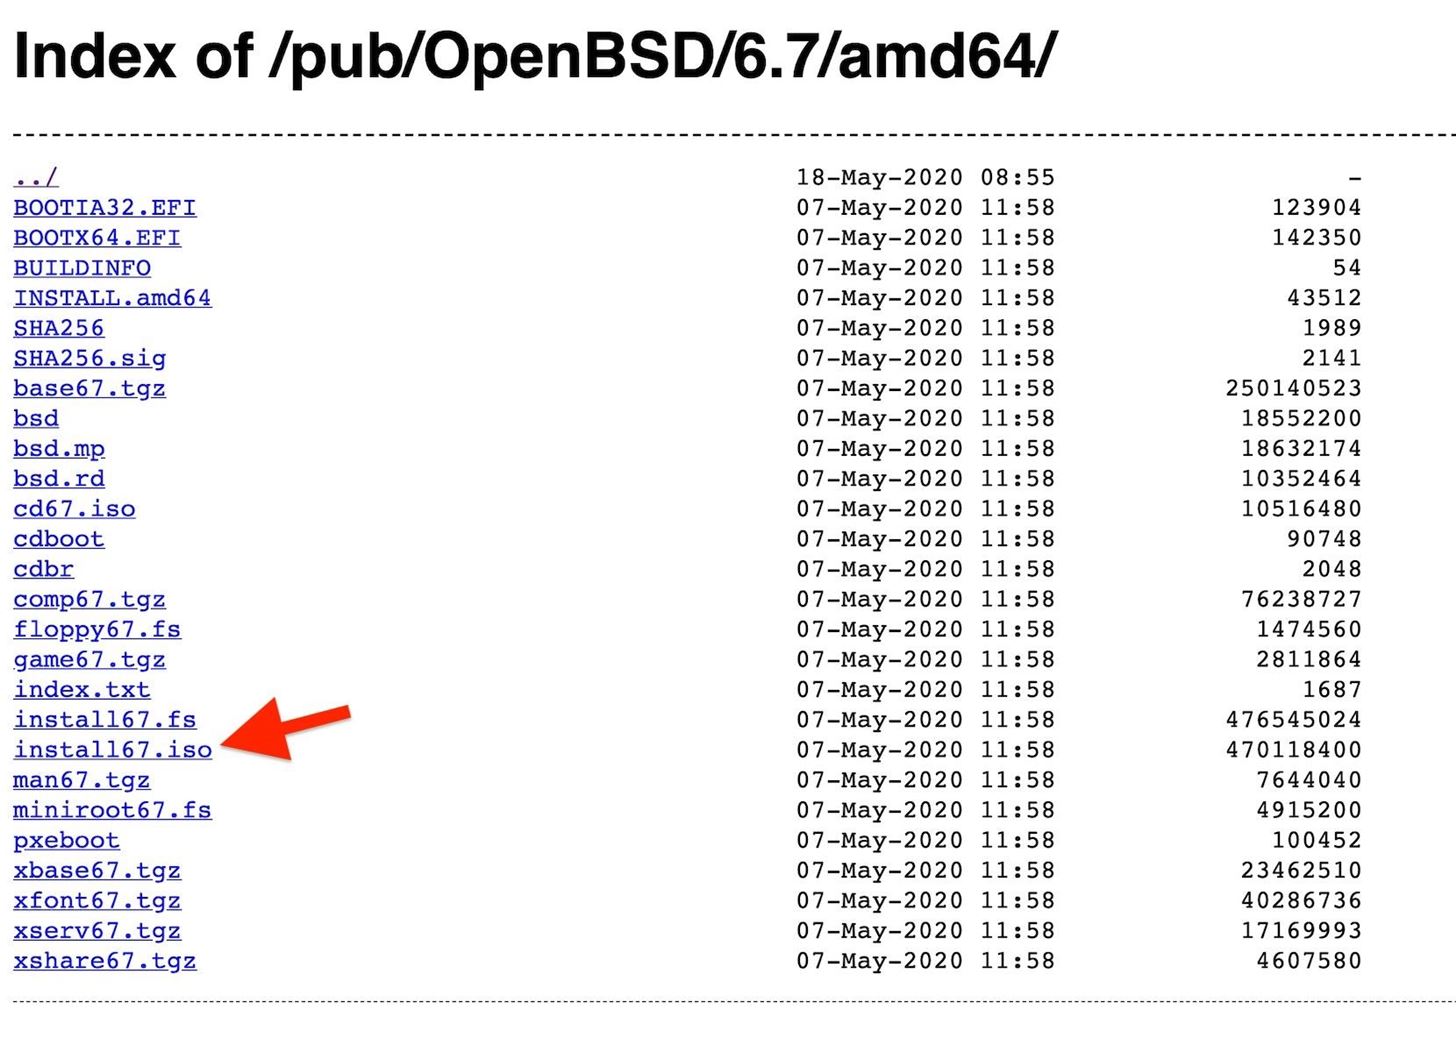
Among this set, the "install67.iso" file represents the installation image for version 6.7 of OpenBSD. Click on this file to download and save it onto your system.
Step 2: Prepare VirtualBox
VirtualBox is one of the simplest virtualization environments for Windows, macOS, and Linux. It can be downloaded from VirtualBox's website, or it can be installed on Debian-based Linux distros like Ubuntu by using apt as in the command below.
~$ sudo apt install virtualboxOnce VirtualBox is downloaded, installed, and opened, click the "New" button at the top of the window to begin creating the new virtual machine.
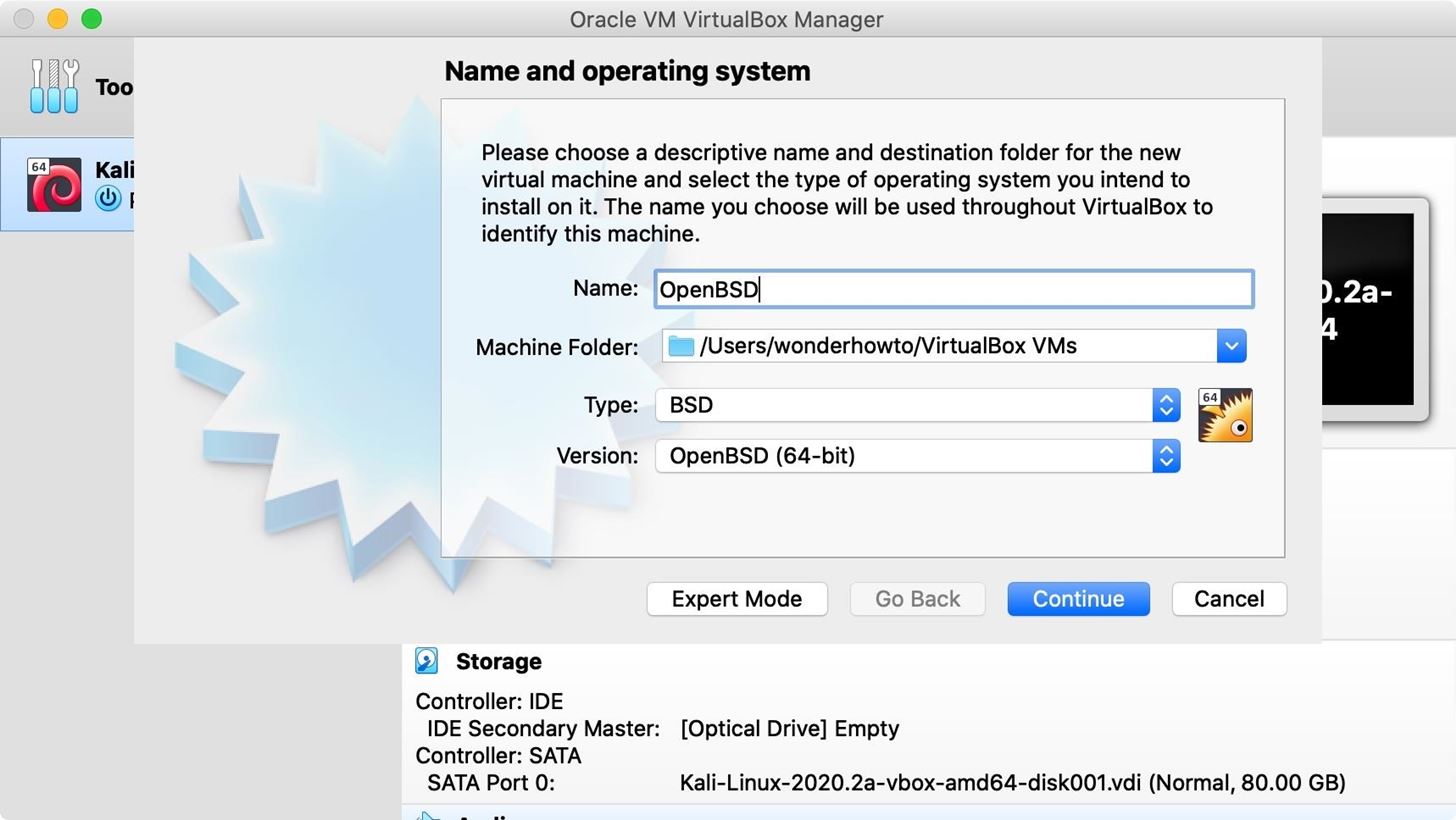
A window will open, requesting a name, type, and version. Typing OpenBSD into the Name field should lead to the automatic population of the following two selections, but if not, set Type to "BSD" and Version to "OpenBSD" 32- or 64-bit, whichever is appropriate for your system. Hit "Continue."
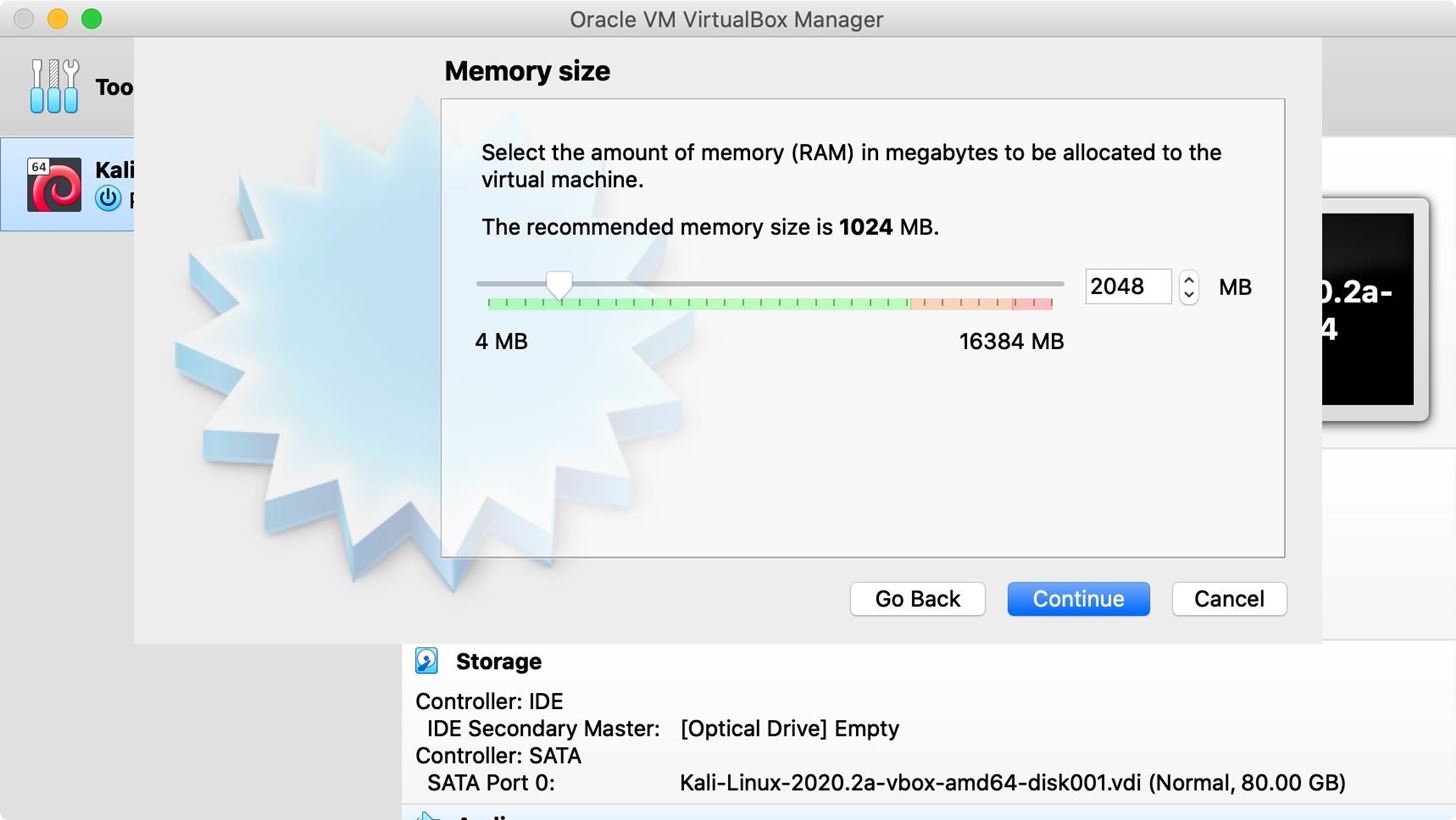
The next portion of the virtual machine configuration is memory allocation. Generally speaking, the more memory one can grant to a virtual machine, the faster the VM will be able to run. The amount of memory one is willing to provide to the VM generally depends on the amount of RAM available on the host machine, shown at the right end of the memory slider bar within VirtualBox. A relatively lightweight operating system such as OpenBSD can function with a limited amount of memory if necessary. Choose your RAM and hit "Continue."
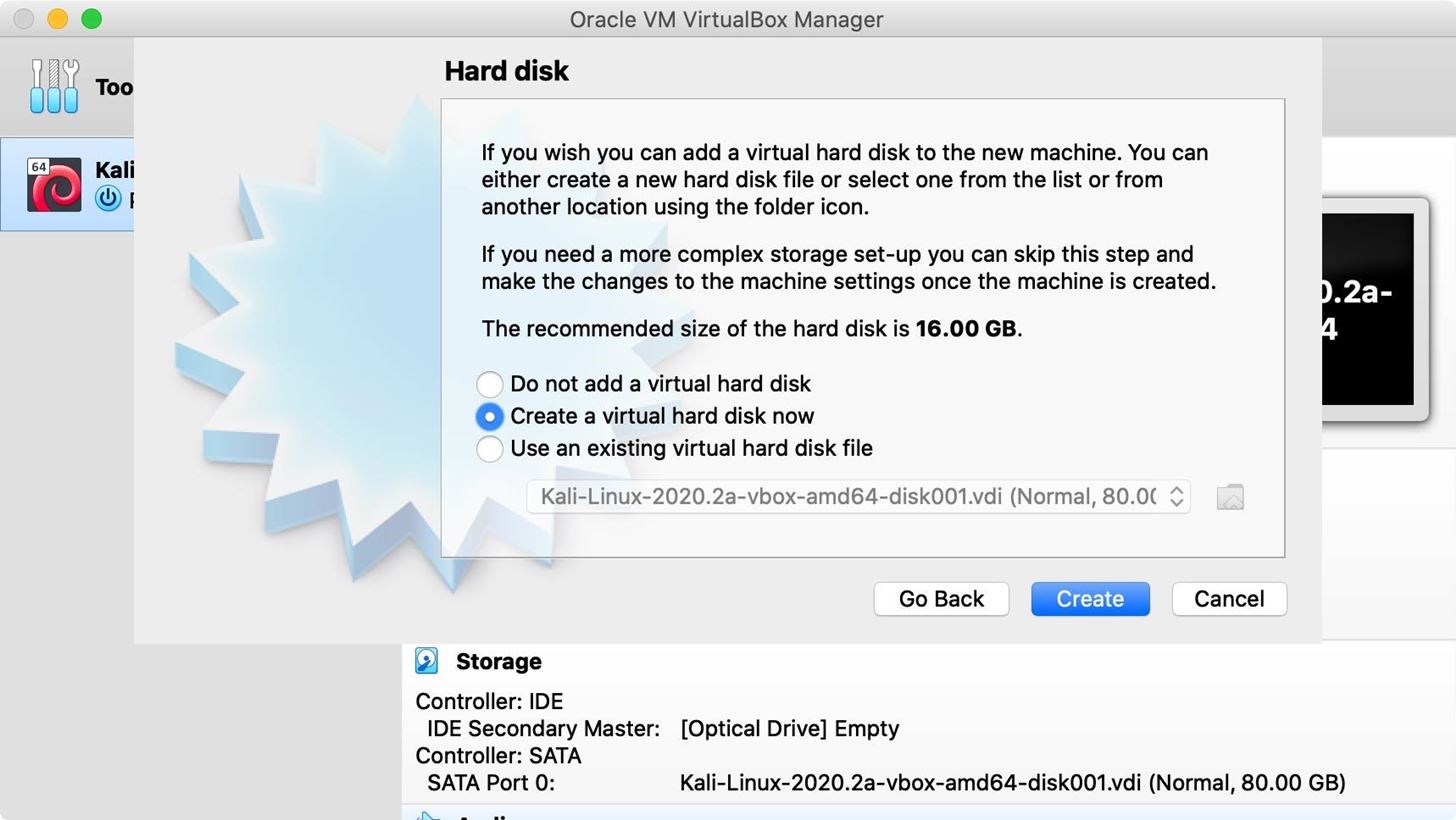
At the Hard disk step, choose to "Create a virtual hard disk now." OpenBSD will need to be installed within the virtual machine, so a virtual hard drive to install this to will be required. Hit "Create."
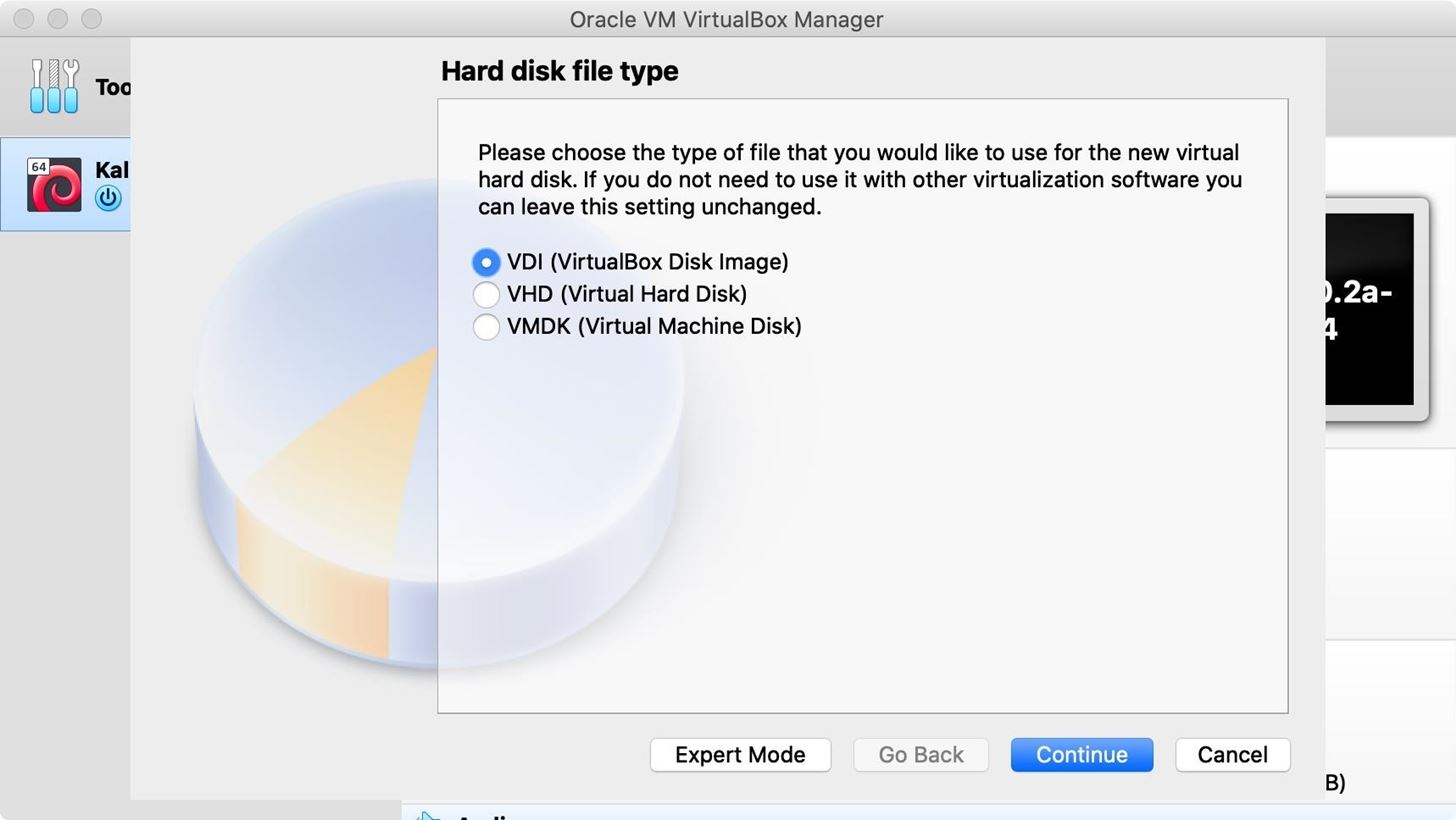
If you have no need to move the virtual machine image between different virtualization tools, it's best to leave VDI selected for the Hard disk file type selection step. Hit "Continue."
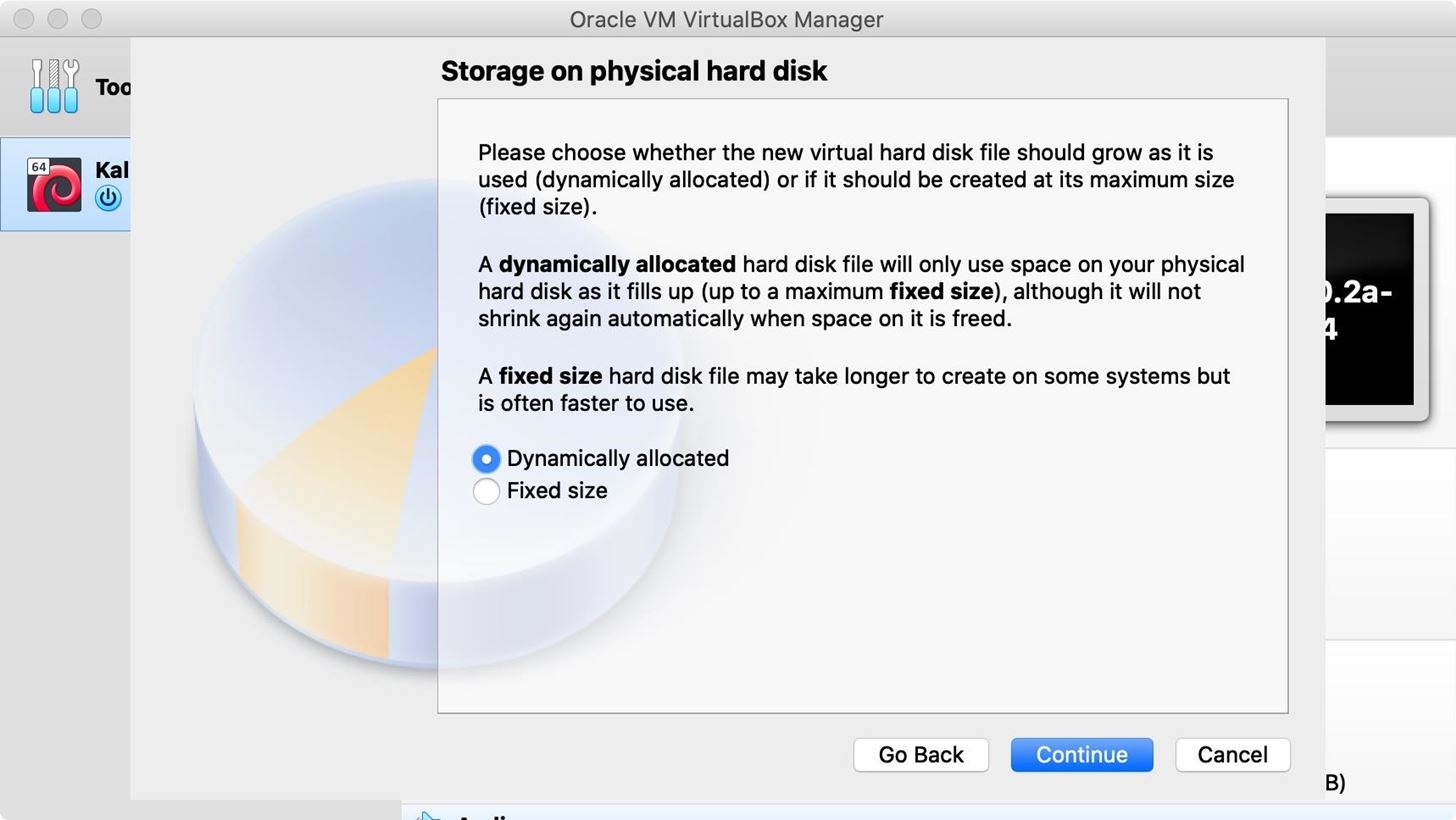
The next selection is between a dynamically allocated or fixed size virtual hard disk. For most users, "Dynamically allocated" is the most simple to use, as it requires the least configuration. Hit "Continue."
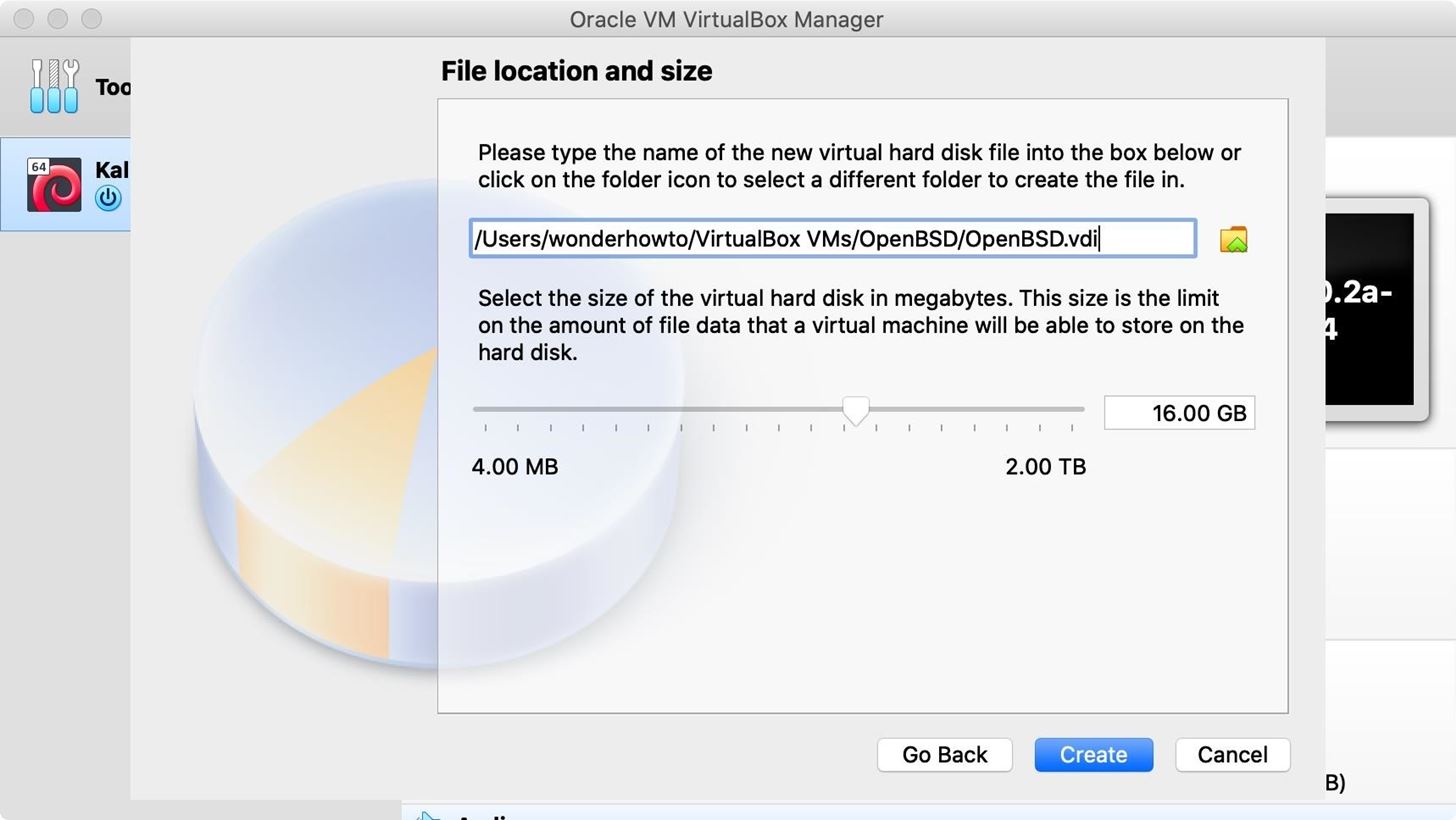
Lastly, the maximum size and storage location of the virtual hard drive can be set. This may be an external hard drive or a specific spot on a local drive. The size is the maximum size to which the virtual hard drive can grow, so if there are considerable size restraints based on hard drive size, it may be worthwhile to limit this amount. The base installation size of OpenBSD will be relatively small, so this limit could easily be set to only a few GB. Choose and hit "Create."
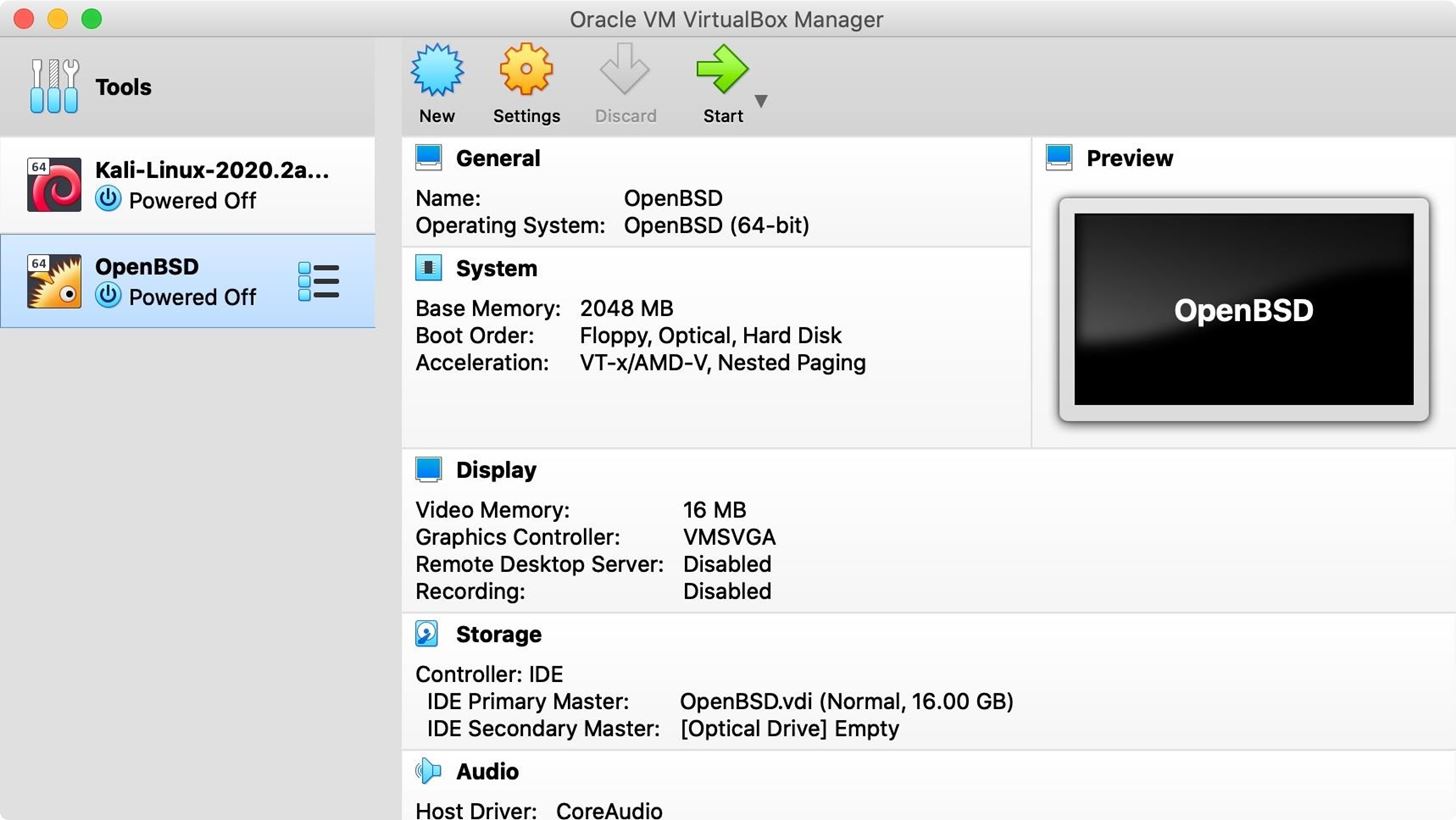
Now the OpenBSD VM should be available from the main VirtualBox menu to be started. To launch it, simply click the "Start" button at the top of the interface while the OpenBSD virtual machine is selected. You can also double-click on it to start it.
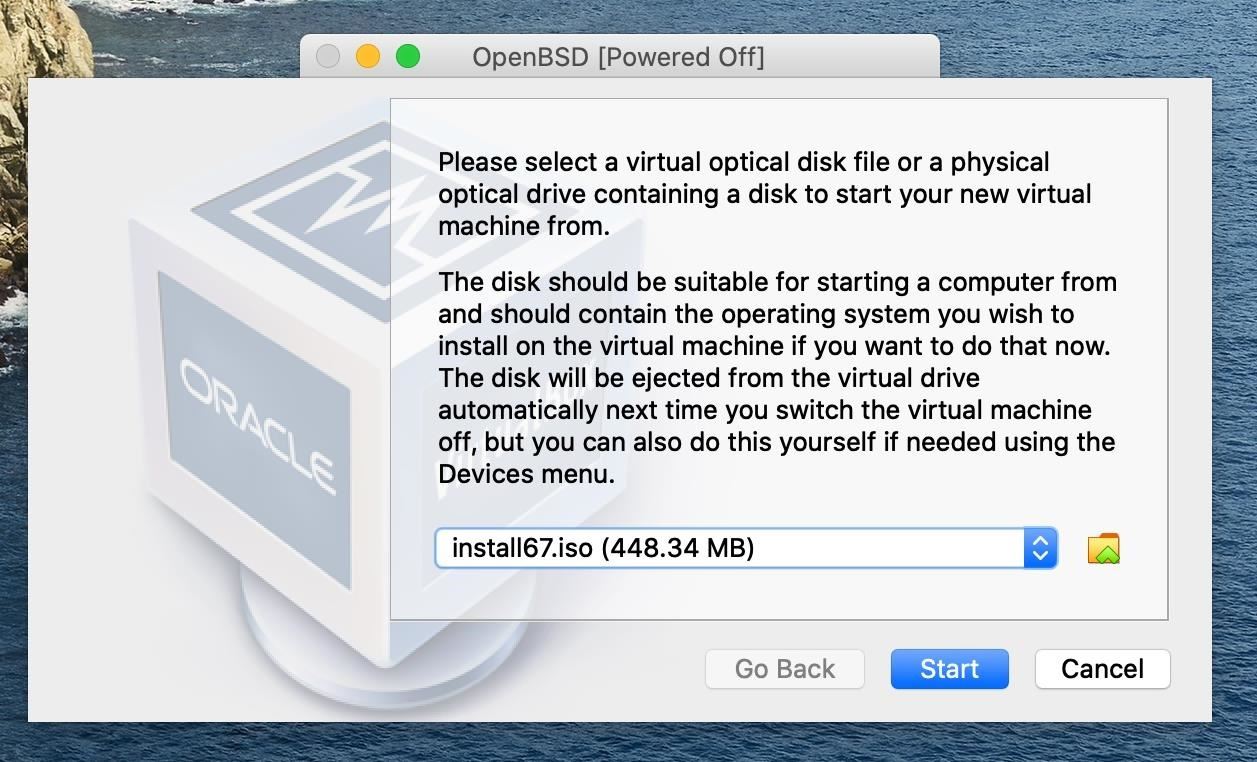
Once the virtual machine is started, it will request a boot medium to start the virtual machine from.
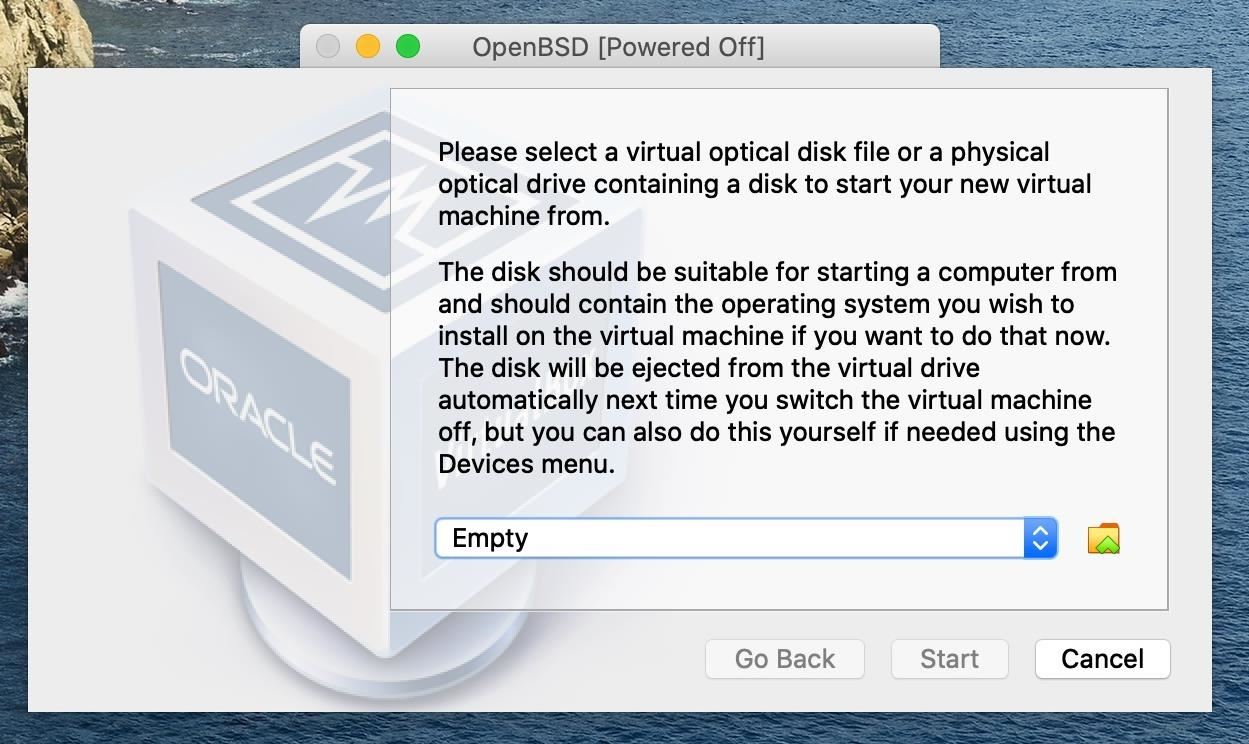
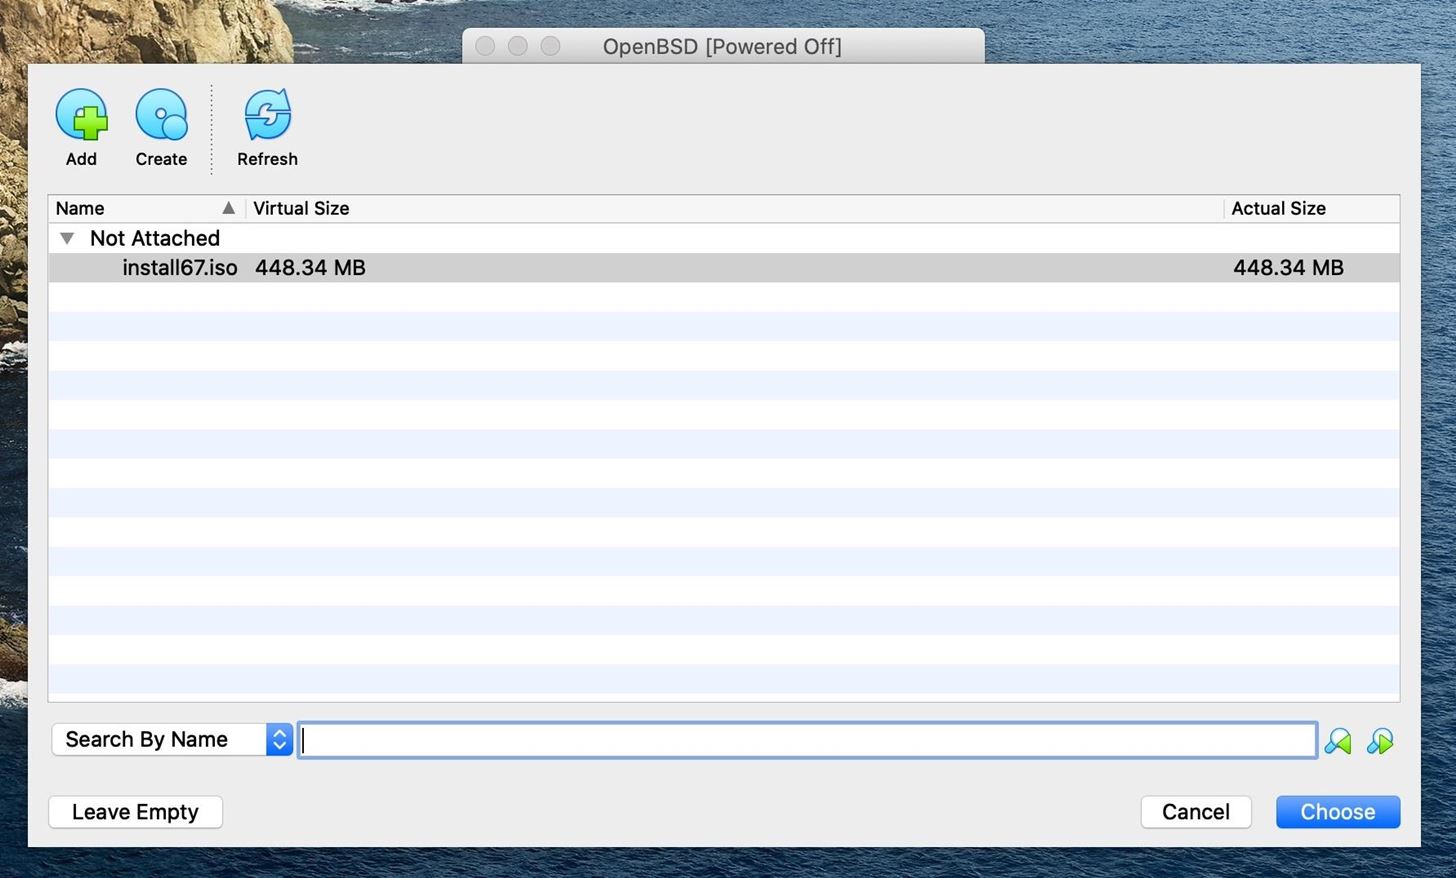
Click on the folder icon to open a file selector. Click "Add," then browse to and select the OpenBSD ISO image downloaded earlier. Click "Open," then "Choose."
Now, click "Start" to launch the virtual machine. The OpenBSD installer should begin to boot.
Step 3: Install OpenBSD
On first boot, the OpenBSD image will load a text-based installer environment, as shown in the image below. To begin the installation process, type i and press Enter.
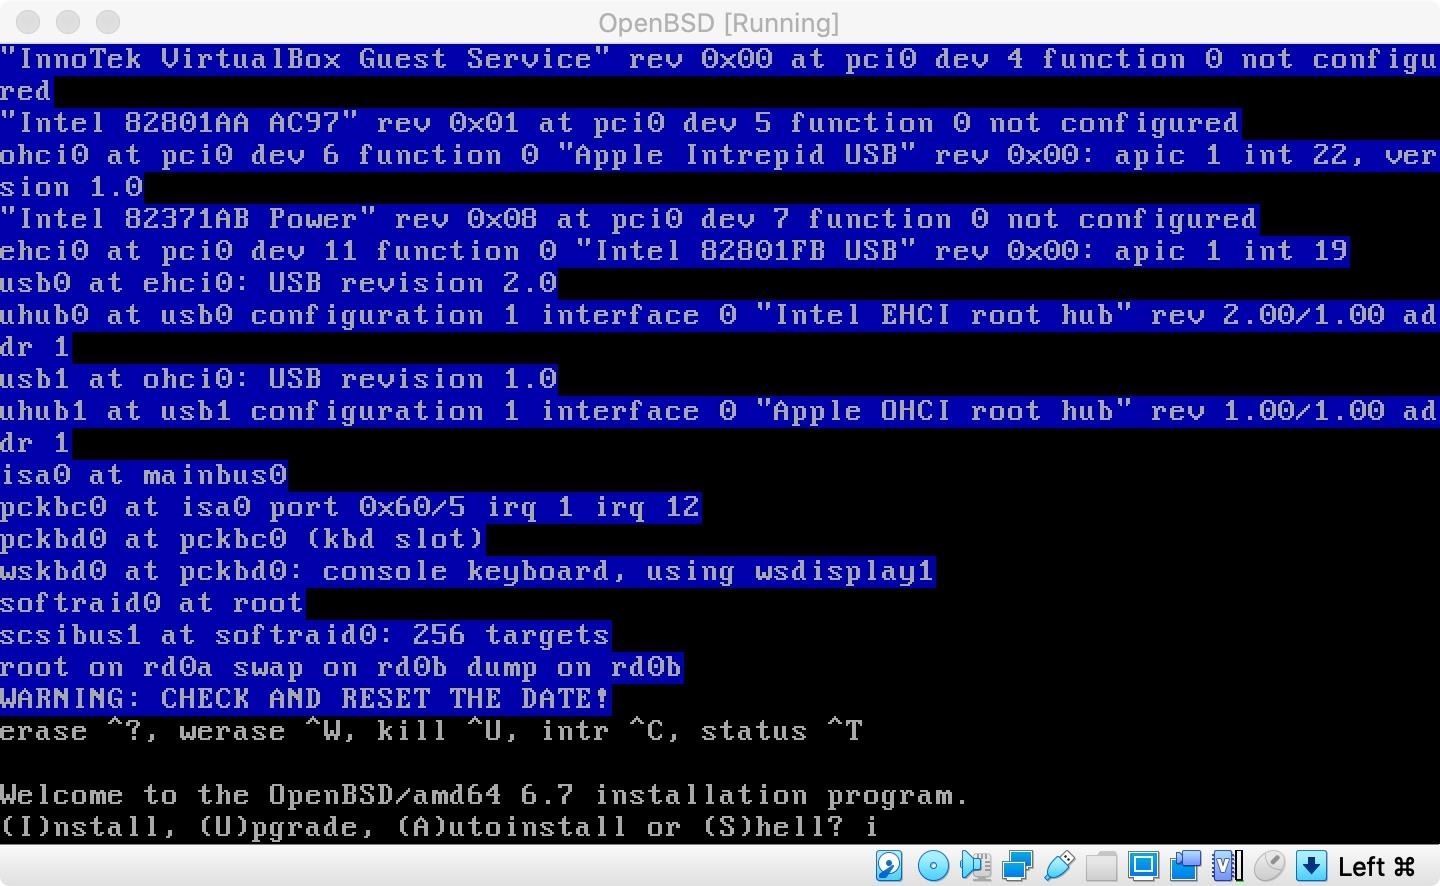
This process includes many questions and configuration options, each of which is explained with a short statement. The first prompt requests the preferred keyboard layout. Type L or ? and press Enter if you wish to list all available options, or simply type us or uk to set the keyboard layout to US or UK English.
At any prompt except password prompts you can escape to a shell by
typing '!'. Default answers are shown in []'s and are selected by
pressing RETURN. You can exit this program at any time by pressing
Control-C, but this can leave your system in an inconsistent state.

Choose your keyboard layout ('?' or 'L' for list) [default] ?

Available layouts: be be.swapctrlcaps br cf cf.nodead de de.nodead dk dk.nodead
ee ee.nodead es fr fr.dvorak fr.swapctrlcaps fr.swapctrlcaps.dvorak hu is is.nodead
it jp jp.swapctrlcaps la lt lv nl nl.nodead no no.nodead pl pt ru sf sf.nodead sg
sg.nodead si sv sv.nodead tr tr.nodead ua uk uk.swapctrlcaps us us.colemak
us.declk us.dvorak us.iopener us.swapctrlcaps us.swapctrlcaps.colemak
us.swapctrlcaps.dvorak us.swapctrlcaps.iopener

Choose your keyboard layout ('?' or 'L' for list) [default] us
Then, give the hostname a name. I'm just going with openbsd.
System hostname? (short form, e.g., 'foo') openbsdThe next questions regard network configuration. Within a virtual machine, the network settings are relatively simple to set. Each option, beginning with Available network interfaces until DNS domain name, can be responded with by merely pressing Enter, as the default network configuration options should be suitable for most users. On a hardware install, it may be worth taking more care when choosing these settings, depending on your network configuration.
Available network interfaces are: em0 vvlan0.
Which network interface do you wish to configure? (or 'done') [em0]

IPv4 address for em0? (or 'dhcp' or 'none') [dhcp]
emo: 10.0.2.15 lease accepted from 10.0.2.2 (XX.XX.XX.XX.XX.XX)

IPv6 address for em0? (or 'autoconf' or 'none') [done]

Available network interfaces are: em0 vvlan0.
Which network interface do you wish to configure? (or 'done') [done]

DNS domain name? (e.g. 'example.com') [my.domain]
Using DNS nameservers at 8.8.8.8 8.8.4.4
The next option, Password for root account, allows one to set the root password. The "will not echo" string denotes that when pressing the keys for the password, it will not be visible, nor will it be returned to the user after entering. The root password should generally be strong, especially for a server or internet-connected system.
Password for root account? (will not echo)
Password for root account? (again)
After entering the root password twice, the installer asks if you would like to start the SSH daemon, or background service, by default. While this is not necessary, it may be useful. To enable it, press Enter.
Start sshd(8) by default? [yes]The following two questions regard the graphical configuration of the system. If you'd like to use a graphical interface, enable the X Window System by pressing Enter. The next question asks if you would like the X Window System to be started by the xenodm login manager. While this isn't necessary, it will make installing a different desktop environment easier, as shown later in this tutorial. To enable it, type yes and press Enter.
Do you expect to run the X Window System? [yes]

Do you want the X Window System to be started by xenodm(1)? [no] yes
Next, enter a name and password for a standard-level user. For security reasons, it's best not to run as the root user, so this user will be used for most standard desktop operations. For most users, it will also be worth denying root SSH login for security reasons.
- Don't Miss: How to Make an SSH Brute-Forcer in Python
Setup a user? (enter a lower-case loginname, or 'no') [no] nullbyte

Full name for user nullbyte? [nullbyte] nullbytehacker

Password for user nullbyte? (will not echo)
Password for user nullbyte? (again)

WARNING: root is targeted by password guessing attacks, pubkeys are safer.
Allow root ssh login? (yes, no, prohibit-password) [no}
For the last question in this set, enter ? to see the available time zones, then type your preferred choice from the list or press Enter to continue with the default selection. Then, so the same thing with the sub-time zone.
What timezone are you in? ('?' for list) [US/Eastern] ?

Africa/     Chile/      GB-Eire     Israel      Navajo      US/
America/    Cuba        GMT         Jamaica     PRC         UTC
Antarctica/ EET         GMT+0       Japan       PST8PDT     Universal
Arctic/     EST         GMT-0       Kwajalein   Pacific/    W-SU
Asia/       EST5EDT     GMT0        Libya       Poland      WET
Atlantic/   Egypt       Greenwich   MET         Portugal    Zulu
Australia/  Eire        HST         MST         ROC         posixrules
Brazil/     Etc/        Hongkong    MST7MDT     ROK
CET         Europe/     Iceland     Mexico/     Singapore
CST6CDT     Factory     Indian/     NZ          Turkey
Canada/     GB          Iran        NZ-CHAT     UCT

What timezone are you in? ('?' for list) [US/Eastern] America

What sub-timezone of 'America' are you in? ('?' for list) ?

Argentina/      Curacao         Iqaluit         Montserrat      Santo_Domingo
Aruba           Danmarkshavn    Jamaica         Nassau          Sao_Paulo
Asuncion        Dawson          Jujuy           New_York        Scoresbysund
Atikokan        Dawson_Creek    Juneau          Nipigon         Shiprock
Atka            Denver          Kentucky/       Nome            Sitka
Bahia           Detroit         Knox_IN         Noronha         St_Barthelemy
Bahia_Banderas  Dominica        Kralendijk      North_Dakota/   St_Johns
Barbados        Edmonton        La_Paz          Nuuk            St_Kitts
Belem           Eirunepe        Lima            Ojinaga         St_Lucia
Belize          El_Salvador     Los_Angeles     Panama          St_Thomas
Blanc_Sablon    Ensenada        Louisville      Pangnirtung     St_Vincent
Boa_Vista       Fort_Nelson     Lower_Princes   Paramaribo      Swift_Current
Bogota          Fort_Wayne      Maceio          Phoenix         Tegucigalpa
Boise           Fortaleza       Managua         Port-au-Prince  Thule
Buenos_Aires    Glace_Bay       Manaus          Port-of-Spain   Thunder_Bay
Cambridge_Bay   Godthab         Marigot         Porto_Acre      Tijuana
Campo_Grande    Goose_Bay       Martinique      Porto_Velho     Toronto
Cancun          Grand_Turk      Matamoros       Puerto_Rico     Tortola
Caracas         Grenada         Mazatlan        Punta_Arenas    Vancouver
Catamarca       Guadeloupe      Mendoza         Rainy_River     Virgin
Cayenne         Guatemala       Menominee       Rankin_Inlet    Whitehorse
Cayman          Guayaquil       Merida          Recife          Winnipeg
Chicago         Guyana          Metlakatla      Regina          Yakutat
Chihuahua       Halifax         Mexico_City     Resolute        Yellowknife

What sub-timezone of 'America' are you in? ('?' for list) New_York
Next, the installer will partition the disks. In general, the only disk available for the virtual machine will be fine for the installation — hit Enter.
While custom partitioning works even within the virtual machine environment, the default Whole disk MBR selection, abbreviated to w, is an ideal selection for the virtual machine. Press Enter again to continue the installation.
Available disks are: wd0
Which disk is the root disk? ('?' for details) [wd0]

No valid MBR or GPT.
Use (W)hole disk MBR, whole disk (G)PT or (E)dit? [whole] w
Setting OpenBSD MBR partition to whole wd0...done.
The auto-allocated layout for wd0 is:
#           size        offset      fstype  [fsize  bsize   cpg]
  a:      429.8M            64      4.2BSD    2048  16384     1 # /
  b:      639.7M        880352        swap
  c:    16384.0M             0      unused
  d:      567.7M       2190432      4.2BSD    2048  16384     1 # /tmp
  e:      807.6M       3353120      4.2BSD    2048  16384     1 # /var
  f:     2059.7M       5007008      4.2BSD    2048  16384     1 # /usr
  g:      551.9M       9225216      4.2BSD    2048  16384     1 # /usr/X11R6
  h:     1863.5M       10355488     4.2BSD    2048  16384     1 # /usr/local
  i:     1411.9M       14171936     4.2BSD    2048  16384     1 # /usr/src
  j:     5343.9M       17063552     4.2BSD    2048  16384     1 # /ussr/obj
  k:     2703.1M       28007776     4.2BSD    2048  16384     1 # /home

Use (A)uto layout, (E)dit auto layout, or create (C)ustom layout? [a]
The next portion of the installation allows for "sets" of packages to be selected, downloaded, and installed. To download them from the internet, enter http when prompted for the location of the sets.
Let's install the sets!
Location of sets? (cd0 disk http nfs or 'done') [cd0] http
You can define your preferred HTTP proxy and server, but the default setting with no proxy will work for most users.
HTTP proxy URL? (e.g. 'http://prozy:8080', or 'non') [none]

HTTP Server? (hostname, list#, 'done' or '?') ?

    1. mirrors.sonic.net/pub/OpenBSD            San Francisco, CA,  USA
    2. ... (there are many more to choose from, but I'm not writing them all here)

HTTP Server? (hostname, list#, 'done' or '?') 1

HTTP Server? (hostname, list#, 'done' or '?') [mirrors.sonic.net]

Server directory? [pub/OpenBSD/6.7/amd64]
Next, sets can be selected, or you can simply install all of them. Hit Enter to begin installing the sets. After the sets finish installing, hit Enter again to choose "done" for the location of the sets.
Select sets by entering a set name, a file name pattern or 'all'. De-select
sets by prepending a '-', e.g.: '-game*'. Selected sets are labelled '[X]'.
    [X] bsd             [X] comp67.tgz      [X] xbase67.tgz     [X] xserv67.tgz
    [X] bsd.rd          [X] man67.tgz       [X] xshare67.tgz
    [X] base67.tgz      [X] games67.tgz     [X] xfont67.tgz
Set name(s)? (or 'abort' or 'done') [done]

Get/Verify SHA256.sig   100% |******************************|    2141       00:00
Signature Verified      100% |******************************|
Get/Verify bsd          100% |******************************|   18117 KB    00:02
Get/Verify bsd.rd       100% |******************************|   10109 KB    00:01
Get/Verify base67.tgz   100% |******************************|     238 MB    00:39
Get/Verify comp67.tgz   100% |******************************|   74451 KB    00:08
Get/Verify man67.tgz    100% |******************************|    7464 KB    00:01
Get/Verify games67.tgz  100% |******************************|    2745 KB    00:00
Get/Verify xbase67.tgz  100% |******************************|   22912 KB    00:03
Get/Verify xshare67.tgz 100% |******************************|    4499 KB    00:01
Get/Verify xfont67.tgz  100% |******************************|   39342 KB    00:05
Get/Verify xserv67.tgz  100% |******************************|   16767 KB    00:03
Installing bsd          100% |******************************|   18117 KB    00:00
Installing bsd.rd       100% |******************************|   10109 KB    00:00
Installing base67.tgz   100% |******************************|     238 MB    00:17
Extracting etc.tgz      100% |******************************|     261 KB    00:00
Installing comp67.tgz   100% |******************************|   74451 KB    00:08
Installing man67.tgz    100% |******************************|    7464 KB    00:01
Installing games67.tgz  100% |******************************|    2745 KB    00:00
Installing xbase67.tgz  100% |******************************|   22912 KB    00:02
Extracting etc.tgz      100% |******************************|    7023       00:00
Installing xshare67.tgz 100% |******************************|    4499 KB    00:00
Installing xfont67.tgz  100% |******************************|   39342 KB    00:02
Installing xserv67.tgz  100% |******************************|   16767 KB    00:01

Location of sets? (cd0 disk http nfs or 'done') [done]
If a time option appears, just hit Enter. Then, the OpenBSD installation should be complete! To start it, hit Enter to select "Reboot" and wait for the system to load.
Time appears wrong. Set to 'Fri Aug 21 17:22:11 EDT 2020'? [yes]

Saving configuration files... done.
Making all devices nodes... done.
Relinking to create unique kernel... done.

CONGRATULATIONS! Your OpenBSD install has been successfully completed!

When you login to your new system the first time, please read your mail
using the 'mail' command.

Exit to (S)hell, (H)alt or (R)eboot? [reboot]
Step 4: Delete the Install File
You may find that the system boots back into the installation screen, most likely due to the initial installation media still being loaded, rather than the virtual hard drive. If this is the case, power down the OpenBSD VM.
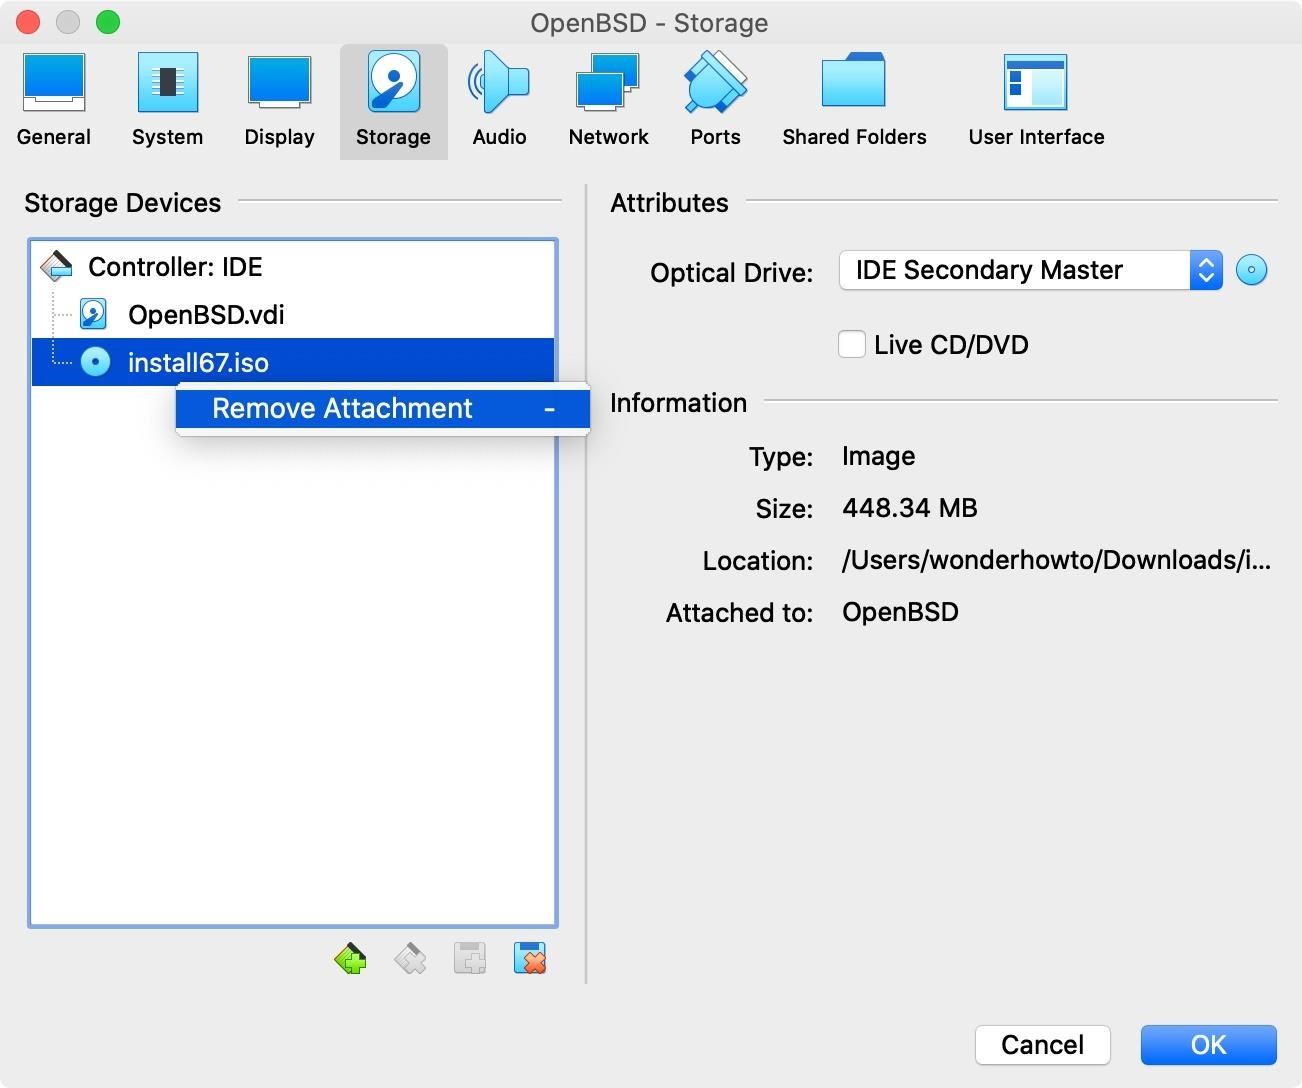
Then, within VirtualBox, select the OpenBSD virtual machine and click "Settings."
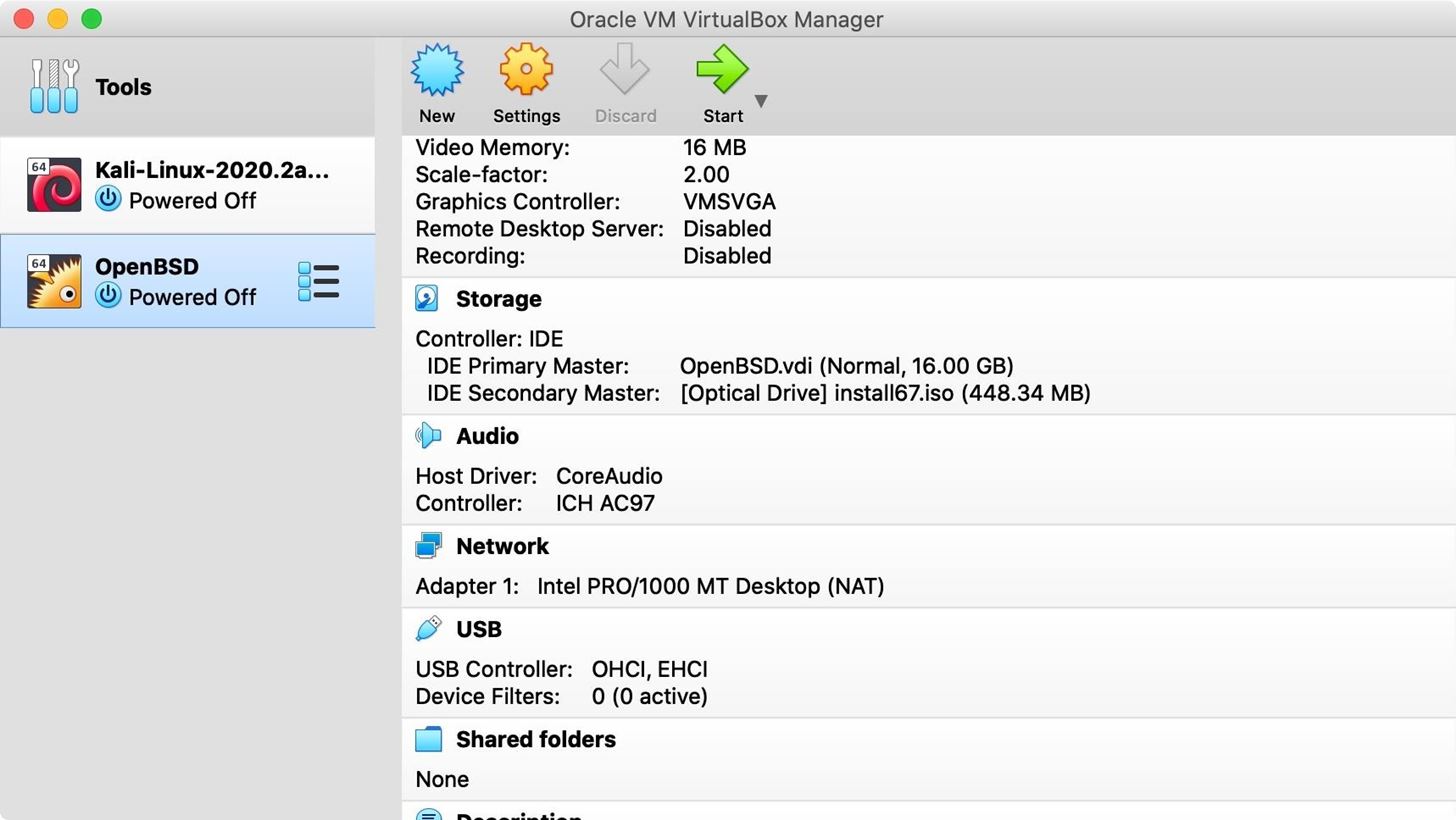
Under the "Storage" menu, right-click on the ISO installation file shown under Storage Devices, and click "Remove Attachment." Hit "Remove" on the prompt, and "OK" to exit the settings. Then, restart the virtual machine.
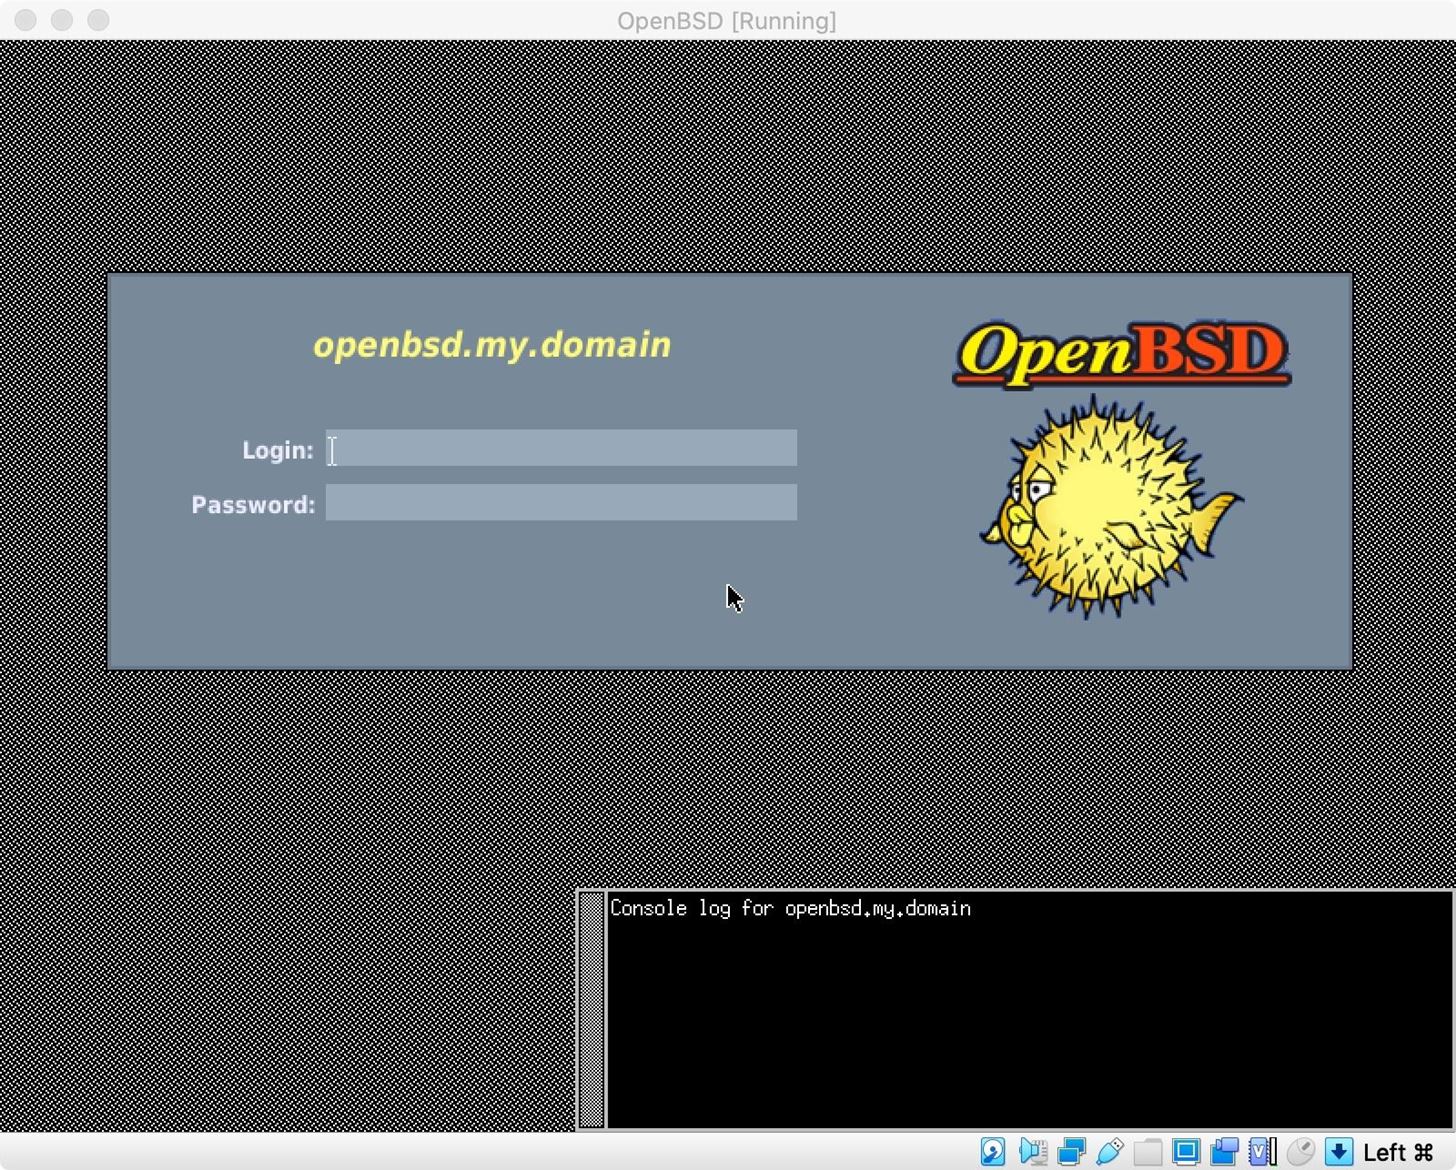
If a login screen such as the one below appears, OpenBSD has installed and booted from its virtual hard drive. Now, we can log in to the OpenBSD desktop environment and begin making changes to the operating system.
Step 5: Configure & Use OpenBSD
After logging in using the username and password defined during the installation process, the OpenBSD X Window System and the fvwm window manager will load. This is a very basic graphical environment, but it does create a stacking window manager which can be used for visual tasks. A left-click menu and Control-click menu are available when clicking on the default desktop.
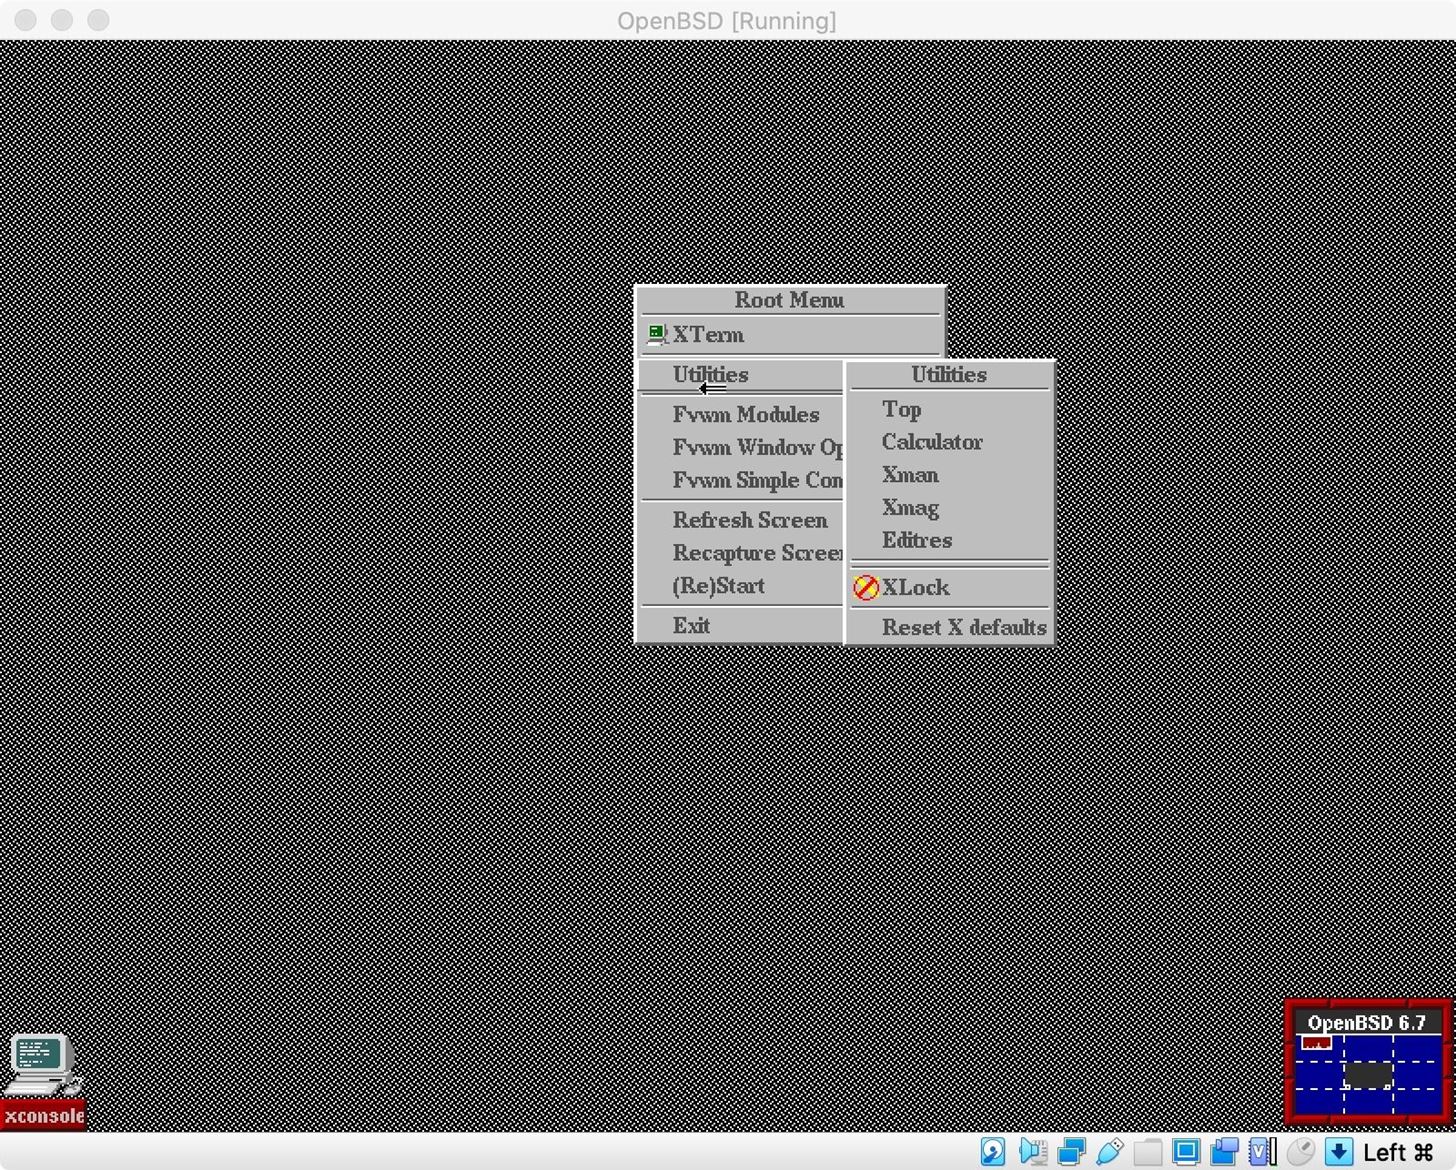
Opening an XTerm window from this menu will help us install additional packages, some of which will allow us to add additional elements to the desktop environment. Once a terminal window is open, we'll use pkg_add to install additional packages. First, run su in a new terminal window to gain superuser privileges. If you logged in as root, you won't need to use su.
~$ su
Password:
Now we can install some additional packages. To replace the default window manager, we'll install the Xfce desktop environment, the Leafpad text editor, the Thunar file manager, consolekit2 to assist with login session management, and the Firefox web browser. I'll also add in nano because why not.
~# pkg_add xfce xfce-extras leafpad thunar firefox consolekit2 nanoAfter these packages are installed, we can return to our regular user terminal session by typing exit and pressing Enter. After this, we can create a "xsession" startup file, which will launch Xfce at the next login, by running the command below. This command "echoes" the statement within the quotation marks into the file ".xsession."
~# exit
~$ echo "exec ck-launch-session startxfce4" > .xsession
Now, you can restart the system. To restart the system, you need to have root privileges, so first sun su once again to regain a root terminal window, then type reboot and press Enter to reboot the system.
~$ su
Password:
~# reboot
When the virtual machine reboots, Xfce should automatically start.
Once the desktop environment is installed, OpenBSD is ready to be used much like any other Unix-like operating system, including Linux.
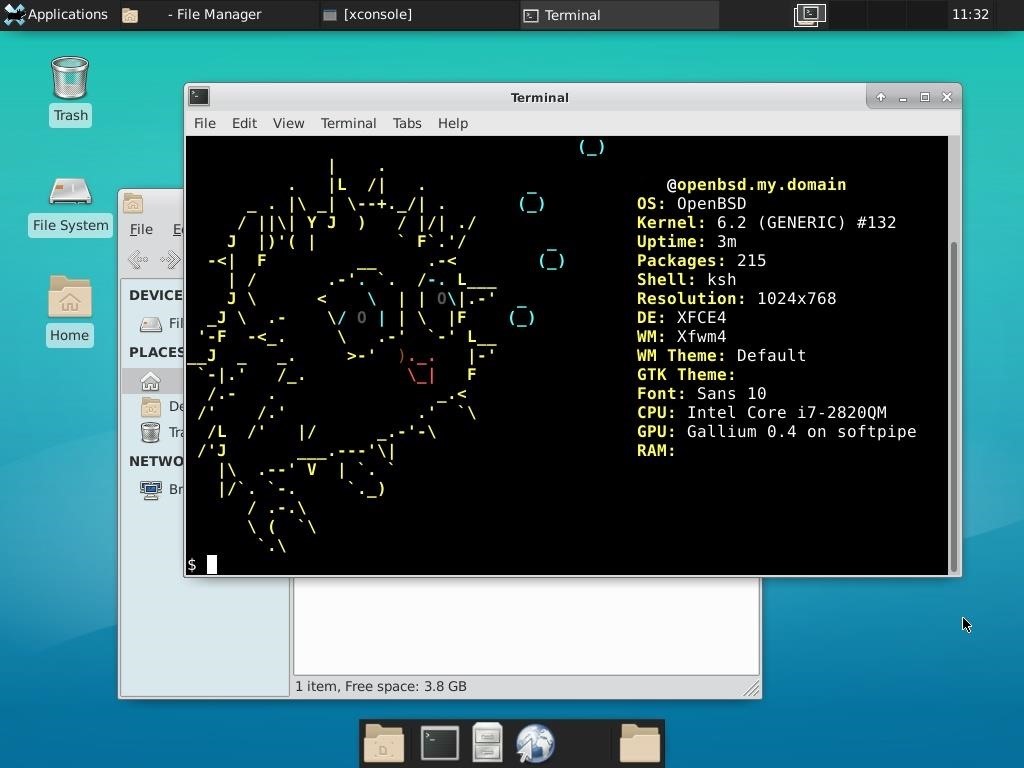
The OpenBSD operating system has software in its repository to do practically any task of other operating systems, including word processors, image editors, and even games. If a tool isn't already available, it can very likely be compiled if the source code is available.
Using OpenBSD
With Xfce installed, the graphical usage of OpenBSD should be relatively familiar for users of Linux distributions or Unix-like operating systems. The command-line environment, ksh, will also generally be familiar to users of Bash. OpenBSD offers extensive documentation, with pages that thoroughly explain the often unfamiliar components of the operating system, such as package management and system administration. A complete user's guide is also available. OpenBSD is a very powerful, extensible system, and becoming familiar with it is a useful skill for any system administrator, security engineer, or hacker!
I hope that you enjoyed this tutorial on OpenBSD! If you have any questions about this tutorial or OpenBSD usage, feel free to leave a comment or reach me on Twitter @tahkion.
Just updated your iPhone? You'll find new emoji, enhanced security, podcast transcripts, Apple Cash virtual numbers, and other useful features. There are even new additions hidden within Safari. Find out what's new and changed on your iPhone with the iOS 17.4 update.


3 Comments
It may be ultra-secure in the program's world, but it can be easily by-passed just by standing behind the user.
A good exercise would have been to have the user validate the signatures of the ISO file before installing! There is a portable `signify` for linux distros!
Is it more secure than Qubes OS? And why? Thanks!
Share Your Thoughts