
The Pi-hole project is a popular DNS-level ad blocker, but it can be much more than that. Its DNS-level filtering can also be used as a firewall of sorts to prevent malicious websites from resolving, as well as to keep privacy-killing trackers such as Google Analytics from ever loading in the browser. Let's take a look at setting a Pi-hole up and customizing a blacklist to suit your needs.
If you're not familiar with what DNS is, let's start there.
A domain name server, or DNS, is the equivalent of the internet's address book. It's what translates between human-readable websites such as wonderhowto.com and network-navigable IP addresses such as 104.193.19.59. In typical operation, your device will issue a DNS request to its assigned router. Then the router will forward that request to an upstream DNS server, one typically provided by your internet service provider.
The Pi-hole works by replacing your router in that chain. Once up and running, a Pi-hole will first check a blacklist and whitelist to determine if the domain should be resolved. If a URL is on the blacklist, it will immediately return a block page, which prevents that request from even leaving your local network. If the Pi-hole otherwise approves the request, then it will first check a local cache to avoid sending the same request to an upstream DNS provider over and over again.
If it doesn't have the IP address in its cache, then the Pi-hole will request the IP from the upstream DNS provider you decide on. The upstream DNS provider can be anything such as Google's public DNS or OpenDNS. These DNS providers then use recursive resolvers to work through the URL and come up with an IP address.
The process provides several benefits to the end-user. First, it means that the Pi-hole will work across all platforms and devices connected to the network, whether it be your smart TV, another IoT device, or the computer you use to browse the web.
Second, it can prevent tracking programs you may not be aware of or can't control, like with an Xbox or PlayStation.
Third, DNS blocking could prevent compromised devices from communicating back to control servers if your blacklist is maintained correctly.
Fourth, it can flat out prevent you from going to phishing websites accidentally. If you type in a phishing URL or click on a phishing link, and that URL is on your blacklist, then the link we'll just look like a dead website.
Finally, if the website is legitimate and the code does load, URLs referenced in the webpage will also be filtered by the Pi-hole. It results in faster loading of webpages as there's less to load, and it stops trackers like Google Analytics from contacting Google's servers.
Now let's take a look at what you need to make your own Pi-hole.
Requirements
With a name like Pi-hole, you might rightly assume that you have to have a Raspberry Pi. However, that's not exactly true. The Pi-hole code can be run on any Linux computer, whether that's a Raspberry Pi, a Raspberry Pi alternative, or a Linux laptop.
However, it's worth keeping in mind that while the CPU requirements are low, it does need to be running 24/7. If at any point it's powered down, you'll break the internet on your local network. That's why it's generally advised to run the Pi-hole on a Raspberry Pi, as they're small with low power requirements and designed to run continuously.
The Raspberry Pi Zero W or WH is the cheapest option and is still powerful enough to run as a Pi-hole, but keep in mind that you'll have your DNS server connected over Wi-Fi. So if the Wi-Fi goes out for any reason, so does the internet on all devices on the network. It can be a real pain when you're roommate decides to microwave a hot pocket and breaks the web for the entire house.
That's why I encourage you to use a Raspberry Pi with Ethernet built-in or an Ethernet adapter for the Raspberry Pi Zero W or WH. For a more detailed rundown of all the hardware and software requirements, visit Pi-hole's website.
If you're going with a Pi, make sure to have the following at a minimum.
- Raspberry Pi 4, Pi 4 B, Pi 3 B, or Pi 3 B+ (with Ethernet and Wi-Fi)
- Or Raspberry Pi 3 A+, Pi Zero WH, or Pi Zero W (with Wi-Fi only)
- Ethernet adapter (if you don't want to use Wi-Fi)
- Ethernet cable (if using Ethernet)
- 16 GB MicroSD card (to load the OS on)
- MicroSD card reader (to flash and configure the OS)
- Power adapter (to keep the Pi-hole on 24/7)
If you want a display incorporated, which can show real-time stats on the Pi-hole while it's running, try bundling all of the below products together. They'll give your network closet that extra little bit of geek panache. Again, I recommend a Raspberry Pi Zero W or WH.
- Raspberry Pi Zero WH (it has the headers soldered on)
- Adafruit PiOLED (a 128x32 monochrome OLED display)
- Ethernet adapter (if you don't want to use Wi-Fi)
- Ethernet cable (if using Ethernet)
- Raspberry Pi Zero case (to protect everything)
- 32 GB microSDHC Class 10 card with NOOBS 3.1 (to load the OS on)
- MicroSD card reader (to flash and configure the OS)
- Power adapter (to keep the Pi-hole on 24/7)
For a larger display, you can try the following setup instead:
- Raspberry Pi 4, Pi 4 B, Pi 3 B, or Pi 3 B+ (with Ethernet and Wi-Fi)
- Or Raspberry Pi 3 A+, Pi Zero WH, or Pi Zero W (with Wi-Fi only)
- Ethernet adapter (if you choose a model without Ethernet)
- Ethernet cable (if using Ethernet)
- Adafruit PiTFT Plus (a 320x240 2.8" TFT + resistive touchscreen display)
- 2x20-pin header (if needed, to connect the Pi and display)
- Raspberry Pi case base (for Pi 2, 3, B+)
- Faceplate with buttons (for the display)
- 32 GB microSDHC Class 10 card with NOOBS 3.1 (to load the OS on)
- MicroSD card reader (to flash and configure the OS)
- Power adapter (to keep the Pi-hole on 24/7)
Step 1: Download Raspberry Pi OS
First, we'll prepare the OS we'll be running Pi-hole on, which would be Raspberry Pi OS, formerly Raspbian. You can download the Raspberry Pi OS image directly, or torrent it via your favorite Torrent client, from the Raspberry Pi's download page. The Lite version is all you need, but feel free to download the full image if you want.
Step 2: Flash the OS to the SD Card
Once the download is complete, write the image to the microSD card. It's a good idea to unplug external hard drives and other USB devices you have on your computer. Then you can connect your microSD using the card reader. It's essential to do to prevent flashing to the wrong device accidentally.
If you already have a program for flashing live images to the card, use that. Otherwise, download and install Etcher, as it's the easiest to use for making bootable SD cards. It works on Windows, macOS, and Linux, while also having a simple-to-use interface. Open Etcher when it finishes installing.
Etcher should detect what operating system you are using, but if not, make sure you download the correct version based on your OS, then open the file and follow the on-screen instructions for installation. When it's installed, open the program (if it doesn't auto-open after installation), and select the image you just downloaded.
Next, be sure the proper drive is selected, then "Flash" the image. Once it's done, safely eject the SD card.
There is a rare chance that Etcher will cause an error. If that does happen, use ApplePi-Baker for macOS or Win32 Disk Imager for Windows.
Step 3: Configure Your Raspberry Pi
Once Raspberry Pi OS has been flashed to the microSD card, make sure the card is ejected safely, then remove and reinsert it to remount the drive. Now, let's find the card by listing our USB storage devices.
~$ lsblk

NAME   MAJ:MIN RM  SIZE RO TYPE MOUNTPOINT
sda      8:0    0   80G  0 disk
├─sda1   8:1    0   78G  0 part /
├─sda2   8:2    0    1K  0 part
└─sda5   8:5    0    2G  0 part [SWAP]
sdd      8:48   1 29.7G  0 disk
├─sdd1   8:49   1  256M  0 part /media/kali/boot
└─sdd2   8:50   1  1.5G  0 part
sr0     11:0    1   57M  0 rom
I can tell from above that "sdd1" is the Raspberry Pi OS boot drive. Let's change into that directory.
~$ cd /media/kali/boot

/media/kali/boot$
Then, add a blank "ssh" file (with no file extension) to its boot folder. That will let us SSH into the Raspberry Pi to set up the Pi-hole.
/media/kali/boot$ cat > sshTo have the Pi connect to Wi-Fi, add another file named "wpa_supplicant.conf" to the boot folder.
/media/kali/boot$ cat > wpa__supplicant.confOpen the file in nano.
/media/kali/boot$ nano wpa__supplicant.confAnd then, add the following, replacing "WiFi Name" and "password" with your information. Both must be in quotes.
country=US
update_config=1
ctrl_interface=DIR=/var/run/wpa_supplicant GROUP=netdev

network={
 scan_ssid=1
 ssid="WiFi Name"
 psk="password"
 key_mgmt=WPA-PSK
}
Once that's done, hit Control-X to quit, Y to save, and Enter to finish up. Then, eject the microSD card safely, and insert it into your Raspberry Pi. Finally, plug the Ethernet cable into your router, plug in the Pi's power adapter, and wait a few seconds for it to boot up.
Step 4: SSH into Your Raspberry Pi
Now that our Raspberry Pi is set up, we need to connect to it using SSH. First, find its IP address on the local network. An easy way to do so is to open your router, usually at 192.168.1.1, and look through the connected devices for the Raspberry Pi's IP address. You can also do an arp-scan in a new Terminal window.
~$ arp-scan -l
Interface: en0, datalink type: EN10MB (Ethernet)
Starting arp-scan 1.9.5 with 256 hosts (https://github.com/royhills/arp-scan)
192.168.77.1 b8:27:eb:4d:1f:f2 Raspberry Pi Foundation
192.168.77.128 b4:f1:da:ec:4c:e7 (Unknown)
516 packets received by filter, 0 packets dropped by kernel
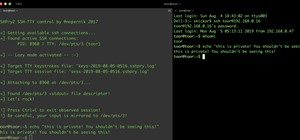
Ending arp-scan 1.9.5: 256 hosts scanned in 1.858 seconds (137.78 hosts/sec). 2 respondedAbove, I can see that the Raspberry Pi has an IP address of 192.168.77.1. Once you have yours, use your favorite SSH app, such as PuTTY or the Chrome Secure Shell extension, to connect to it using the username pi@youripaddress, then enter the password raspberry when prompted.
~$ ssh pi@192.168.77.1

The authenticity of host '192.168.77.1 (192.168.77.1)' can't be established.
ECDSA key fingerprint is SHA256xxxxxxxxxxxxxxxxxxxxxxxxxxxxxxxxx.
Are you sure you want to continue connecting (yes/no)? yes
Waarning: Permanently added '192.168.77.1' (ECDSA) to the list of known hosts.
pi@192.168.77.1's password: raspberry
Alternatively, if you have a spare monitor, keyboard, and mouse lying around, you can attach them directly to the Raspberry Pi and open up a terminal that way.
Step 5: Install Pi-Hole on Your Raspberry Pi
Once you have a terminal open, it's time to begin installing Pi-hole. The Pi-hole team has made it extremely easy by automating the entire process, so you just need to run the following command to get started.
pi@raspberrypi$ curl -sSL https://install.pi-hole.net | bashHowever, if you're extremely security conscious, you may be aware that piping to bash is a somewhat controversial method as there's potential to download a malicious link unintentionally. If you're nervous about that, you can manually clone the GitHub repository, check the code yourself, then run bash instead, just like below.
pi@raspberrypi$ git clone --depth 1 https://github.com/pi-hole/pi-hole.git Pi-hole

Cloning into 'Pi-hole'...
remote: Enumerating objects: 98, done.
remote: Counting objects: 100% (98/98), done.
remote: Compressing objects: 100% (90/90), done.
remote: Total 98 (delta 13), reused 36 (delta 0), pack-reused 0
Receiving objects: 100% (98/98), 156.96 KiB | 1.43 MiB/s, done.
Resolving deltas: 100% (13/13), done.
Updating files: 100% (82/82), done.

pi@raspberrypi$ cd "Pi-hole/automated install/"

pi@raspberrypi/Pi-hole/automated install$ sudo bash basic-install.sh
Step 6: Follow the Installation Prompts
Either way you begin installing Pi-hole above, it should have the same result of launching the Pi-hole installer. At first, there will just be some text in the terminal as it performs checks.
[✗] Root user check
  [i] Script called with non-root privileges
      The Pi-hole requires elevated privileges to install and run
      Please check the installer for any concerns regarding this requirement
      Make sure to download this script from a trusted source

  [✓] Sudo utility check
stty: 'standard input': Inappropriate ioctl for device

  [✓] Root user check

        .;;,.
        .ccccc:,.
         :cccclll:.      ..,,
          :ccccclll.   ;ooodc
           'ccll:;ll .oooodc
             .;cll.;;looo:.
                 .. ','.
                .',,,,,,'.
              .',,,,,,,,,,.
            .',,,,,,,,,,,,....
          ....''',,,,,,,'.......
        .........  ....  .........
        ..........      ..........
        ..........      ..........
        .........  ....  .........
          ........,,,,,,,'......
            ....',,,,,,,,,,,,.
               .',,,,,,,,,'.
                .',,,,,,'.
                  ..'''.

  [✓] Disk space check
  [✓] Update local cache of available packages

  [✓] Checking apt-get for upgraded packages... 153 updates available
  [i] It is recommended to update your OS after installing the Pi-hole!

  [i] Installer Dependency checks...
  [✓] Checking for apt-utils
  [i] Checking for dialog (will be installed)
  [✓] Checking for debconf
  [✓] Checking for dhcpcd5
  [✓] Checking for git
  [✓] Checking for iproute2
  [✓] Checking for whiptail
After a minute or two, you should begin to see blue terminal windows with dialog boxes. You can press Enter to get past the first few, but be careful not to go too fast, as some of them are actually important.
The first big choice is to select whether to use Wi-Fi or Ethernet. So when you hit the Choose an Interface screen, pick your poison. Ethernet would be eth0; Wi-Fi would be wlan0. Use the Up and Down arrow keys to move to one of them, and Spacebar to select it. Ethernet is the preferred option if it's available — press Enter to confirm.
The next important choice will be which upstream DNS provider to use. All of the options listed are good, so just use your favorite. If you don't know what to use, Google is always a solid choice. Cloudflare is the fastest, according to DNSperf, a DNS metric site.
After choosing which DNS to use, you need to select the blacklists to load. Seven come chosen by default and should cause little trouble. We'll discuss the blacklists later, so you can leave these at the defaults for now.
Continue to leave settings at their default until you reach the Select a privacy mode for FTL screen. Carefully consider your choice for privacy mode. "Show everything" can be extremely helpful when troubleshooting, but if anyone gains access to the Pi-hole itself, they could quickly go back and look through your DNS history. "Disabled statistics" or using "Anonymous mode" will provide more privacy, but they make it difficult to troubleshoot, such as when something's on the blacklist and shouldn't be.
You'll be returned to the regular terminal as it loads dependencies. Wait for a bit, and then you'll see an Installation Complete! screen. Don't close this page before copying your admin webpage password at the very bottom. You'll use the password to access the Pi-hole admin settings.
Step 7: Change the Password & Hostname
If you want to change the password to something easier to remember — or something more difficult for hackers to crack — use the following command in a new terminal window, and enter your new password twice.
pi@raspberrypi$ pihole -a -p

Enter New Password (Blank for no password):
Confirm Password:
  [✓] New password set
It's also an excellent time to update the Pi's password to something other than raspberry. If you don't, anyone on the network can get around the Pi-hole admin page by directly logging into the Pi host the Pi-hole.
pi@raspberrypi$ passwd

Changing password for raspberrypi.
Current password:
New password:
After updating those passwords, it's good practice to change the hostname so that we can distinguish the Pi-hole from other devices on the network, particularly, other Raspberry Pis. Open the "hostname" file with nano, and edit "raspberrypi" to something like "Pi-hole."
pi@raspberrypi$ sudo nano /etc/hostnameWhen you're done editing it, hit Control-X, then Y, and Enter to save and close the file. Next, do the same to the "hosts" file.
pi@raspberrypi$ sudo nano /etc/hostsWhen you're done, /etc/hosts should look something like the following. You should only have to edit the last line.
127.0.0.1       localhost
::1             localhost ip6-localhost ip6-loopback
ff02::1         ip6-allnodes
ff02::2         ip6-allrouters

127.0.1.1       Pi-hole
Step 8: Set the Pi-Hole as Your DNS
With Pi-hole installed and running, you can open any web browser, navigate to the Pi-hole's admin IP address. It should look something like 192.168.1.4/admin and 192.168.1.4/admin/index.php?login will take you right to the login page. Once there, put in your password and log in.
Now, open another tab in your browser and navigate to your router's admin page and log in. For most of you, it should be 192.168.1.1 by default. The default credentials usually are admin for username and password, but it varies from manufacturer to manufacturer. So if admin doesn't work, a simple Google search for the name of your router and default credentials should give you everything you need.
Once you're logged in to the router, look for the DNS settings. Often, it will be under "Advanced Setup." For me, on a Netgear router, it was under the "Internet" tab. There, you want to designate a specific IP address for the DNS server. I had to click on "Use These DNS Servers." Input the IP address of Pi-hole and leave any others blank. That will ensure all the DNS requests going through the router are redirected to the Pi-hole. Be sure to "Apply" the changes.
There is an off-chance that you'll be unable to find any such settings, mainly if you're using the combination modem/routers often provided by ISPs. If you do find yourself in this situation, there's still a solution. Simply proceed to the next step.
Otherwise, congratulations! Your Pi-hole is all set up and redirecting DNS traffic from your router. There's no need to go around changing DNS settings on each device because the router will take care of that for you.
For extra DNS security, pull up the Pi-hole tab and navigate to "Settings," then "DNS," and scroll to the bottom and look for "Use DNSSEC" and check the box. Doing so will enable DNSSEC, which is used to verify signatures of DNS requests sent to upstream providers. Note that it will only work with certain DNS providers, such as the ones mentioned before (Google, Cloudflare).
If you're running a VPN, such as PIA, be sure to check the settings and make sure "DNS leak protection" is disabled or else you won't receive the benefits of the Pi-hole's DNS filtering. The Pi-hole doesn't get a chance to do its thing when DNS queries are sent over a VPN.
Step 9: Set the Pi-Hole as DHCP (If Needed)
This step is optional if you were able to find DNS settings in your router. However, it is mandatory if you couldn't. Either way, I still recommend doing it.
What we're going to do is set the Pi-hole to act as a Dynamic Host Configuration Protocol (DHCP) server. DHCP servers do what you would imagine a router does — they handle assigning IP addresses to devices on the network. By having the Pi-hole do it, you can guarantee that all DNS traffic on the network will go through the Pi-hole. Additionally, it will provide significantly more information on the admin page because now the Pi-hole will have access to hostnames and other data.
First, open your router tab and look for "LAN Setup" or something similar. There, you should find a setting for the DHCP server. When you do, uncheck the box, or otherwise disable it, and apply the changes. You must do it on the router first, then quickly proceed to the next part of this step. If you don't, if devices attempt to connect while you have no DHCP server, it can cause all sorts of IP problems.
With the DHCP server on the router disabled, move over to your Pi-hole tab and go to "Settings" and "DHCP," then check the box beside "DHCP server enabled" and ensure the IP ranges are the same as they were on your router. Then, click "Save" to apply the changes.
Now your router is acting as switch and access point, and the Pi-hole is taking care of the actual routing.
Step 10: Add Your Own Blacklists
With the Pi-hole doing its thing, we can turn our attention to improving the blacklist. The blacklist is the list of URLs that the Pi-hole will not resolve. You could have any website on the list, and the Pi-hole will prevent it from appearing on your network.
For security and privacy, we want to focus on known malicious URLs, such as phishing sites, spam, and trackers. Luckily, we don't have to come up with these lists ourselves. There are plenty of people who work tirelessly to create lists just like them. Firebog, blocklist, and Zeltser all have some great lists that you can sift through to find everything that suits your needs. Wikipedia can also be quite useful when trying to pick a list.
When you find a list you like, copy the list's URL and go to the Pi-hole admin page. There, go to "Settings," then "Blocklists." You can paste the link in where it says to "Enter one URL per line," then click "Save," and the Pi-hole will start blocking all the URLs on that list.
I only recommend adding one list at a time, as well as taking a day or two between adding new ones. That's because some lists will cause more trouble than others, like lists for porn sites or fake news. The last thing you want is your roommate barging into your room at 2:00 a.m., demanding to know why a particular website isn't loading. If a specific list is becoming annoying, you can easily disable it by clicking on the checkbox beside the list in the "Enabled" column.
If you're going to go full-on insane in the membrane with your blocking, the Reddit Pi-hole community has come up with a list that blocks over 2.5 million URLs. If you're lazy and trust the internet, it can be installed with a simple command run on the Pi-hole terminal.
pi@raspberrypi$ curl -sSL https://raw.githubusercontent.com/Kevin-De-Koninck/pi-hole-helpers/master/expand-block-list.sh | bashAlternatively, you can always make your own blocklist or add a single URL from the "Blacklist" tab on the Pi-hole admin page. If you're really clever, you could use the same tool hackers would use to generate phishing websites and preemptively block them.
If you're curious about using wild cards and regex to expand your blacklist, be sure to check out the Pi-hole docs and Reddit megathread.
Step 11: Whitelist Null Byte
Inevitably, you'll find a website that you like that wound up on your blacklist somehow. There are two ways to fix it. First, you can figure out which blocklist you added that contains that particular URL, then disable the list, as described above.
Second, you can whitelist the URL. To whitelist a URL, go to the "Whitelist" tab, type the URL in the bar, and click "Add." It's important to note that the whitelist just means that the website will resolve, so if you're still using a list aimed at ads, it will deprive the site of ad revenue. So if you appreciate the content we provide here at Null Byte, don't use ad-blocking lists when visiting our website.
Step 12: Join the Pi-hole Community
I've barely scratched the surface on what can be done with a Pi-hole, so if you're interested in it, I highly recommend you join the greater Pi-hole community on Discourse or Reddit. They have some really great projects to check out.
Thanks for reading! If you have any questions, you can ask them here or on Twitter @The_Hoid or @NullByte.
Just updated your iPhone? You'll find new emoji, enhanced security, podcast transcripts, Apple Cash virtual numbers, and other useful features. There are even new additions hidden within Safari. Find out what's new and changed on your iPhone with the iOS 17.4 update.


Be the First to Comment
Share Your Thoughts