


In 2019, the Raspberry Pi 4 was released with specs including either 1 GB, 2 GB, or 4 GB of memory, a Broadcom BCM2711B0 quad-core A72 SoC, a USB Type-C power supply, and dual Micro-HDMI outputs. Performance and hardware changes aside, the Pi 4 Model B runs Kali Linux just as well, if not better, than its predecessors. It also includes support for Wi-Fi hacking on its internal wireless card.
For hackers interested in a cheap Kali Linux computer capable of hacking Wi-Fi without a separate wireless network adapter, the Pi 4 Model B is a great way to run Kali without needing a virtual machine. Thanks to the number of Wi-Fi hacking tools included in Kali Linux, the new Pi 4 Model B represents a complete Ethernet and Wi-Fi hacking kit for beginners.
Hacking on a $45 Computer
The reasons for using a Raspberry Pi as a hacking computer are many. Previous Raspberry Pi versions have proved that it doesn't take expensive hardware to run tools in Kali Linux. Virtual machines can behave unpredictably, especially when working with Wi-Fi hacking. Plus, it's sometimes more straightforward to run Kali on hardware rather than in a virtual machine.
Another advantage to the Raspberry Pi is that it can easily be used in combination with a device like an unmodified iPhone or Android smartphone. If your smartphone supports creating a Wi-Fi hotspot, it's simple to connect the Pi to your hotspot and control it over SSH. If your smartphone can't create a hotspot, the Pi can also host its own Wi-Fi network, allowing you to join the network created by the Pi on your phone and SSH into it on the go.
Wi-Fi Hacking Without a Network Adapter
One of the most exciting things about using a Raspberry Pi for hacking is the add-on of the Nexmon firmware. The addition makes it possible to put the built-in Wi-Fi network adapter into monitor mode. That means it's possible to do things like grab WPA handshakes, listen in on Wi-Fi traffic, and execute attacks like WPS-Pixie without needing a separate compatible Wi-Fi network adapter.
For someone interested in getting started with Wi-Fi hacking, the Raspberry Pi 4 Model B provides a Kali-supported Wi-Fi network adapter and an onboard computer capable of basic cracking and MiTM attacks in a single package. The increase in speed and power of the Pi 4 Model B make it a more capable networking device as well as a more capable computer.
While the internal network adapter is capable of doing all the things we want it to do, the process for putting it into monitor mode is a little different from the previous Raspberry Pi. Rather than using the familiar airmon-ng start command, we'll be using a new command to add the network card as a device in monitor mode manually.
What You'll Need
To get started, you'll need one of the new Raspberry Pi 4 Model B options. You'll also need some accessories to power and interact with the board, starting with a compatible USB Type-C adapter.
After the release of the Pi 4 Model B, it became clear that the specification for the USB-C standard had not been followed. Thanks to the omission of a resistor, the new Pi 4 Model B can't be used with "smart" charging cables that can adjust themselves to the voltage of anything they are plugged into. Plugging an unsupported smart charging cable, like a Macbook Pro USB-C cable, won't be able to power the Pi 4 Model B.
Aside from a supported USB-C cable, you'll also need a Micro-HDMI adapter. The twin Micro-HDMI ports on the Pi 4 Model B are really tiny and can easily be confused with Micro-USB cables, but the two are not compatible.
As with the other models of Raspberry Pi, you'll need to supply a micro SD card, card reader, keyboard, and mouse, as well as a monitor of some sort to get started working with the Pi. After the initial setup, you should be able to access the Pi without a keyboard or mouse by logging in over a network with SSH.
Download the Kali Disk Image
The first step will be to determine which disk image you want to use for the Pi 4 Model B and download it so that you can burn it to the microSD card. There are two places we can get this disk image: the official Kali website or from the Whitedome website for the "Sticky Fingers" Kali build that includes some useful modifications.
In testing, I found the "Sticky Fingers" build had a few issues, so for now, I'd recommend going with the official Kali version for a guaranteed stable build. If you want the extras that come from using the "Sticky Fingers" build, you can download that image from the Whitedome website.
Otherwise, I recommend you download the file either directly or via a torrent from the Kali Linux download page.
Load the MicroSD Card Using Etcher
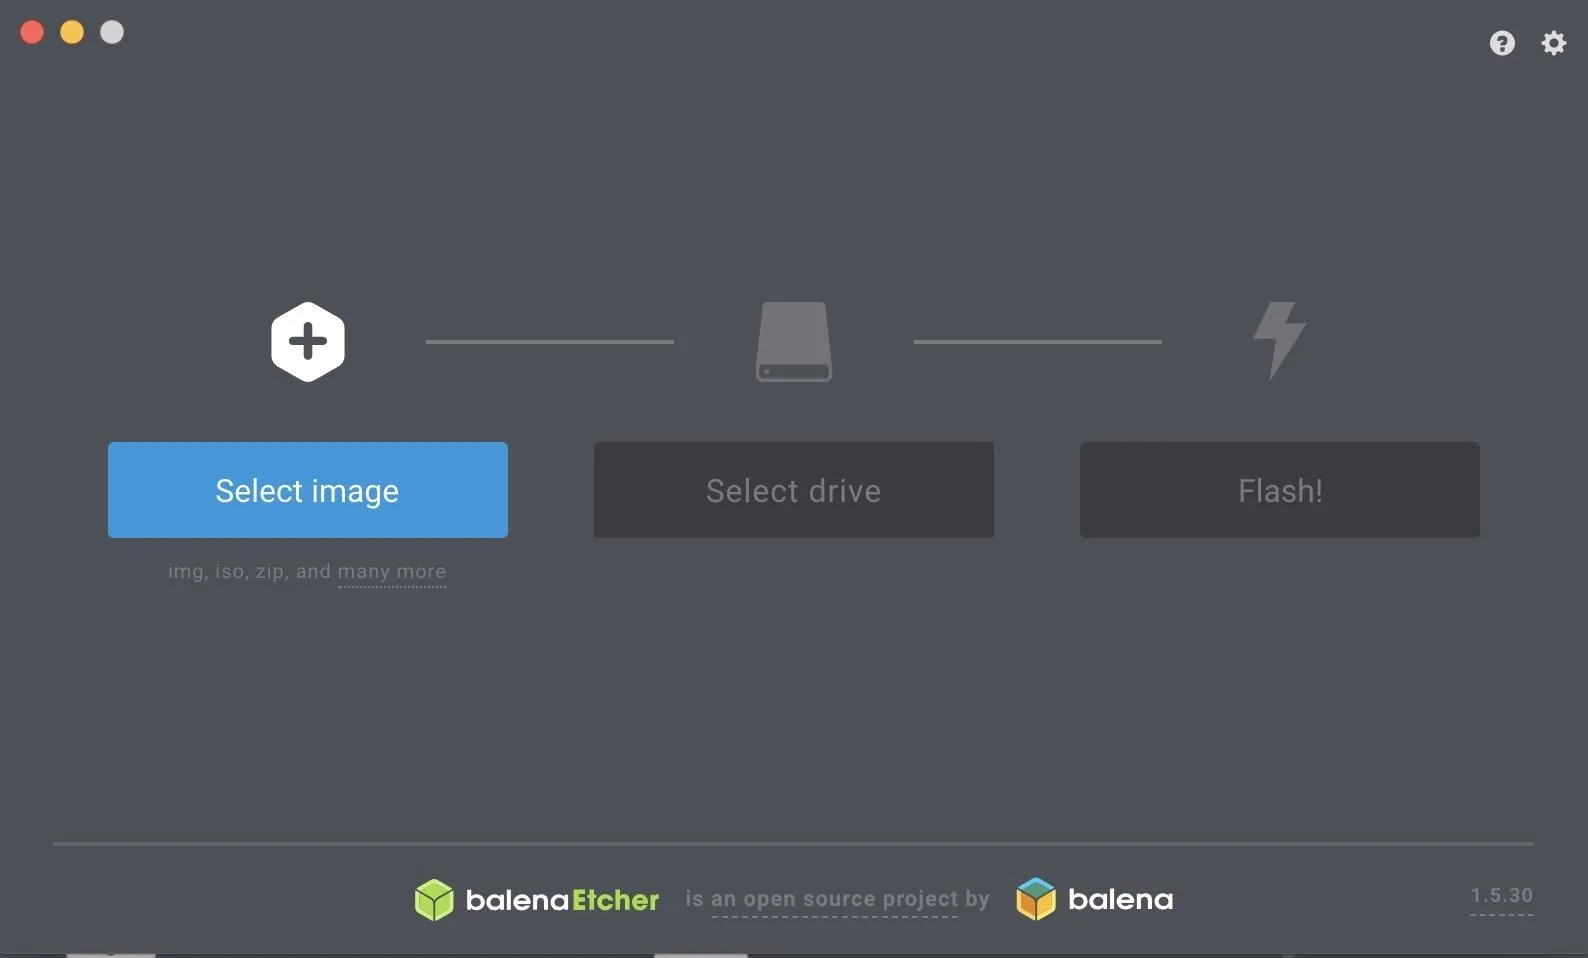
To flash the Kali Linux image to the Pi 4 Model B's microSD card, plug the microSD card into your computer, either directly or via a card reader, and download Etcher from its official website. Follow the on-screen prompts to install it, then open Etcher when it's done installing. In the window that appears, click the blue button that says "Select image," then load the Kali image.
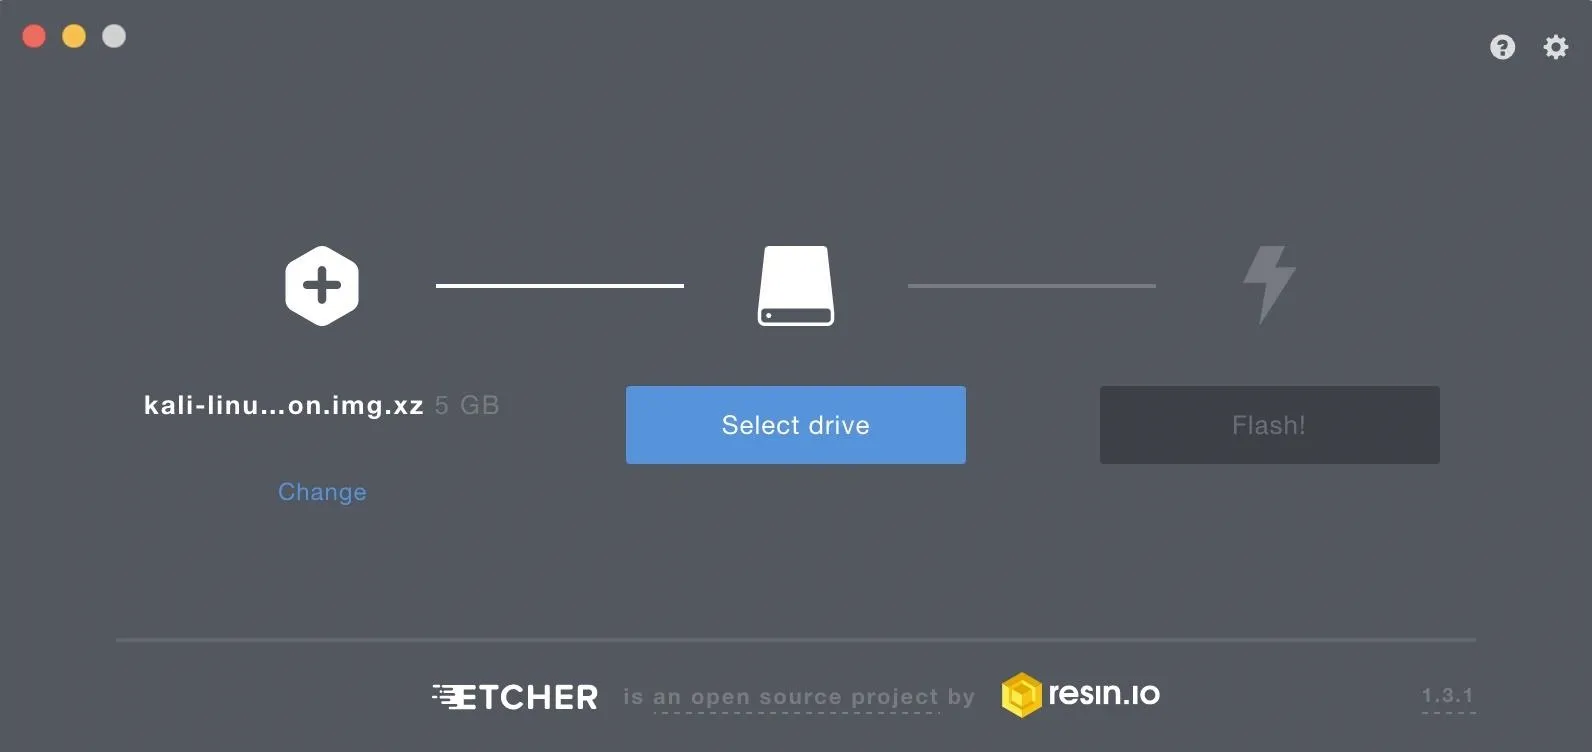
Next, click the blue button that says "Select drive," and make sure you've selected the microSD card and not your hard drive. I know, how could you do that? Well, I've seen people try.
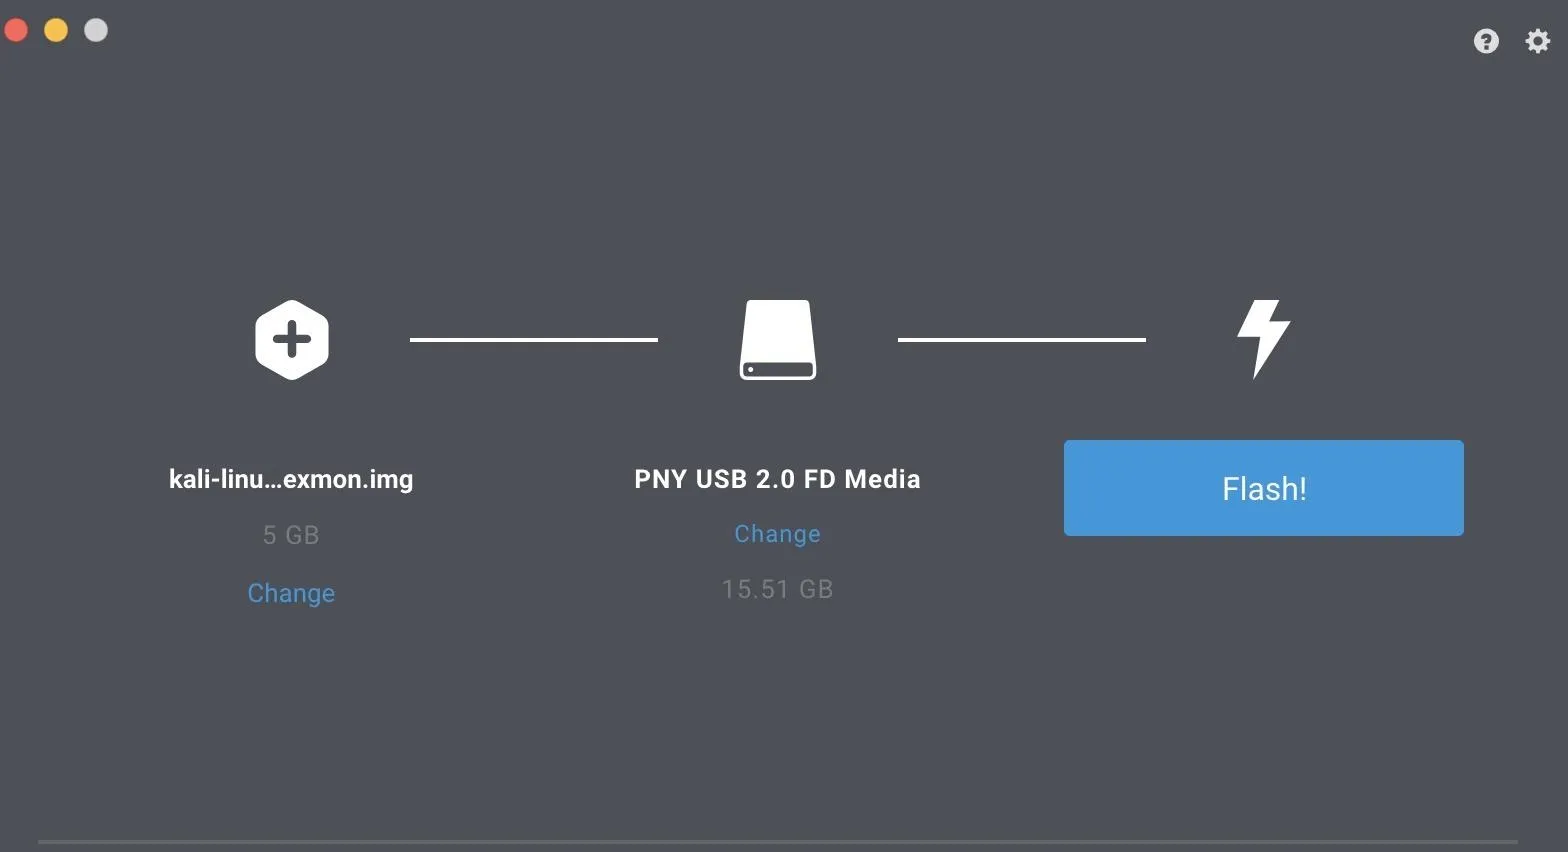
Finally, click the blue "Flash!" button to flash the Kali image to your microSD card.
This should take around 15 minutes or so. Once it's done, eject the microSD card and insert it into your unpowered Raspberry Pi 4 Model B.
Connect & Update the Raspberry Pi
With the newly flashed microSD card in the Raspberry Pi 4 Model B, plug it into power, and plug the Micro-HDMI cable into a monitor. Plug in a keyboard and mouse to the Pi 4 Model B's USB ports, and wait for it to boot to the loading screen.
Once at the Kali loading screen, enter the default login and password, root and toor, to log in. After logging in, we'll need to update and upgrade Kali Linux for the installation to work. Packages have likely been moved, updated, or otherwise changed since our download was created, so this step ensures that we've downloaded the most recent version of all installed packages.
First, connect to the internet via Wi-Fi or Ethernet, and then open a terminal window and run the following command. Keep in mind that it can take up to an hour to upgrade on a slow connection.
~# apt update && apt upgradeOnce you've updated and upgraded your system, you'll be ready to take the first steps in changing default credentials and SSH keys.
Change the Root Password & SSH Keys
Using default SSH keys is terrible and can lead to being the victim of a man-in-the-middle attack. Because of this, we'll need to change our default SSH keys and enable SSH to run at boot to safely communicate with our Raspberry Pi 4 Model B over SSH.
In your terminal window, enter the following commands to change directory into the folder containing the SSH keys and reconfigure the server.
~# cd /etc/ssh/
~# dpkg-reconfigure openssh-server
That should create new SSH keys. Next, we'll run a few commands to enable runlevels for SSH and allow us to start the service at boot so we can log in remotely.
~# update-rc.d -f ssh remove
~# update-rc.d -f ssh defaults
~# nano /etc/ssh/sshd_config
In the nano window that opens, make sure that "PermitRootLogin" is un-tabbed to allow root login. After this is done, you can hit Control-x to exit the nano window after applying the changes.
Next, type sudo service ssh restart to apply these changes. Finally, type update-rc.d -f ssh enable 2 3 4 5 to enable SSH at boot with the settings we've applied.
~# sudo service ssh restart
~# update-rc.d -f ssh enable 2 3 4 5
Finally, we'll need to change the root password from toor. To do this, type passwd root and select a new password.
~# passwd root

Enter new UNIX password:
Retype new UNIX password:
passwd: password updated successfully
Now, our Pi should be updated, upgraded, and have a unique password and SSH keys. This will prevent it from being targeted by tools like Rpi-hunter.
Put the Internal Card into Monitor Mode
Next, we're going to put our card into wireless monitor mode, which will allow us to do a couple of useful things, including grab WPA handshakes and listen in on network traffic. The way we will do this is by creating a monitor interface, rather than calling airmon-ng like usual. This is because we'll be using the Nexmon patch, a firmware update that allows the Pi's internal card to be put into monitor mode. To use it, open a terminal window and type the following commands.
~# iw phy `iw dev wlan0 info | gawk '/wiphy/ {printf "phy" $2}'` interface add mon0 type monitor
~# ifconfig mon0 up
~# ifconfig
You should now see a new interface called "mon0" which is in monitor mode and ready to be used. If this didn't work, you can try these commands instead.
~# sudo iw phy phy0 interface add mon0 type monitor
~# ifconfig mon0 up
~# ifconfig
Now, to test the card, we can use airodump-ng to see if it's working and collect information about nearby networks. Type the following, and you should see nearby Wi-Fi networks begin to appear.
~# airodump-ng mon0We can also run a test for packet injection using the following command.
~# aireplay-ng --test mon0If you see a successful test on your screen, then it's working! You've got a monitor mode interface on your Raspberry Pi.
There Aren't Many Surprises Running Kali on the New Pi
While the new Raspberry Pi comes with considerable hardware upgrades, the process of loading and using Kali Linux remains almost unchanged. The Pi 4 Model B makes it easy for aspiring hackers to load Kali or other operating systems, and the advantage of not needing a separate Wi-Fi network adapter makes it a perfect option for anyone wanting a low-cost, dedicated Kali Linux hacking computer.
I hope you enjoyed this guide to loading Kali Linux on the Raspberry Pi 4 Model B! If you have any questions about this tutorial on hacking with the Raspberry Pi 4, leave a comment below, and feel free to reach me on Twitter @KodyKinzie.
Cover photo by Kody/Null Byte


Comments
Be the first, drop a comment!