

ESP8266-based microcontrollers can be used to create exciting and legal Wi-Fi hacking games to test your or your friends' Wi-Fi hacking skills.
When you first start learning how to hack Wi-Fi, it can be tempting to use your powers on Wi-Fi networks you don't have permission to use. Needless to say, this can get you into a lot of trouble because Wi-Fi hacking isn't particularly subtle, so it's easy to get caught. To keep you from getting into a predicament, we want to make sure you have access to a couple of fun Wi-Fi hacking games.
The games we've created can be used for a CTF (capture-the-flag) game, a hackerspace, or just a group of friends that want to practice their hacking skills. There are actually five different scenarios we'll cover. In order, we'll cover how to use the handshake injector, make a reactive target, create a Wi-Fi access point, generate a hidden network, and play the Chicken Man Game.
What You'll Need
All you need to follow along with this guide is at least one ESP8266-based D1 Mini module. Some of the games below require multiple D1 Minis, so the more, the merrier.
- IZOKEE ESP8266 ESP-12F D1 Mini (3 Pack) (currently $12.69)
- IZOKEE ESP8266 ESP-12F D1 Mini (5 Pack) (currently $15.79)
- Organizer ESP8266 ESP-12F D1 Mini (5 Pack) (currently $15.69)
If you want to play the Chicken Man Game, you'll also need two Raspberry Pis.
- CanaKit Raspberry Pi 4 8GB Starter Kit - 8GB RAM (currently $119.99)
- CanaKit Raspberry Pi 4 4GB Starter PRO Kit - 4GB RAM (currently $99.99)
- CanaKit Raspberry Pi 4 Starter Kit - 2GB RAM (currently $89.99)
Step 1: Find Your Board's Serial Port
To push the code to your D1 Mini, you'll need to know the serial port on your computer that it's connected to, so plug the board in if you haven't already. In Linux, you can try the following command to try and find its port. You can also grep it to narrow down your search. Below, you can see that I'm connected to ttyUSB3.
~$ dmesg

[34156.770688] usb 1-1.2: new full-speed USB device number 16 using ehci-pci
[34156.881101] usb 1-1.2: New USB device found, idVendor=1a86, idProduct=7523
[34156.881106] usb 1-1.2: New USB device strings: Mfr=0, Product=2, SerialNumber=0
[34156.881109] usb 1-1.2: Product: USB2.0-Serial
[34156.881920] ch341 1-1.2:1.0: ch341-uart converter detected
[34156.884053] usb 1-1.2: ch341-uart converter now attached to ttyUSB3
In macOS, you can try the ls /dev/cu.* command, and in Windows, visit your Device Manager to figure it out. Whichever OS you're using, you need to find the port and be sure that it's the right one. You can usually figure that out by unplugging it and rerunning the search; if it's missing, it's probably it.
Step 2: Download the ESPtool
To push the code to the D1 Mini board, you could use Arduino IDE, which we've covered many times before. But since the binary files are precompiled and don't need to be edited, we can just use ESPtool instead as long as Python is installed. If you've followed our other D1 Mini guides, you more than likely already have it. If not, it's easy to install on Linux:
~$ sudo apt install esptool
[sudo] password for nullbyte:

Reading package lists... Done
Building dependency tree
Reading state information... Done
esptool is already the newest version (2.8+dfsg-1).
0 upgraded, 0 newly installed, 0 to remove and 121 not upgraded.
You can verify the installation with:
~$ esptool

esptool.py v2.8
usage: esptool [-h] [--chip {auto,esp8266,esp32}] [--port PORT] [--baud BAUD]
               [--before {default_reset,no_reset,no_reset_no_sync}]
               [--after {hard_reset,soft_reset,no_reset}] [--no-stub]
               [--trace] [--override-vddsdio [{1.8V,1.9V,OFF}]]
               {load_ram,dump_mem,read_mem,write_mem,write_flash,run,image_info,make_image,elf2image,read_mac,chip_id,flash_id,read_flash_status,write_flash_status,read_flash,verify_flash,erase_flash,erase_region,version}
               ...

esptool.py v2.8 - ESP8266 ROM Bootloader Utility

positional arguments:
  {load_ram,dump_mem,read_mem,write_mem,write_flash,run,image_info,make_image,elf2image,read_mac,chip_id,flash_id,read_flash_status,write_flash_status,read_flash,verify_flash,erase_flash,erase_region,version}
                        Run esptool {command} -h for additional help
    load_ram            Download an image to RAM and execute
    dump_mem            Dump arbitrary memory to disk
    read_mem            Read arbitrary memory location
    write_mem           Read-modify-write to arbitrary memory location
    write_flash         Write a binary blob to flash
    run                 Run application code in flash
    image_info          Dump headers from an application image
    make_image          Create an application image from binary files
    elf2image           Create an application image from ELF file
    read_mac            Read MAC address from OTP ROM
    chip_id             Read Chip ID from OTP ROM
    flash_id            Read SPI flash manufacturer and device ID
    read_flash_status   Read SPI flash status register
    write_flash_status  Write SPI flash status register
    read_flash          Read SPI flash content
    verify_flash        Verify a binary blob against flash
    erase_flash         Perform Chip Erase on SPI flash
    erase_region        Erase a region of the flash
    version             Print esptool version

optional arguments:
  -h, --help            show this help message and exit
  --chip {auto,esp8266,esp32}, -c {auto,esp8266,esp32}
                        Target chip type
  --port PORT, -p PORT  Serial port device
  --baud BAUD, -b BAUD  Serial port baud rate used when flashing/reading
  --before {default_reset,no_reset,no_reset_no_sync}
                        What to do before connecting to the chip
  --after {hard_reset,soft_reset,no_reset}, -a {hard_reset,soft_reset,no_reset}
                        What to do after esptool.py is finished
  --no-stub             Disable launching the flasher stub, only talk to ROM
                        bootloader. Some features will not be available.
  --trace, -t           Enable trace-level output of esptool.py interactions.
  --override-vddsdio [{1.8V,1.9V,OFF}]
                        Override ESP32 VDDSDIO internal voltage regulator (use
                        with care)
The commands we'll use for each game below follow the same syntax, where "SERIALPORT" is your serial port, and "FILENAME.bin" is the path to the game file. The -p just means port.
~$ esptool.py -p SERIALPORT write_flash -fm dout 0x0000 'FILENAME.bin'Step 3: Install the Game Files
You can get the games from Kody Kinzie's GitHub page. You can download the ZIP from there, but it's easier just to use the git clone command below.
~$ sudo git clone https://github.com/skickar/esp8266games.git

Cloning into 'esp8266games'...
remote: Enumerating objects: 18, done.
remote: Counting objects: 100% (18/18), done.
remote: Compressing objects: 100% (16/16), done.
remote: Total 18 (delta 7), reused 0 (delta 0), pack-reused 0
Receiving objects: 100% (18/18), 415.48 KiB | 2.75 MiB/s, done.
Resolving deltas: 100% (7/7), done.
Then, change into that directory so we can begin:
~$ cd esp8266games
~/esp8266games$
Step 4: Run the Handshake Injector
The first game to cover is the Handshake Injector. To run it, take the ESPtool command mentioned in Step 2, swap out the port with your port (it's ttyUSB3" for me), and add the path to the HandshakeInjectorD1Mini.bin file. Hit Enter, and it should flash the game to your D1 Mini.
~/esp8266games$ esptool.py -p /dev/ttyUSB3 write_flash -fm dout 0x0000 '/home/skicka/esp8266games/HandshakeInjectorD1Mini.bin'When it's done, it should immediately begin broadcasting a handshake that we can listen to in a Wireshark capture, and then we can crack the handshake provided we have the password somewhere in our brute-forcing password list. This is a great way to demonstrate how brute-forcing works, and it only requires a single ESP8266 to practice.
Step 5: Run the Reactive Target
The second thing that we are going to practice is being a client. This means that we don't want to attack an entire network — we just want to attack a single device on a network. To set this up, use the ReactiveTargetD1Mini.bin file in the command.
~/esp8266games$ esptool.py -p /dev/ttyUSB3 write_flash -fm dout 0x0000 '/home/skicka/esp8266games/ReactiveTargetD1Mini.bin'After it finishes uploading, we'll need a three-color RGB LED — or three different colored LEDs (red, green, blue) — to indicate the status of this reactive target. Once we have it plugged in, we can determine exactly whether or not we've successfully connected to a Wi-Fi network. If we have, we can see if we are currently being kicked off.
Let's say that you have a smartphone and you want to generate a Wi-Fi access point. In this case, it's pre-programmed to one called "Control," and the password is "testytest." As soon as it joins that network, it will turn green, and then it'll turn red any time it is being kicked off the network.
If something's wrong and it can't find the access point, it'll turn blue, which means it hasn't been able to successfully connect — just to allow you to diagnose when it isn't working, preventing you from having a really frustrating CTF if the device never was able to connect in the first place.
Anyway, this should allow you to connect to an existing access point. Maybe an access point on your phone, such as a hotspot you're creating. It'll attack the device that's connected to it and see exactly when you are succeeding.
It's a great way to teach people how to attack an individual device on a network without taking out any other devices on the network. You can even use a whole bunch of these to make sure that each person is attacking their own target, which will keep the chaos down if you're doing a larger workshop.
Step 6: Run the WiFi Access Point
Let's say we want to attack an entire network. We can add the WiFiAccessPoint.bin file to the command, which is a default Arduino script. This will create an access point that the reactive target above will automatically join.
~/esp8266games$ esptool.py -p /dev/ttyUSB3 write_flash -fm dout 0x0000 '/home/skicka/Downloads/WiFiAccessPoint.bin'We could use one D1 Mini as the reactive target and this D1 Mini as a simple access point to join. We are now free to attack the client and the access point because we know that this is a dummy access point that we will not get in trouble for attacking. Nobody would be influenced or otherwise negatively impacted by us taking down this network.
To practice taking down an entire network, check out the available networks in the area. Hopefully, you'll see the one that our test device would automatically connect to. If you see it, you can expect that your reactive target would be automatically connecting to it.
Check out our full guide on using test networks to generate crackable Wi-Fi handshakes.
Step 7: Run the Hidden Network
Now, let's say we want to do a CTF game where we have a hidden Wi-Fi network. Well, we can do that too using the HiddenNetworkD1Mini.bin file. This is a spin on the access point that we just created where instead of making it visible, the only thing we're really changing is that we can't see it.
~/esp8266games$ esptool.py -p /dev/ttyUSB3 write_flash -fm dout 0x0000 '/home/skicka/esp8266games/HiddenNetworkD1Mini.bin'As soon as it's loaded, we shouldn't be able to see this access point anymore. Then, you can try to brute force the AP name. It's a great way to practice tools that will allow us to attack a hidden network. You can see more on creating and finding a hidden network in our full guide.
Step 8: Run the Chicken Man Game
If you have two Raspberry Pis, I highly recommend you check out the Chicken Man Game., which is a Wi-Fi hacking CTF that allows you to use a couple of boards to create both a chicken and a chicken man. The "chicken" is a hackable Wi-Fi access point. If you manage to get the password, you'll be able to log in and actually score points.
The "chicken man" is a game piece that's constantly joining these networks and generating handshakes for you to capture, and it's keeping score of who is in the lead and making sure that whatever team is winning is getting a nice little light show if have some NeoPixels set up.
To run it, put the ChickenManGame.bin in the command.
~/esp8266games$ esptool.py -p /dev/ttyUSB3 write_flash -fm dout 0x0000 '/home/skicka/esp8266games/ChickenManGame.bin'Once it's done loading, you can check to make sure that it's working properly. For example, you can always look at the serial output using screen or Arduino IDE to make sure that it is accurately displaying the information you want. In this case, it should depend on whether it's a chicken or a chicken man, either creating an access point or looking for access points.
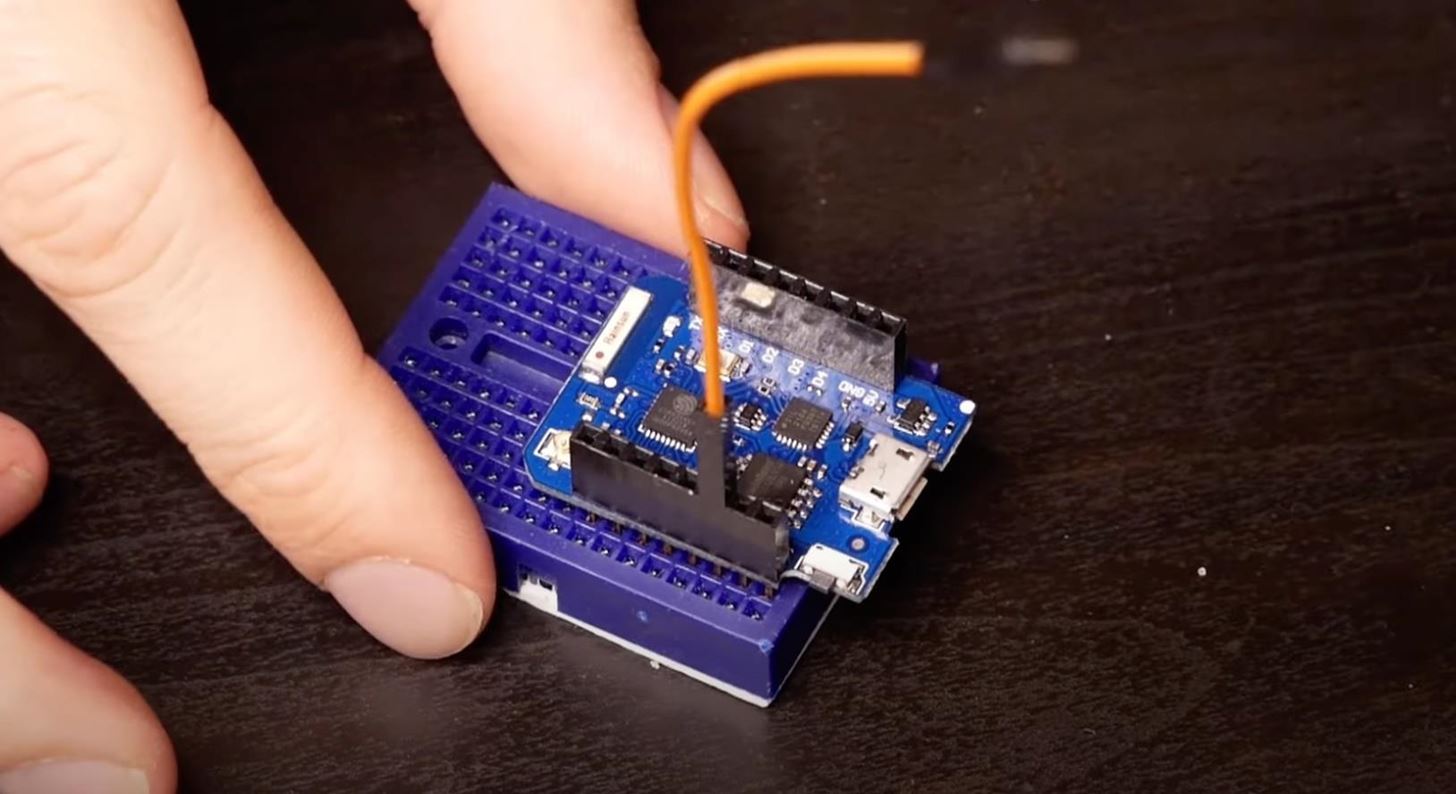
If you want to change the chicken to a chicken man, and have it actually joining the access points and creating the handshakes, then you'll need to make a small change by connecting the D7 pin to ground.
Aside from that small change, they're virtually the same. So if you've got three boards lying around, you can make two of them into access points that can be hacked, and the third will go ahead and join them as a chicken man, generating handshakes and keeping track of who is in the lead.
For more info on the Chicken Man Game, check out its GitHub.
Check Out the Video for More Info
Check these files out if you're interested in doing an interesting, fun Wi-Fi hacking CTF in your area. It's a great way to get started teaching people about how Wi-Fi is insecure and needs to be fixed without getting in trouble actually breaking into someone else's Wi-Fi yourself.
While the D1 Mini might be small, it can be used by the games we've gone over today to practice deauthing an individual device off the network, crack handshakes, or attack a hidden network. That's pretty cool for such a small price. For more information, make sure to watch the Cyber Weapons Lab video above.
Just updated your iPhone? You'll find new emoji, enhanced security, podcast transcripts, Apple Cash virtual numbers, and other useful features. There are even new additions hidden within Safari. Find out what's new and changed on your iPhone with the iOS 17.4 update.


Be the First to Comment
Share Your Thoughts